 |
| AC/DC IN-DEPTH REVIEW PART ONE |
|
Hello and welcome to this first part of our exclusive In-Depth Review of Stern's AC/DC. AC/DC will come in four different versions - the Pro model we're looking at here, a Premium version with most of the extra features of the top models, and two Limited Edition variants - Back in Black and Let There Be Rock - which are restricted in the numbers to be made. These take the Premium version and add extra bling to justify the additional cost over and above the Premium model. At the time of writing this review, although we've revealed many details of the features to be included in the more expensive versions, only the Pro model has actually been produced and even then, only a few sample games such as the one we're reviewing here. This is the same Pro version we initially showed and the one which was exhibited at the IMA and EAG-Expo shows in Europe in January. Because the Premium and Limited Edition version have significantly more hardware features - and the additional rules relating to them - we hope to be able to update this review once these top-end games become available to show how those extra elements integrate into the game. So we have Stern's next music-themed pinball, coming just a year after they released The Rolling Stones. But with that game not exactly setting the world on fire with its dancing Mick, the design philosophy has changed quite a bit with AC/DC. Tom Kopera's main toy on his The Rolling Stones annoyed as many players as it amused, but Steve Ritchie has gone back to one of his most popular ideas for the Pro's main toy. What continues through both these designs - and all those inbetween - is the desire for shorter ball times coupled with simpler, more reliable playfields while keeping the fun in the game. Let's see how they fared, beginning as we usually do by examining how the game looks. The translite image features a composite of Angus Young front and centre in his schoolboy outfit, with brother Malcolm behind, lead singer Brian Johnson on the left wearing his trademark flat cap, bassist Cliff Williams behind Brian, and Phil Rudd on the right on drums. Mixed with the five band members are elements from their albums and tours, such as the inflatable Rosie character they have on stage during Whole Lotta Rosie, the train image from Rock-N-Roll Train and the cannon used on the cover of For Those About To Rock, on that same track and in their live performances.
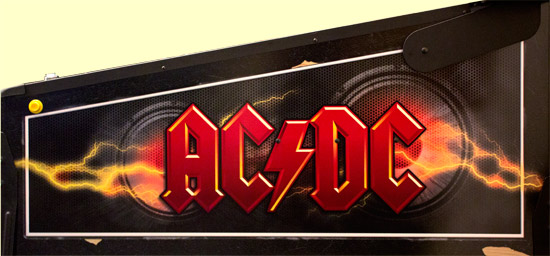
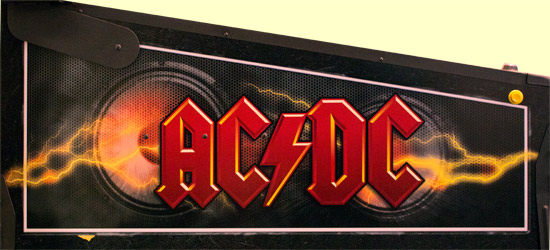
The composition looks a little awkward with Malcolm's lofty position and with nearly everyone's eyes being hidden in one way or another, but the lower third with the lightning, flames and sharp bevels does convey the power, energy and edginess of the band. The cabinet sides avoid re-using the band members and instead go for a speakers and mesh look, combined with the logo and some more lightning, giving the composite image a weather-beaten feeling by including some artificial damage, as though the game had been through the roadies' hands a few times. AC/DC is the second Stern game to use cabinet decals instead of direct printing onto the wood, and so the resolution of the artwork is much higher than in pre-Transformers days.
The background layer is reversed on the opposite side and the fake damage is a little different. There is a white frame which surrounds and constrains most of the artwork with the exception of the lightning which extends beyond the frame to the edge of the decals. AC/DC uses a slightly different method of applying the decals compared to the first game to use them, Transformers. On Transformers, the decals extended beyond the back edge of the cabinet sides and wrapped around the rear by about an inch.
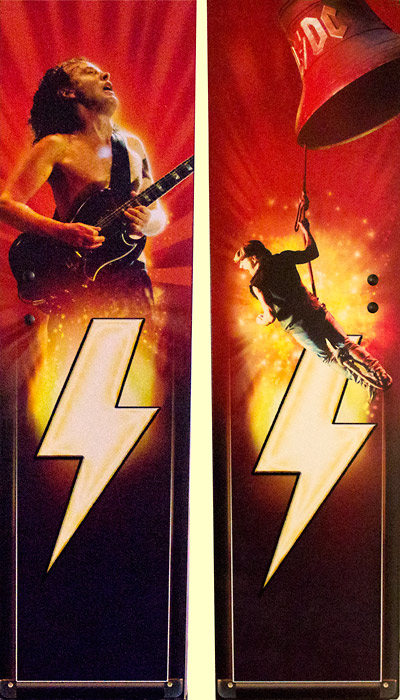
This doesn't happen on AC/DC, where the decals are about 1cm smaller than the cabinet on all four sides, and so don't wrap around the back. This technique obviously works best when the printed image has a black background which can blend into the black cabinet paint and disguise the slight border. On the backbox sides we have two different images sharing the same framing device. The left shows Malcolm Young which makes up for his relative demotion on the translite, while the same profile boost is given to Brian Johnson on the right backbox side as he swings on the AC/DC bell rope.
The cabinet front continues the speaker grille motif from the sides and keeps it simple with just the AC/DC logo, some more lightning, a couple of larger AC/DC lightning bolt flashes and a plain frame, with just a little faux damage for good effect.
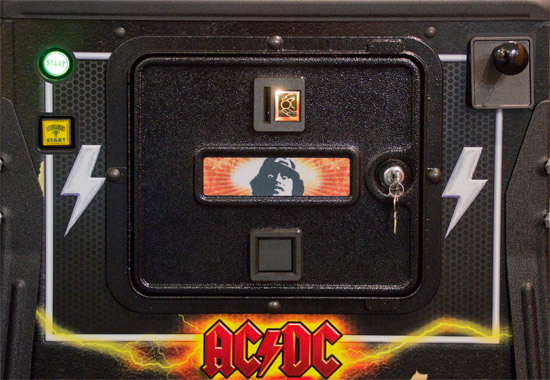
The coin door sticker shows a manic-looking Angus while the rest of the front is the standard Stern arrangement of two start buttons and the plunger. This is a European model, so it only has a single multi-coin slot and no bill acceptor cutout. There's another set of decals on the game and these live under the glass.
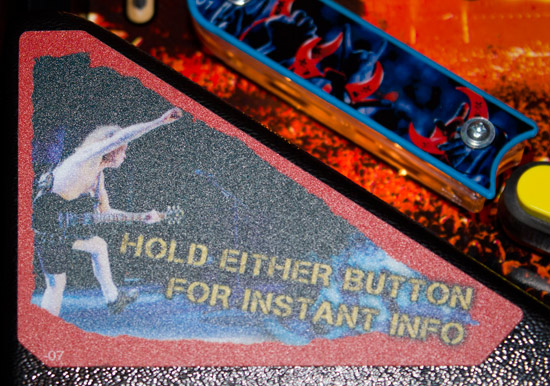
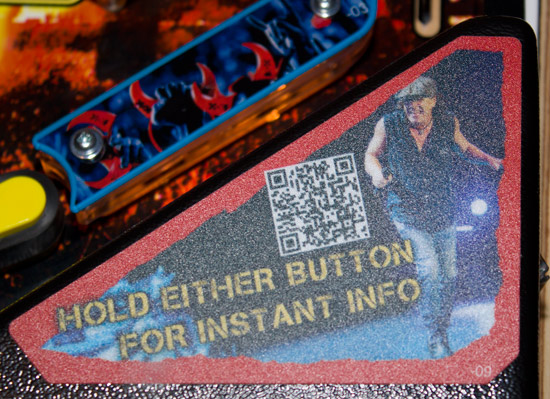
The main game title decal sits in the centre of the apron, just below the same logo on the playfield. The apron decals are printed on a non-reflective material which unfortunately makes then appear washed out and lacking in contrast. The same is true of the two side decals on the apron.
To save you scanning it, the QR code in the picture above links to: Looking up from the apron and removing the translite shows no obvious changes to the backbox content.
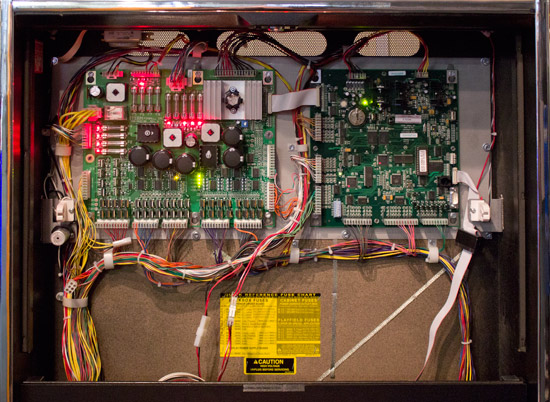
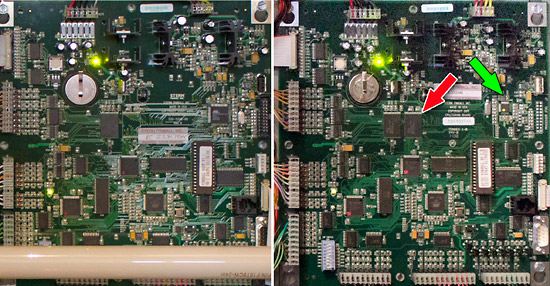
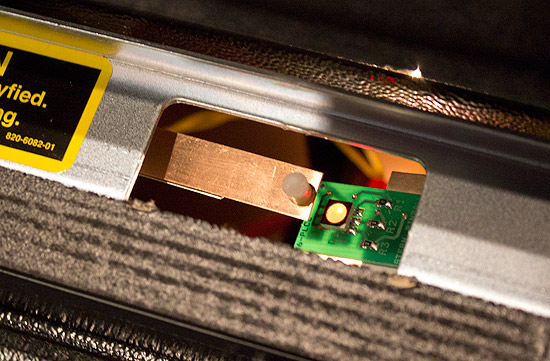
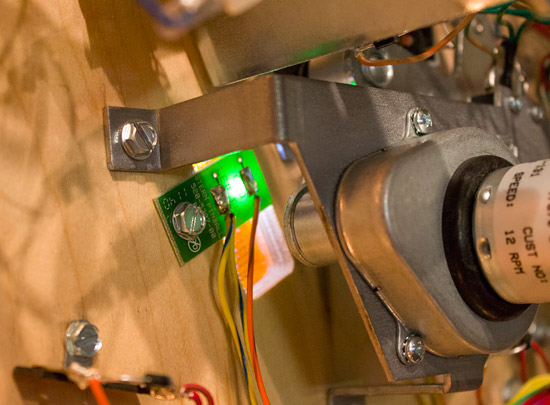
However, it has been advertised that AC/DC comes with an improved sound package - even on the Pro model. So let's look a little closer and compare the CPU board to the equivalent from a year ago on The Rolling Stones. The first change is the use of a new I/O controller (shown with a green arrow below) which handles the USB connection and the JTAG testing interface. But the second change is probably the more significant, especially in the context of a music-based game. Arrowed below in red is a second Spansion S29GL512P flash memory chip which adds another 512Mb (64MB) of storage to the game.
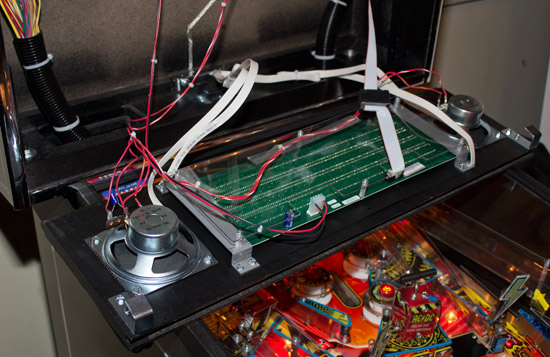
There had been some speculation about how the game could have enough memory to contain twelve full AC/DC tracks. Well, there's your answer; they added another memory chip. This CPU board will probably also be used on Stern's next game and any others they produce before their new boardset is introduced - which is expected to be at the end of 2012 - allowing for more (or higher quality) music and longer video clips for the DMD. Speaking of sound and DMD animations, here's where they get conveyed to the player through the speakers and the display.
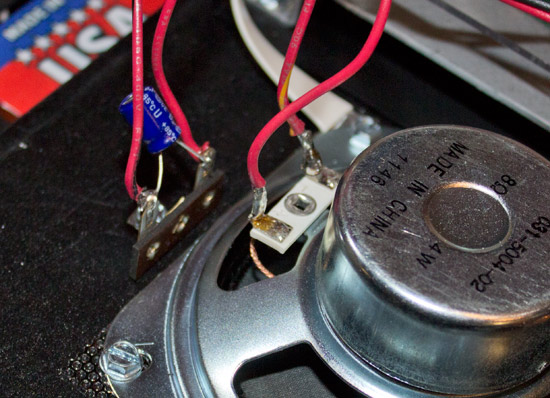
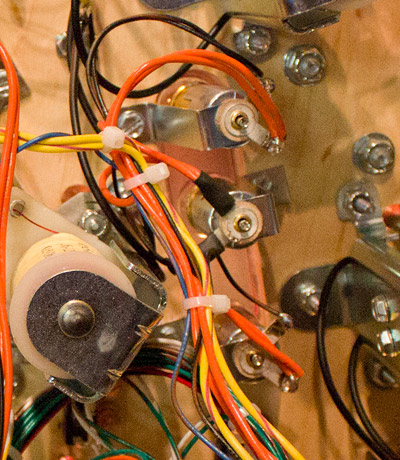
AC/DC is the first game since 24 where the whole production run comes with red LED displays installed from the factory. Previously, LED displays were fitted to European games where RoHS (Restriction of Hazardous Substances) laws forbid the importing of lead-based products, such as the orange gas plasma display traditionally used in pinballs. Gas plasma displays were still fitted to games destined for countries without RoHS (or equivalent) laws in place, but now they too get the red LED displays. With the LED display only using a low voltage, the high voltage driver board is no longer needed and is therefore not fitted in the backbox. Going back to the sound, the only difference we could see compared to earlier games is the addition of a small electrolytic capacitor in series with the left speaker.
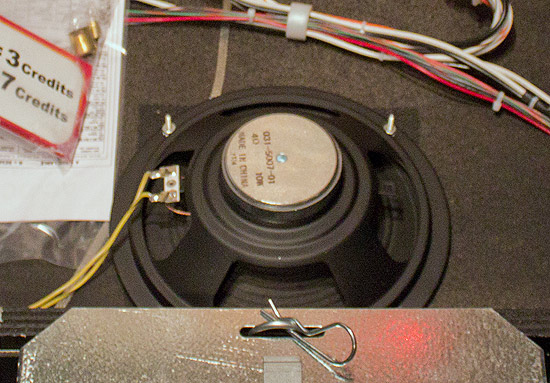
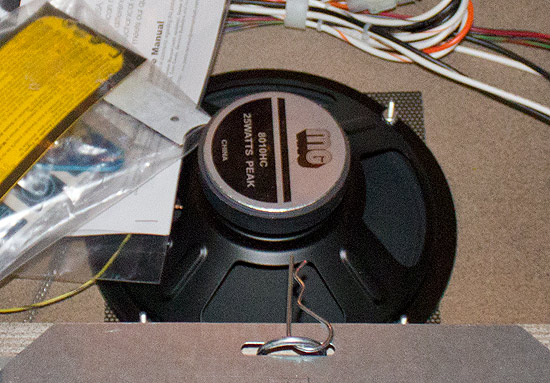
This acts to filter out the low frequencies, making the left speaker act more like a tweeter and allowing the right speaker to handle both mid and high frequencies, while the cabinet speaker deals with the bass. Oddly for a game like AC/DC, the cabinet speaker appears to be a lower-rated version than the one found in previous games such as Tron.
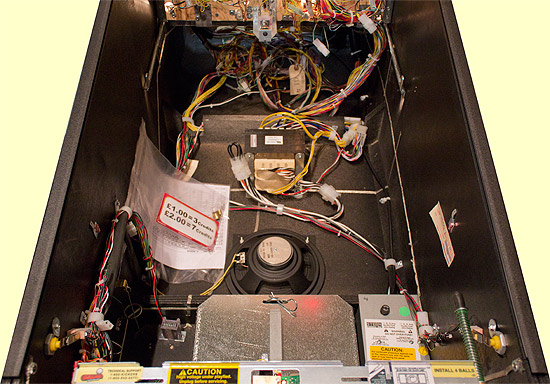
Power rating doesn't necessarily equate to sound quality or efficiency though, so the overall balance may be better on AC/DC. Elsewhere in the cabinet, everything else is as expected. Because this is a game for the UK market, it comes with a coin meter pre-installed next to the coin box, which is something operators in this country seem to want.
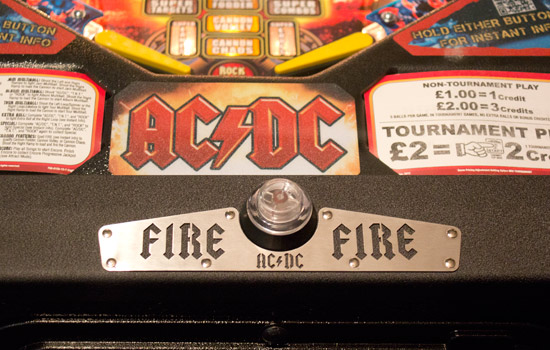
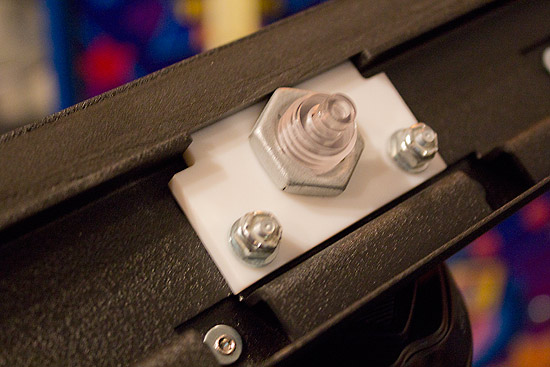
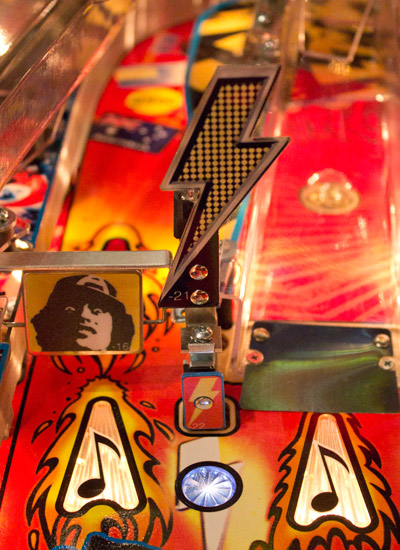
A new feature for all versions of AC/DC is the lock bar fire button. Clearly, lock bar buttons aren't new - they've been used on games such as Austin Powers and Black Rose to perform the same job, on Riverboat Gambler to choose roulette wheel colours and on many Stern machines as tournament start buttons - but what's different here is the implementation.
The laser-cut steel plate surrounding the housing draws your attention to the button and gives the whole device a touch of class over and above any implementation we've seen before. Although it is positioned in the centre of the lock bar, because of the shooter lane, it doesn't align with the centre-line of the playfield which passes straight between the flippers. It also doesn't line up with the AC/DC logo directly above, but is aesthetically better than offsetting it to line up with these elements. The button itself is made of clear plastic which is illuminated with a bright red LED. Unlike the tournament start buttons Stern used to sell in their ToPS tournament system kit, this button doesn't have an annoying cable you need to disconnect every time you remove the lock bar. That's because both the switch and the illuminating LED are built into the front molding beneath.
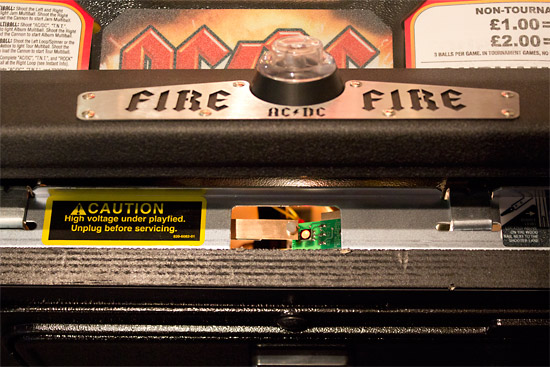
The fire button is like a clear flipper button which is bolted onto the lock bar.
When pressed, the button pushes down on a leaf switch to make a switch closure. Meanwhile, an angled PCB-mounted red LED shines into the clear plastic button housing to illuminate it.
Although it makes them difficult to access, putting these components under the front molding means they are not part of the lock bar itself and are relatively well-protected from accidental damage. However, don't be temped to put pinballs on the front molding when servicing the game or they could roll into this hole and short something out. OK then, that's our look at the external artwork and hardware, so now it's time to see what Steve Ritchie and the team at Stern have given us to play as we examine the playfield.
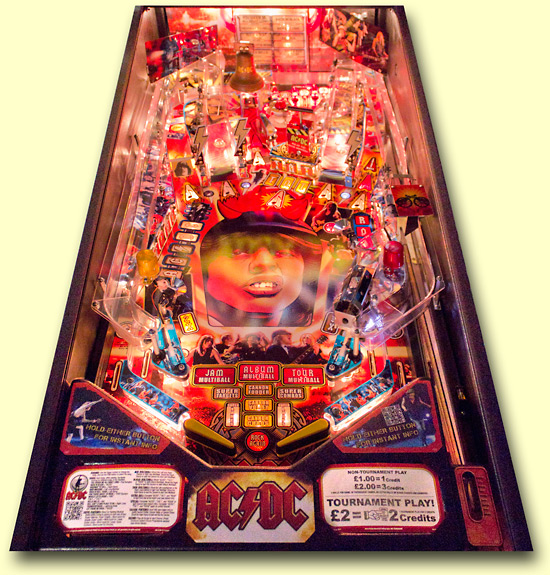
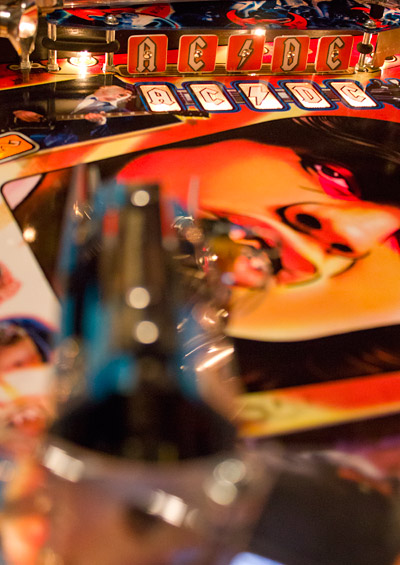
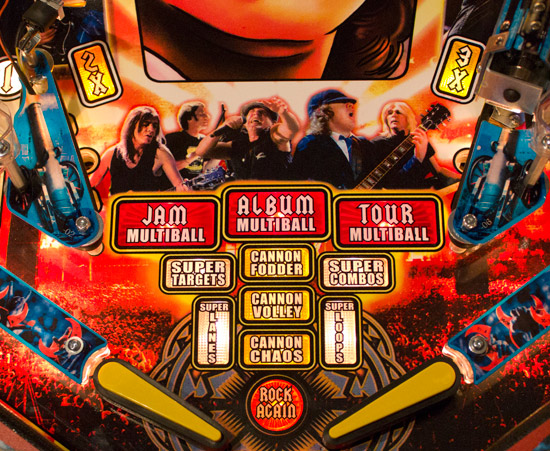
One of the most contentious aspects of the playfield and the one thing which jumps right out at you when you first see pictures of the game is that enormous Angus face right in the centre of the playfield. You do have to wonder what they were thinking putting it there, other than some economy in only creating one playfield design for the Pro and the Premium/LEs where there is a subterranean mini-playfield in place of the face. However, it's fair to say that everyone who played the game at the two trade shows in Germany and the UK soon found they didn't pay much attention to that part of the artwork and eventually didn't notice it at all. That's not to say it's a good idea in the first place, but it wasn't the big deal initially thought and, as you can see in the picture above, it blends in much more once you get the translite's reflection on it. As we usually do, we'll start our tour of the playfield down at the flippers and then work clockwise, taking in each feature as we come to it. Then in the second part of this In-Depth Review we'll explain how they all fit into the rules and what they score. So let's start at the beginning, which means the flipper area.
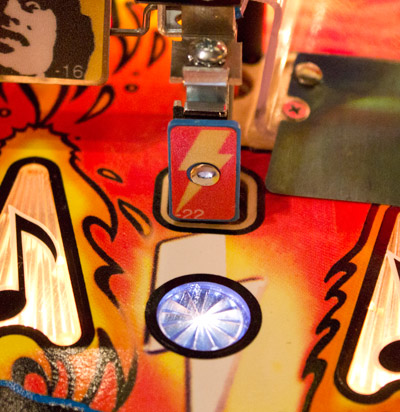
There are just the two flippers on AC/DC and here they are, complete with a stadium crowd background and an AC/DC motif reminiscent of the Black Ice album cover design but with the addition of the 'Rock Again' (shoot again) insert. Below the flippers is another AC/DC logo while above them is the feature grid. The 'Devil horns' are another theme which resonate with AC/DC fans ever since Highway To Hell, and they make several appearances in the game. The first is in the artwork on the lane guides.
Just a single inlane and outlane on the left side of the game, and while Transformers used tinted plastics to spread the thematic colours around the playfield, AC/DC relies of the strong artwork colours to provide the rich red and yellow hues. A simpler approach is also taken with the slingshots, where multiple levels and transparent panels have been eschewed in favour of a flat, solid, single level design picturing the cannon image used on the translite and in other places within the game.
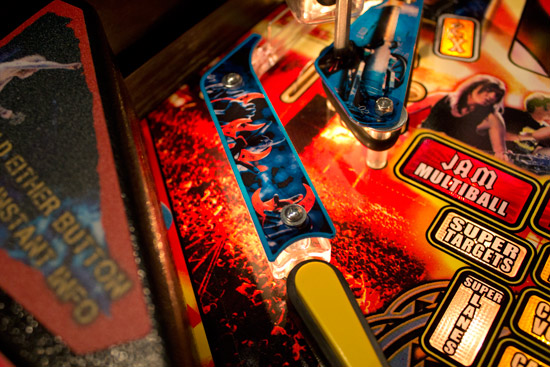
At the top corner we find the familiar spotlight to help illuminate the central playfield area. The left corner has a support post for the left ramp which ends here and dumps the ball into the left inlane.
The left inlane and outlane have rollover switches to light the first two letters in F-I-R-E with the other two letters placed over in the right inlane and outlane. The flipper buttons cycle through the lit and unlit inserts in the normal way. The mandatory copyright text is positioned out of the way under the left ramp spanning the two lanes, and not in the regular place further down the left outlane as it approaches the flipper area. There is a rubber ring on the post at the top of the inlane/outlane divider and another on the outlane adjuster to provide some possibility of bouncing the ball out of danger, although the left ramp does obscure your view a little (but nowhere near as much as the right inlane/outlane).
From the factory, the outlane adjuster is set to the middle position of the three available, which always seem to make sense. Adjusting it is done by removing a lock nut under the playfield, lifting out the post, putting it in it's new hole and putting the nut back on. Above the left outlane is a small area with a rubber ring, backlit with a general illumination lamp. This leads to the first of the game's three target banks.
The Back in Black AC/DC standup targets are a regular five-bank which become drop targets in the Premium and Limited Edition models. Each target lights up an insert in front with the same label. All five are fairly easily shot from the right flipper and the top one or two can be backhanded from the left. More Devil horns decorate the plastic which covers the area behind the target bank and which sits beneath the long left ramp return. To the right of the AC/DC target bank is the first of the game's major shots and the only true orbit shot - the War Machine left orbit.
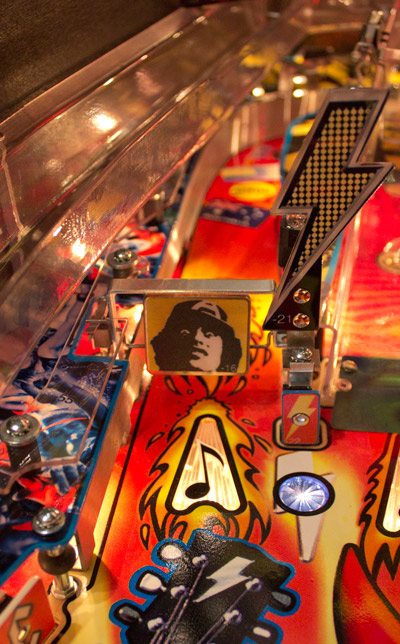
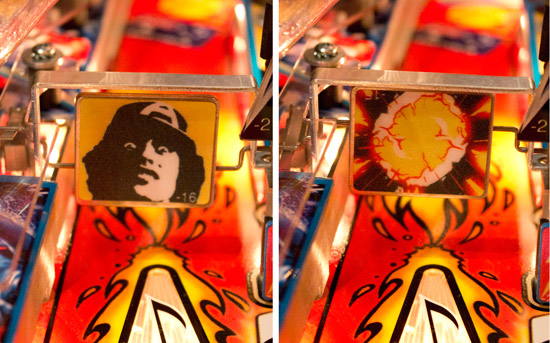
The game's only spinner sits at the entrance to the left ramp, showing Angus's face on the front side and an explosion on the reverse. The left orbit and the left spinner combine to create the War Machine shot.
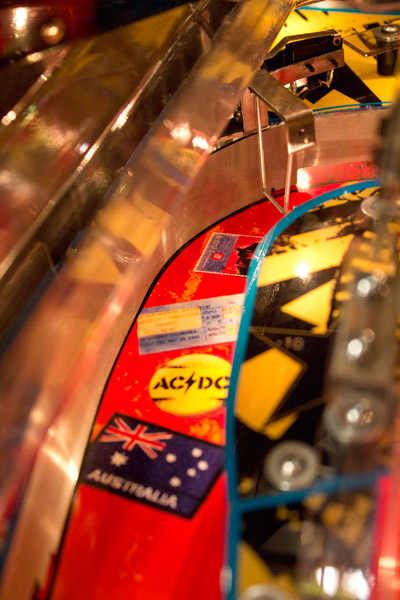
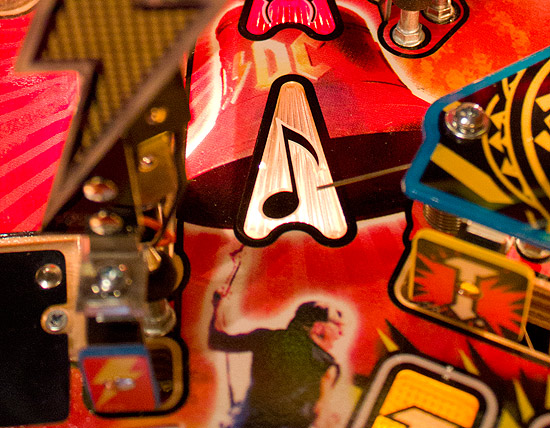
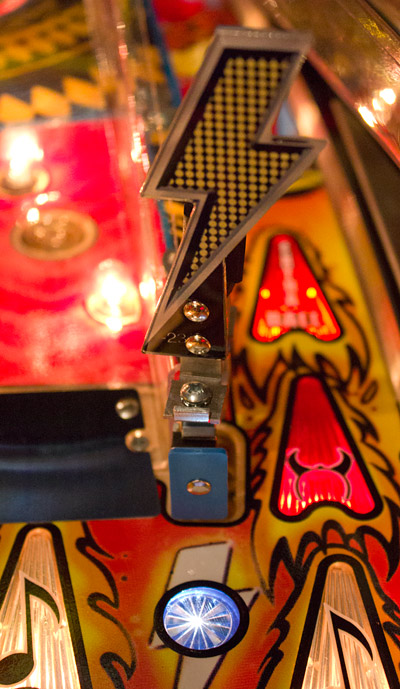
Instead of the usual trio or even quartet of inserts to indicate when a shot is lit, the major shots here in AC/DC have just a single arrowhead note insert which, when activated, flashes very rapidly as though it's about to time out. In reality a flashing shot stays like that for as long as it is lit, but it adds a sense of urgency and tension to the shot. The left orbit continues up the left side of the playfield, passing several assorted pieces of related artwork such as a passport picture, an Australian flag and tour memorabilia before it curves around to pass across the top of the game, and it is here that the switch to detect a successful shot sits.
It's quite possible to made a shot which triggers that switch but doesn't make it all the way to the end of the lane, but it doesn't award the shot twice if it passes under the switch once and then rolls back under it again. On the right-hand side of the left orbit entrance is the first of three Thunderstruck standup targets.
The usual rules apply to this. Hit it and its insert lights up. Light up all three targets' inserts to collect an award. Above each target is a large lightning bolt plastic which, despite its size, is remarkably easy to not notice.
These targets are quite prone to sending the ball out of control, and on AC/DC an out-of-control ball usually means only one thing - a drain. So they are best not shot directly, and sometimes you are better off avoiding them altogether. The first Thunderstruck target stands between the left orbit lane and our next major shot - the left ramp.
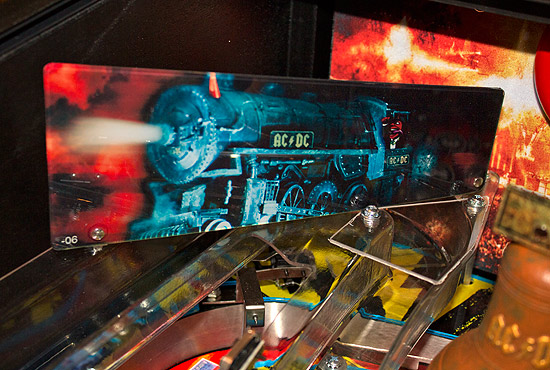
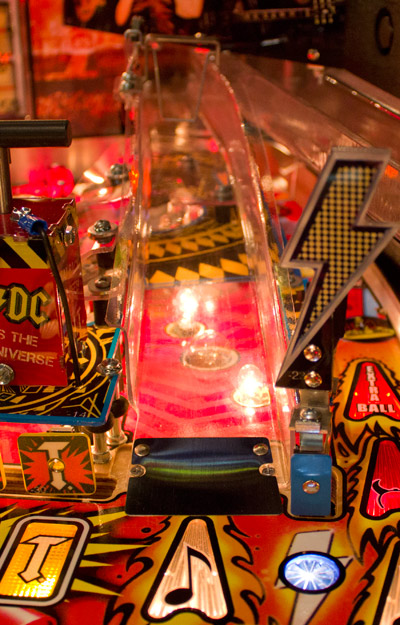
The left ramp is a single piece of clear plastic, without any decals or decoration (at least, on this particular machine), but with a flash lamp under the ramp's initial incline. There's a switch at the entrance for sound and lighting effects and another further up which is the one which registers a complete ramp shot. There were no ramp protectors fitted, so if they don't appear once the game hits the line, they should definitely be retro-fitted. This is the Rock 'N' Roll Train ramp and so it features a picture of the said train at the top of the ramp, where an actual model of the train appears in the more expensive versions of the game.
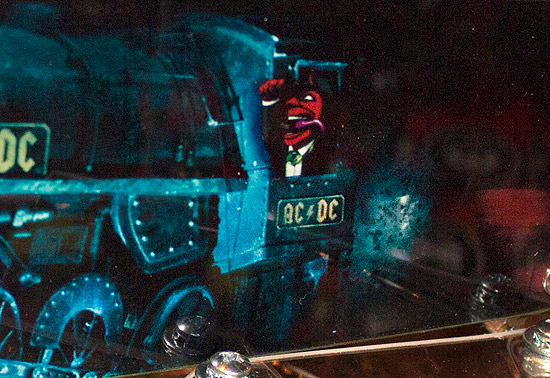
Now we have to come clean here because the picture of the train above has been enhanced quite a lot. In reality the printed train image on the sample games is both dark and highly reflective, making it difficult to see what it's mean to be. Hopefully this will be made brighter in the production games but we boosted it for you here so you can see it a little better.
The train picture covers the very top of the ramp - the point where the ball changes direction - as well as the switch which records a successful ramp shot and a flash lamp which does little to illuminate the picture but does some signposting that the shot is now worth something nice.
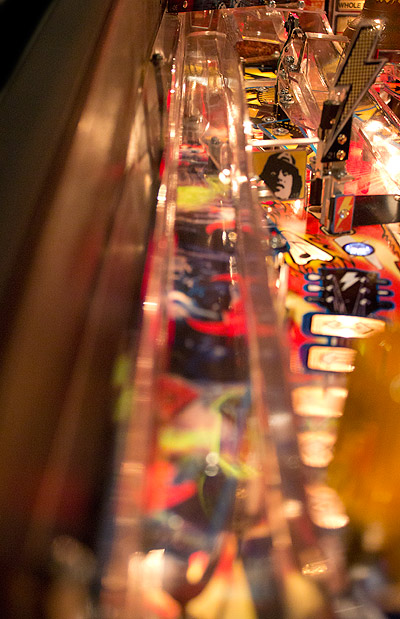
The Rock 'N' Roll Train left ramp continues from the top left of the playfield on a perfectly straight and flat journey down towards the left inlane.
The left ramp bends in just before it reaches the end so it can get over to the inlane, while the whole end section is topped with a clear plastic cover to prevent bounce-outs when the ball hits the rubber end-stop.
The right side of the left ramp's entrance is home to the second Thunderstruck target which is set back slightly from its counterpart on the left side and so provides a modicum of protection to the edge of the plastic ramp behind.
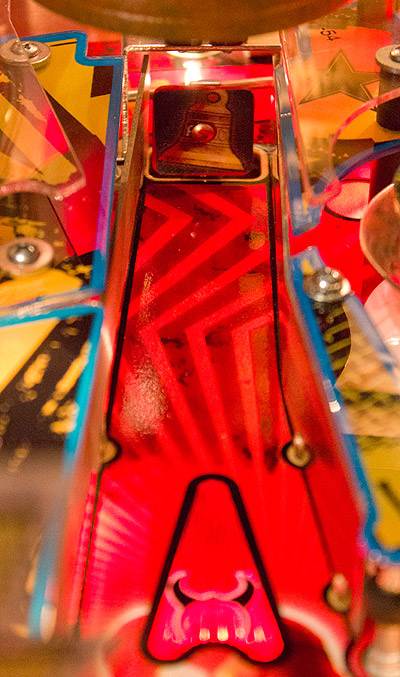
Next on our tour of the playfields we come to the Hells Bells centre lane.
This is a pretty straight lane which tapers and ends with a single standup target. It contains two inserts - a regular white note one and a red Devil horns one, while the standup target has a bell decal.
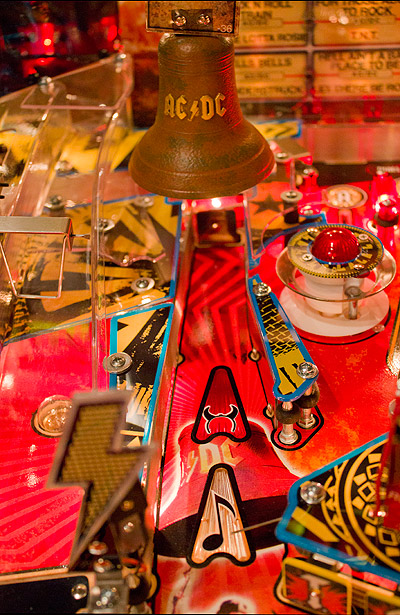
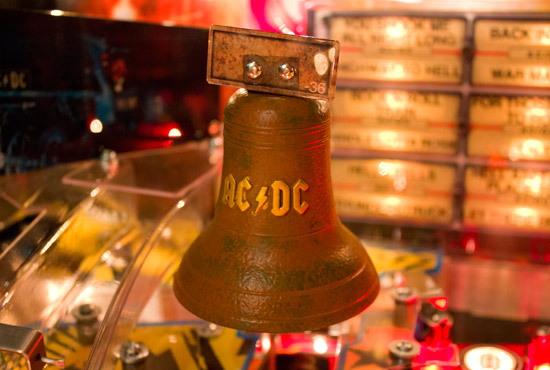
Naturally, the main focus of this feature is the large plastic bell mounted over the lane and the impressive-sounding ring it gives when the target is struck.
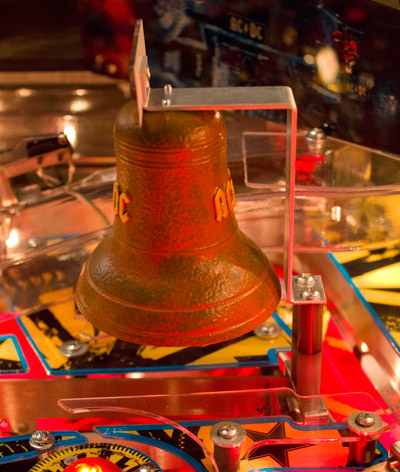
In the Pro model the bell is purely cosmetic with no moving parts, but in the Premium and LE versions the clapper acts like a captive ball and can be hit by the main game ball, or made to move by a magnet mounted beneath like the Sanctum ball lock on The Shadow. The bell is mounted on a bracket which screws into two posts mounted behind the standup target.
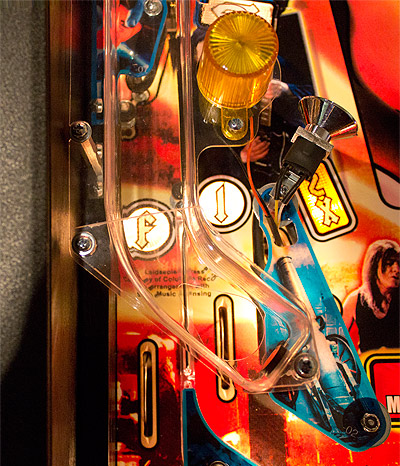
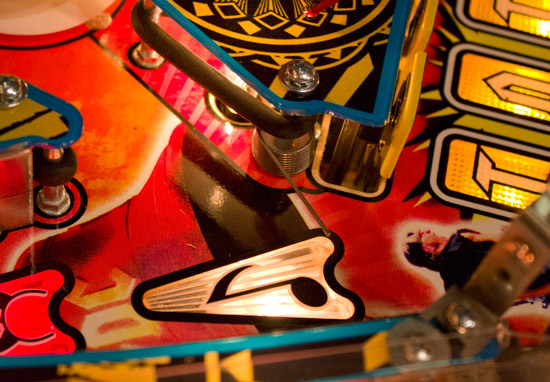
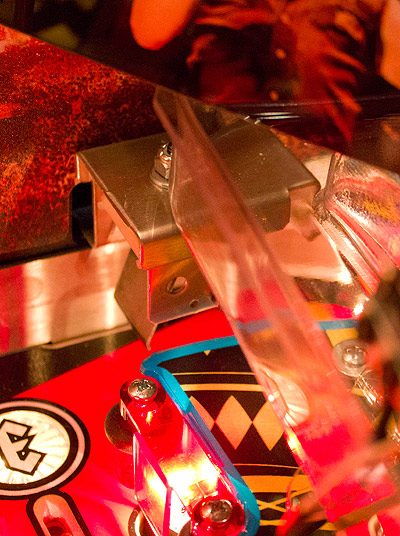
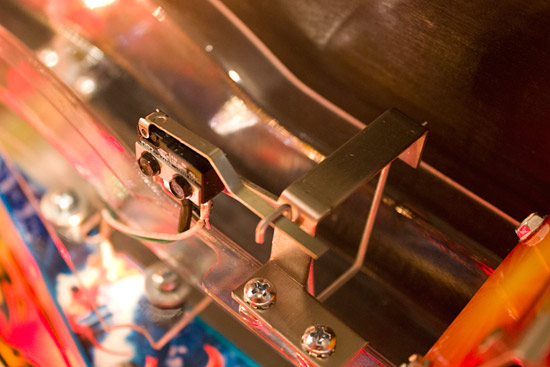
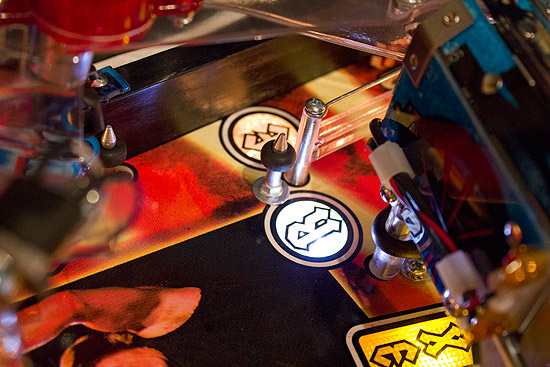
It's mounted quite high above the Hells Bells lane and might look better if it was lowered a little so the ball disappears underneath it to hit the standup target. It looks as though it would be a fairly straightforward job to lower the bell too. The entrance to the Hells Bells lane has a device intended to stop straight-down-the-middle drains.
The spring arm has been used on other Stern games to achieve the same thing and varies from being very effective at deflecting the ball to being equally effective at sending in between the flippers, depending on how the game was set up and how much rubber remains on the post at the entrance.
The aim of the spring arm is to press the ball against the lane's left wall so it hits the post with the black rubber ring as it exits the lane. The post deflects the ball so it rolls to the right and not straight down the middle. The ball can get to the spring arm either from rolling back down the Hells Bells lane, or from the exit from the pop bumpers, so let's have a look at that whole area starting with the top rollover lanes.
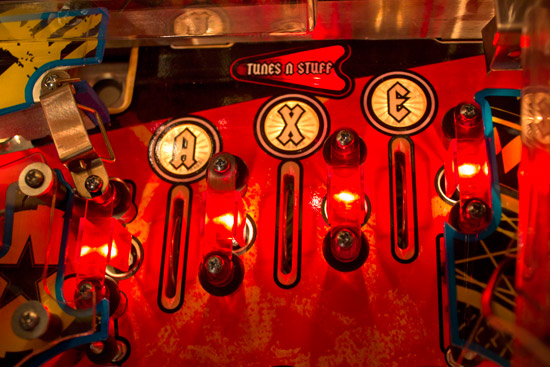
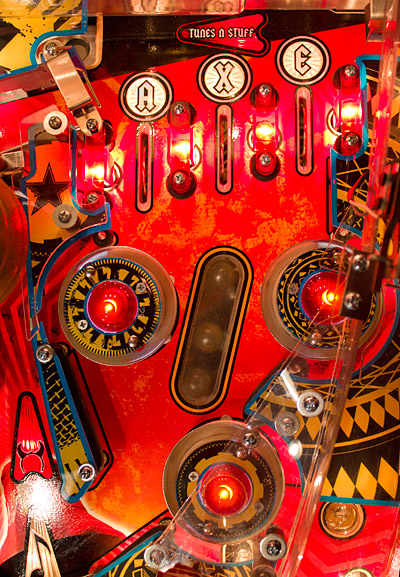
On the left side is a one-way gate which allows balls from the left orbit lane to pass through but stops anything coming in the opposite direction, forcing it into the three Whole Lotta Rosie rollover lanes. These have a normal 'lane change' action to cycle through lit and unlit inserts, and rolling through a lane lights its respective A-X-E insert. There's plenty of rubber here to allow some effective nudging - as you need to during one of the modes - but lane change is usually sufficient to get your unlit lane to light. Above and to the right of the rollover lanes is a controlled gate.
This allows or blocks shots from the left orbit, letting the ball continue all the way round when open, or forcing it into the rollover lanes if it's closed. The most interesting features in this area, though, are found at the very top of the playfield. One of them being the top saucer.
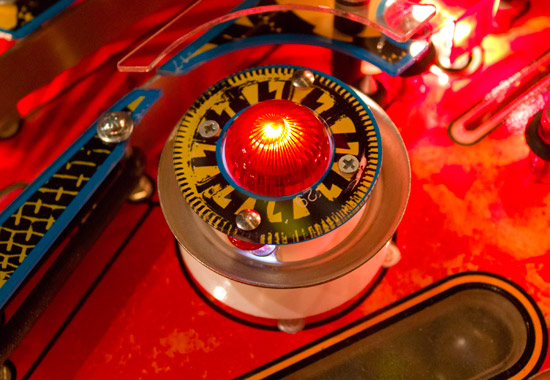
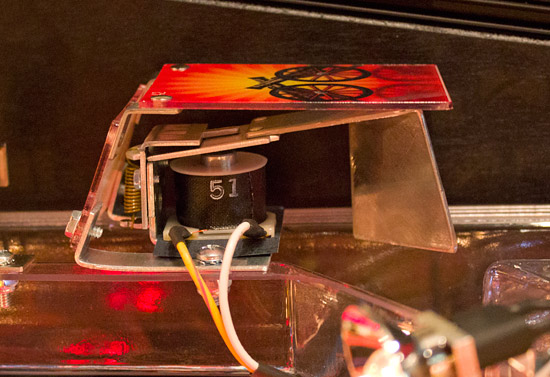
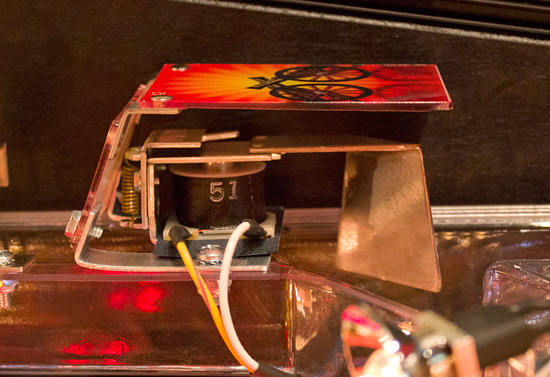
Marked with a 'Tunes N Stuff' arrowhead insert, the saucer is shot from the right orbit (which we'll continue to call an 'orbit', even though it doesn't). Most shots of any reasonable strength will end up in the saucer, including the initial plunge and all auto-launched balls. If the saucer isn't lit for anything then the ball is quickly ejected to end up in the rollover lanes, or if the insert is lit, the ball is held while the player makes their selection before being kicked out. Above the top saucer and mounted on the back wall, we find the song selector.
When the ball is shot into the top saucer, if the 'Tunes N Stuff' insert is lit, the player can choose to change the current song. Each of the twelve songs has a specific area of the playfield where enhanced scoring can be achieved, while other shots advance the score for that tune. Changing tunes locks in those points and if, at the end of the game, your score for that tune is the highest, you get onto the high score table. The jukebox-like song selector shows which tunes you have played, which you have yet to play, and which is your current song. You can choose to stick with your current song or use the flippers to scroll through the list, and then hit the fire button to select. The selector has two more of those red Devil horns and these have lamps to illuminate them, though the area is already brightly lit and so the effect is not that noticeable. So after the ball passes through one of the top rollover lanes, it ends up in the You Shook Me All Night Long pop bumpers.
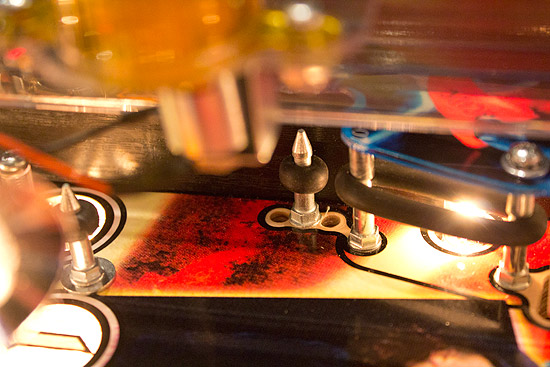
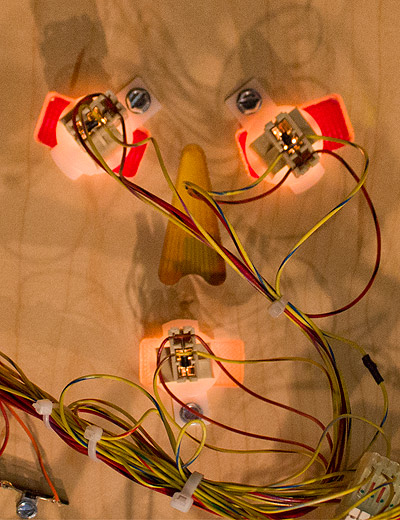
Each bumper cap has its own design and they are all topped by red domes which look much better than the bare LEDs used on other games.
Most importantly though, the clear hotdog insert in the centre of the pop bumpers has not one, not two, but a full three flash lamps. We had to have a look under the playfield to check, but three it is. Nice!
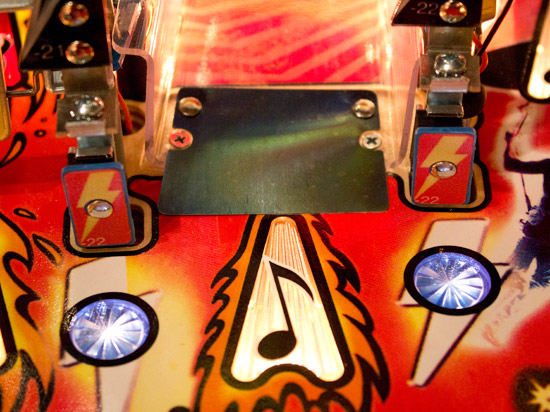
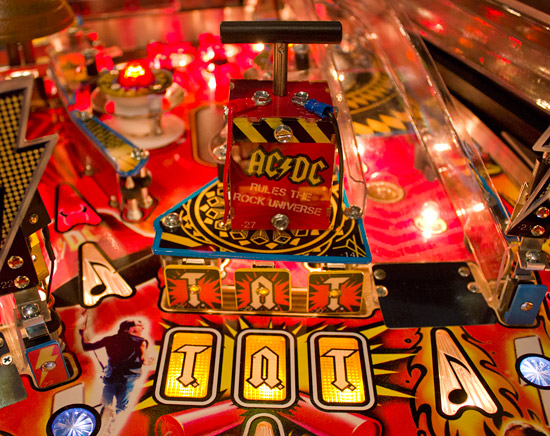
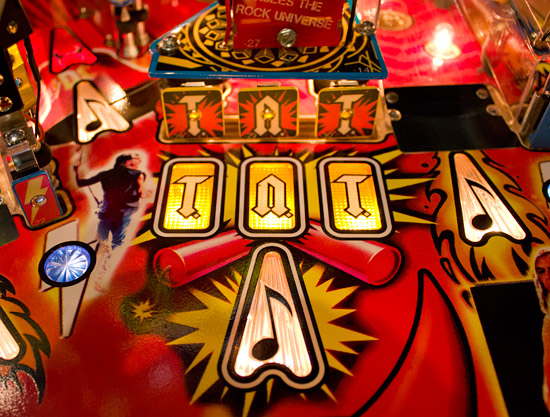
There's only one exit from the pop bumpers and that's into the Hells Bells lane we looked at earlier. So moving on from there, out next feature on the playfield is the T.-N.-T. target bank.
This is a three-bank of standup targets with corresponding inserts and a white note insert to indicate when they're lit for a major points award.
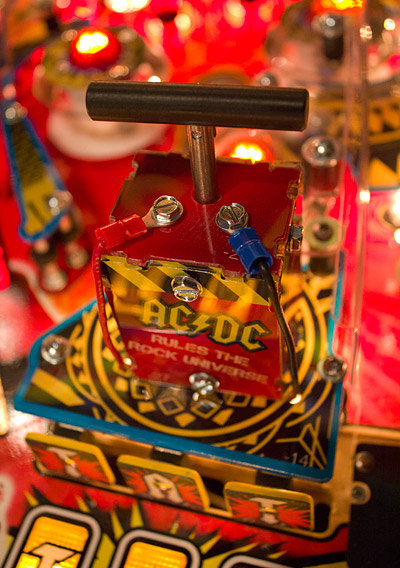
Mounted above the targets is a detonator toy. On the Pro this is a static object, but on the Premium and LE models it animates.
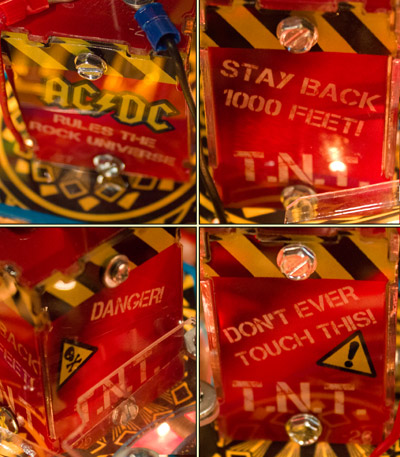
The red and blue connectors are a nice touch and purely for effect, but they show a good attention to detail, just like the correct punctuation on the inserts and the target decals. Each side of the detonator also has a different warning message. Here are all four of them:
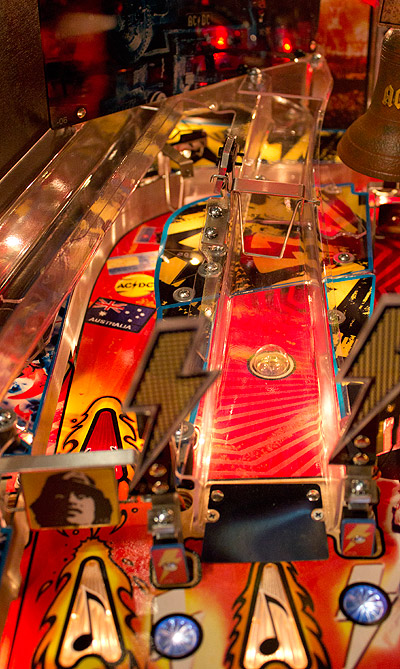
Immediately to the right of the T-N-T targets is the game's second ramp - the Highway to Hell right ramp.
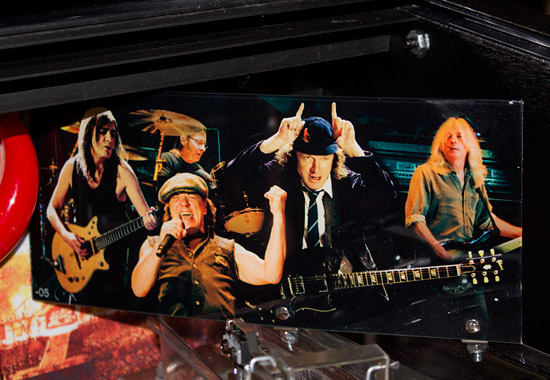
The right ramp is like a mirror-image of the left ramp, at least to begin with, being made of clear plastic and without any decorative decals. There is a flasher beneath the ramp and as it rises to the turn, there is a large printed plastic covering the very top. Whereas the left ramp sported a picture of the Rock N Roll Train, the right ramp is host to an image of the band.
As with its counterpart on the opposite ramp, the band's picture has a glossy finish which reflects many of the playfield's lamps, making it difficult to see properly. It's brighter than the train image though which helps with its visibility. Also copying the Rock N Roll Train picture, the band image hides the ramp's turning point which is much tighter than on the left ramp. Unlike the left ramp though, the switch to sense a successful shot is much further down the ramp return.
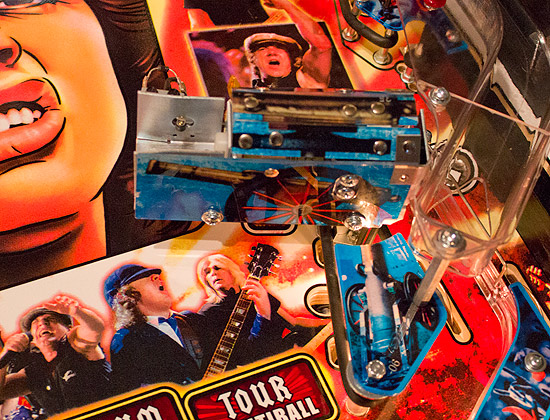
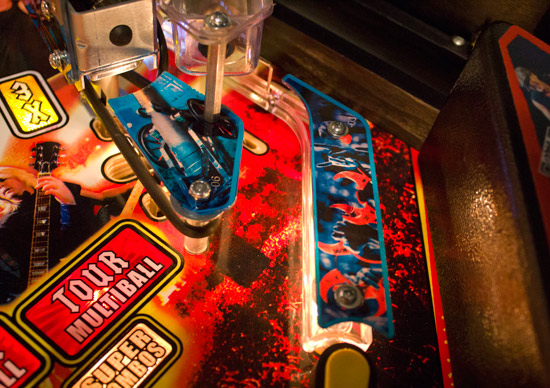
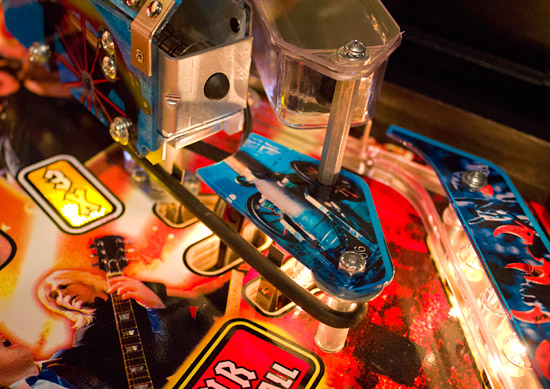
The reason for this can be found in the main difference between the left and the right ramps - the cannon.
The cannon consists of two parts - the diverter and the launcher. If the cannon feature is not enabled, the ball rolls under the diverter and down to the right inlane, from where it ends up at the right flipper.
Once the cannon is qualified, whenever the ball triggers the right ramp switch shown above, a coil energises in the diverter which pulls down on the diverter arm and blade.
This blade is just low enough to send the ball to the left and into the cannon launcher. The diverter is covered with a bright red/orange plastic depicting two cannons which does an adequate job of hiding most of the unsightly diverter mechanism.
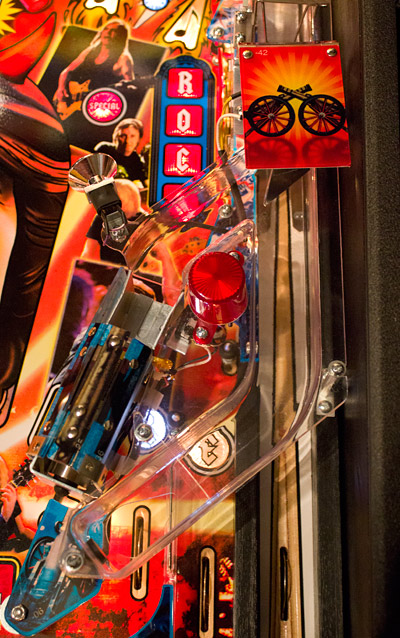
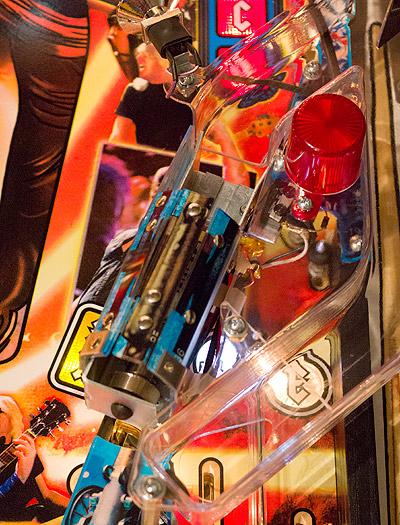
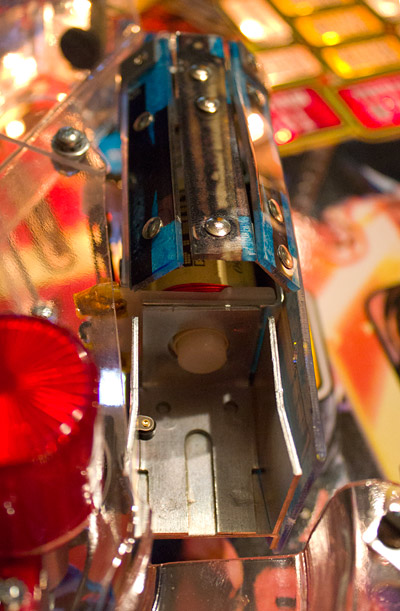
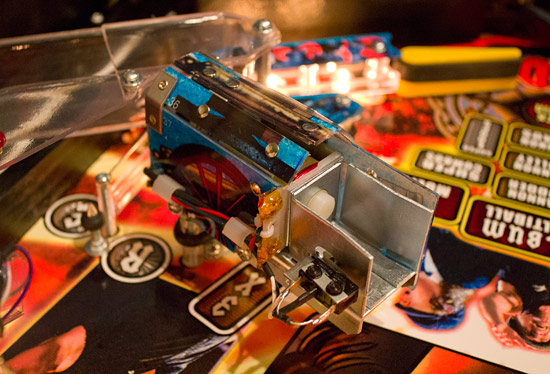
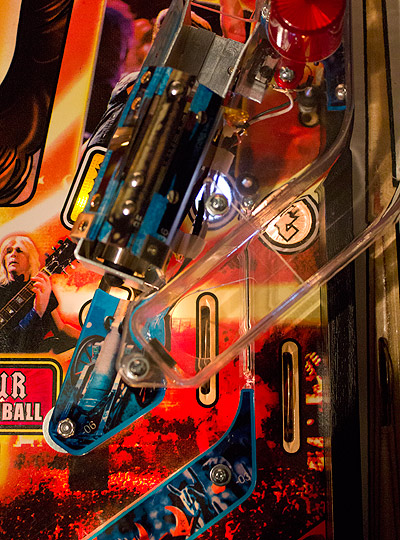
To let you know the cannon is available, the red flasher next to the diverter is illuminated until you finally shoot the right ramp to load the cannon. The cannon launcher operates just like the one in Terminator 2, panning left and right until the player presses a switch and releases the ball, which is then fired at a flashing target. The construction of the cannon launcher doesn't make for the most attractive device ever seen.
Despite the riveted artworked plastic pieces, it bears little resemblance to an actual cannon while the minimalist approach leaves much of the housing uncovered and visible to the player. When the ball is diverted in the left ramp, it rolls into the front of the cannon launcher and rests on the coil plunger tip, where it triggers a side-mounted microswitch.
Once the ball has settled, the cannon launcher swings out and the fire button on the lock bar flashes. Only the fire button actually releases the ball. You might think a tap on one of the flipper buttons would too, but it doesn't.
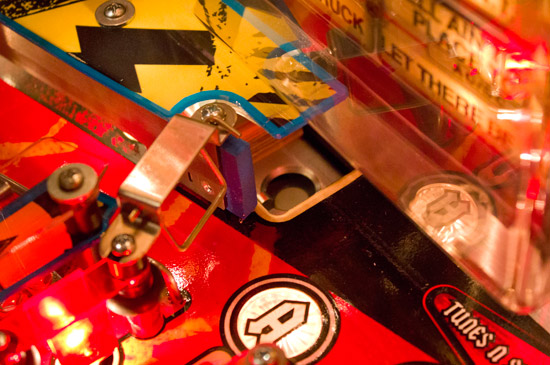
When the cannon launcher swings out, we get our best look at the business end which is normally hidden by the right ramp.
The exposed microswitch and attached diode don't look pretty, and could easily be tidied up with a few snips and a little re-soldering. Really though, making a more attractive cannon launcher cover would be a good aftermarket project for someone. The launcher swings out far enough to shoot the bottom 'A' target in the Back in Black AC/DC target bank on the left.
Once the cannon launcher has fired the ball, it returns to its 'home' position ready to accept the next ball sent its way by the diverter. The cannon features in many of the game's rules as a means to start various multiballs and scoring modes, so it gets far more use than the T2 cannon. Just to the right of the right ramp's entrance is the last of the three Thunderstruck standup targets.
There's not much more to say about that, so next we come to the orbit which isn't - the Hell Ain't A Bad Place To Be right orbit.
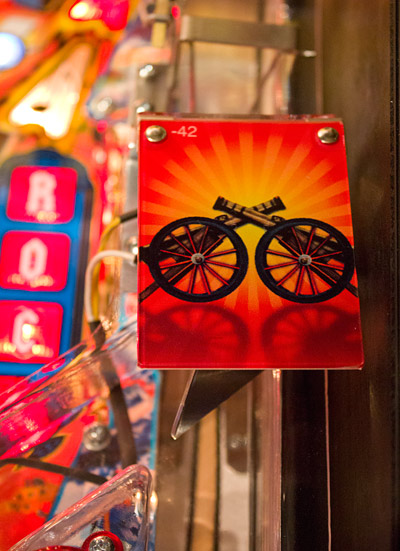
The right orbit is the shot which feeds the top saucer, but it also collects the extra ball when lit and has another of those Devil horns inserts, just like the Hells Bells centre lane. It's a long way to the top if you want to get to that saucer, but not so far just to trigger the switch which registers the shot, which is a rollunder switch about three-quarters of the way up the lane. Along the way you'll encounter more AC/DC logos, passport photos and assorted tour imagery. The final feature to shoot is found just below the entrance to the right orbit.
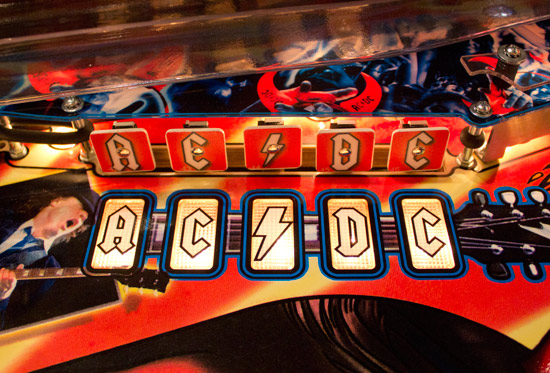
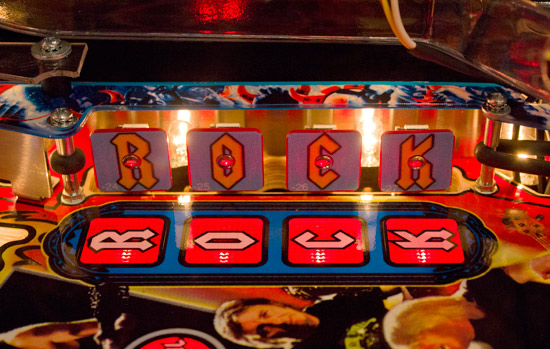
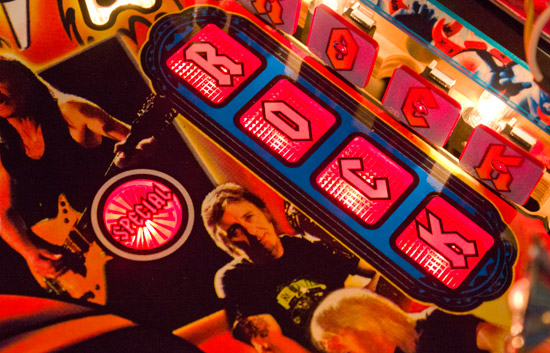
This is the third bank of standup targets found in the Pro version of the game and they represent the song Let There Be Rock. As usual, each target has a corresponding insert in front which lights when the target is hit. The three target banks (A-C-/-D-C, T. -N. -T. and R-O-C-K) combine to award Album Multiball, extra ball and special when all three are completed. Complete them once for multiball and to light extra ball on the right orbit, complete them again to get a special. When a special is available for completing the targets, a special insert lights in front of the R-O-C-K targets.
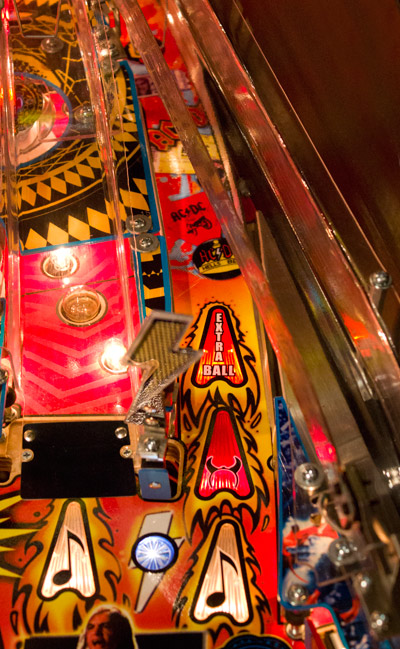
Continuing round the playfield, we reach the right inlane and outlane area. There are a couple of problems here. The first is that the cannon launcher covers much of the top of both lanes, making it hard to see where the ball is going and to take any evasive action if a drain is imminent.
There are rubber rings on both the divider post and the outlane adjuster, allowing for some good nudging action. But the restricted visibility makes that difficult at times.
The second problem can be seen in both the pictures above. Because the cannon mechanism is quite large, there's no room under the playfield to fit incandescent lamps behind the '3x' and the 'R' inserts. So white LEDs have been used instead.
LEDs are used extensively in the LE models so there's no specific problem with their use, but when placed next to an insert lit with a lamp, the different colour temperatures of the two light sources is obvious.
Other than those two issues, the right inlane and outlane are unexceptional. The lane guide cover features more images of the crowd and their Devil horn headwear, while beneath that, a clear plastic section helps spread the light from the two incandescent lamps inside.
The right slingshot has undergone some modifications to make space for the cannon launcher. The slingshot cover is a truncated version with just two support points which might make it more liable to damage. The cannon also makes it impossible to mount a spot lamp on the top corner of the slingshot, or a flasher dome in the centre. Consequently, both have been moved up the playfield and become part of the right ramp.
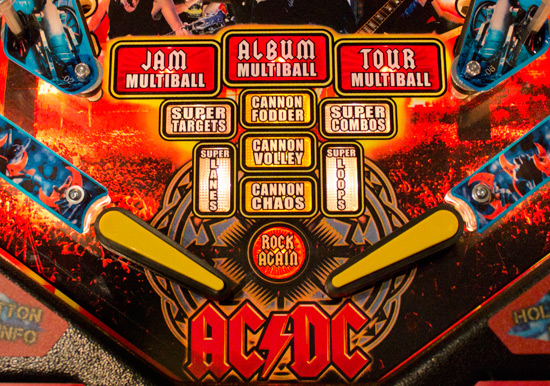
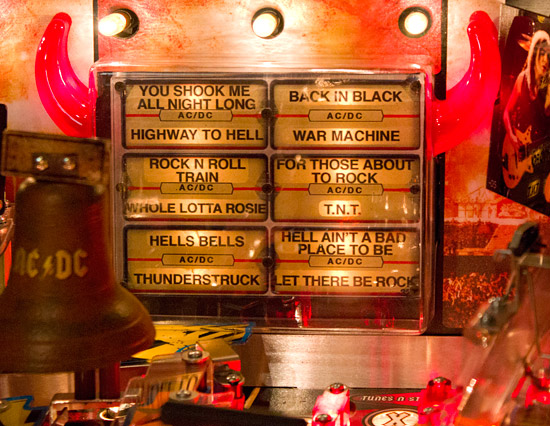
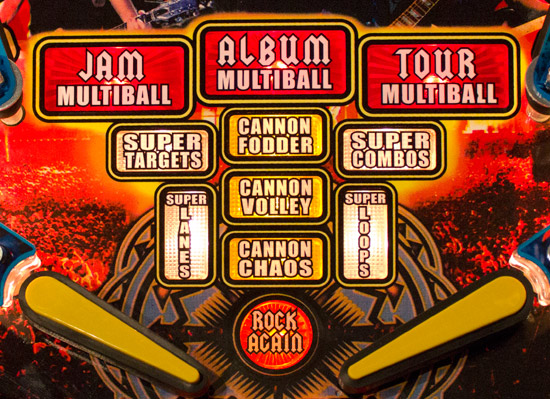
That brings us back to the flippers where we began this look at the playfield's features, and it's above the flippers where we find the main feature grid.
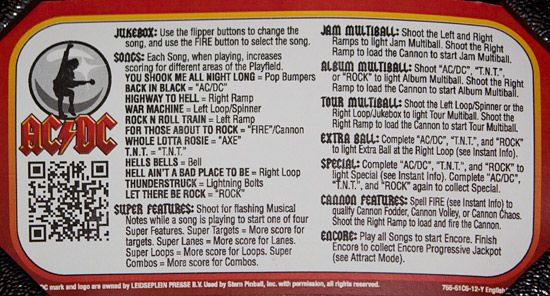
The three multiball modes are qualified in different ways but all started by shooting the cannon. Jam Multiball comes from the ramps, Album Multiball is lit by completing the three target banks, while shooting the left and right orbits - the ones with the passport images - enables Tour Multiball. The three Cannon modes also start by firing the cannon, and are played in order by completing the F-I-R-E inlane/outlane inserts. Finally, the Super modes come from shooting lit white note inserts and increase the scoring from the relevant parts of the playfield. Above the feature grid are a couple of inserts which indicate when 2x or 3x playfield scoring is running.
There are a few more inserts we haven't yet mentioned. Can you see where they are?
There's actually an insert for Angus's nose too, though that one doesn't have a lamp installed.
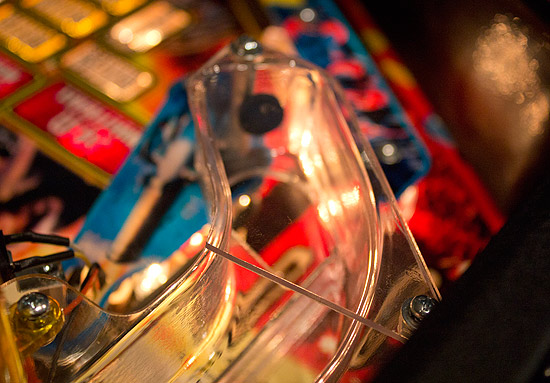
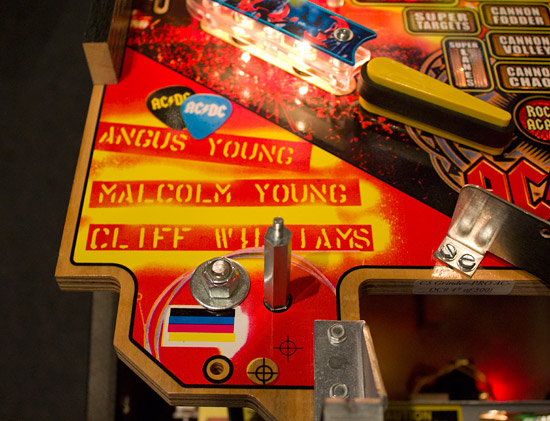
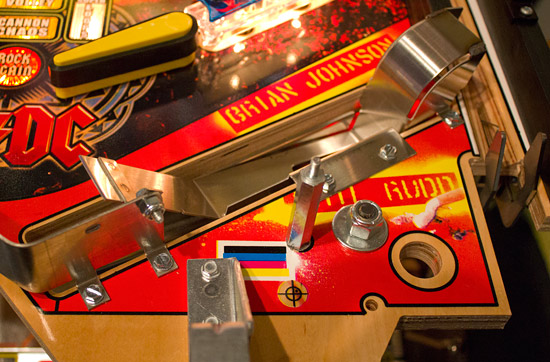
That completes our look at the playfield features, but we're not finished yet though, because the eagle-eyed amongst you might have noticed something unusual in some of these playfield pictures. Scroll up a few pictures and see if you can spot anything odd in the right inlane/outlane image. Got it yet? If you look at the point where the plastic apron meets the outlane, doesn't it look as though there is something peeking out from under the apron? We thought so too, so we did what anyone would do with a brand new game; got out the socket set and started dismantling it. Just as we suspected. Some extra artwork, naming the band members through spray-painted stencils and featuring two branded plectrums, some guitar strings and a stubbed-out cigarette.
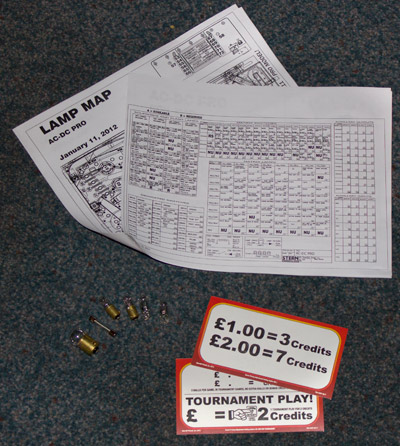
What it's doing under the apron and whether it will stay there we don't know, but if it remains in the game at least you'll know what it is hiding under there. That really does end our look at the playfield's features but we still have some more details of the game to bring you. With the game comes the usual goodie bag, which normally containing lamps, decals and the manual. This sample AC/DC came with a minimal manual showing lamp, switch and solenoid positions, some pricing cards, two #555 wedge lamps, two #44 bayonet lamps and one #89 flash lamp. In addition, the goodie bag contained a solitary 5A fuse which is the first time we've seen that particular component included.
There's usually also a pricing card pre-fitted on the apron along with the instruction card. And speaking of the instruction card...
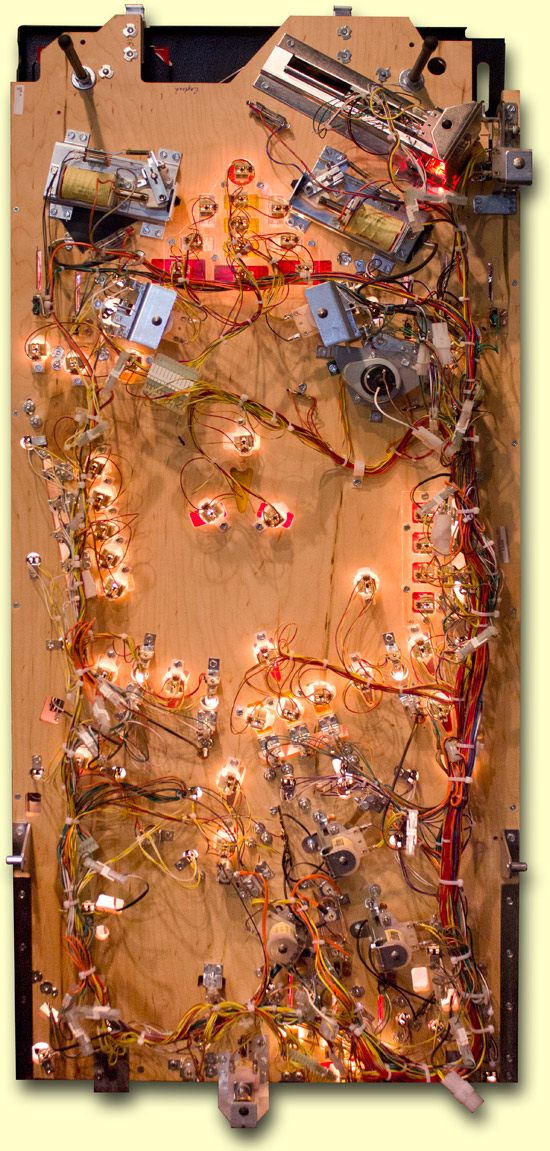
Once again, we can save you the bother of scanning that QR code as it resolves to: As we approach the end of this first part, let's lift the playfield and have a look at the underside of the game.
Finally, here's one little nugget we found in the game's menu options which nobody has mentioned yet. Feature adjustment #1 changes the music between the studio version and a live version.
When we tried it, the live setting produced no music at all, so it presumably hadn't been implemented yet. Of course it may never be added if there's no memory space or there are licensing problems, but it would certainly add another level of enjoyment to the game's music tracks if it comes about. And with that thought we reach the end of part one of our In-Depth Review of Stern's new AC/DC game. We'll be back with part two to review the whole package once the software is a little more developed, and we look forward to welcoming you back then. If you want to be notified of our latest reports - including In-Depth Reviews such as this one - sign-up for our free Pinball News Update Scheme where we send you the occasional e-mail with all that's been added to the site recently to make sure you don't miss out. We asked for your thoughts about AC/DC, and we have published them below. Your comments:
© Pinball News 2012 |