 |
CAPTAIN NEMO |
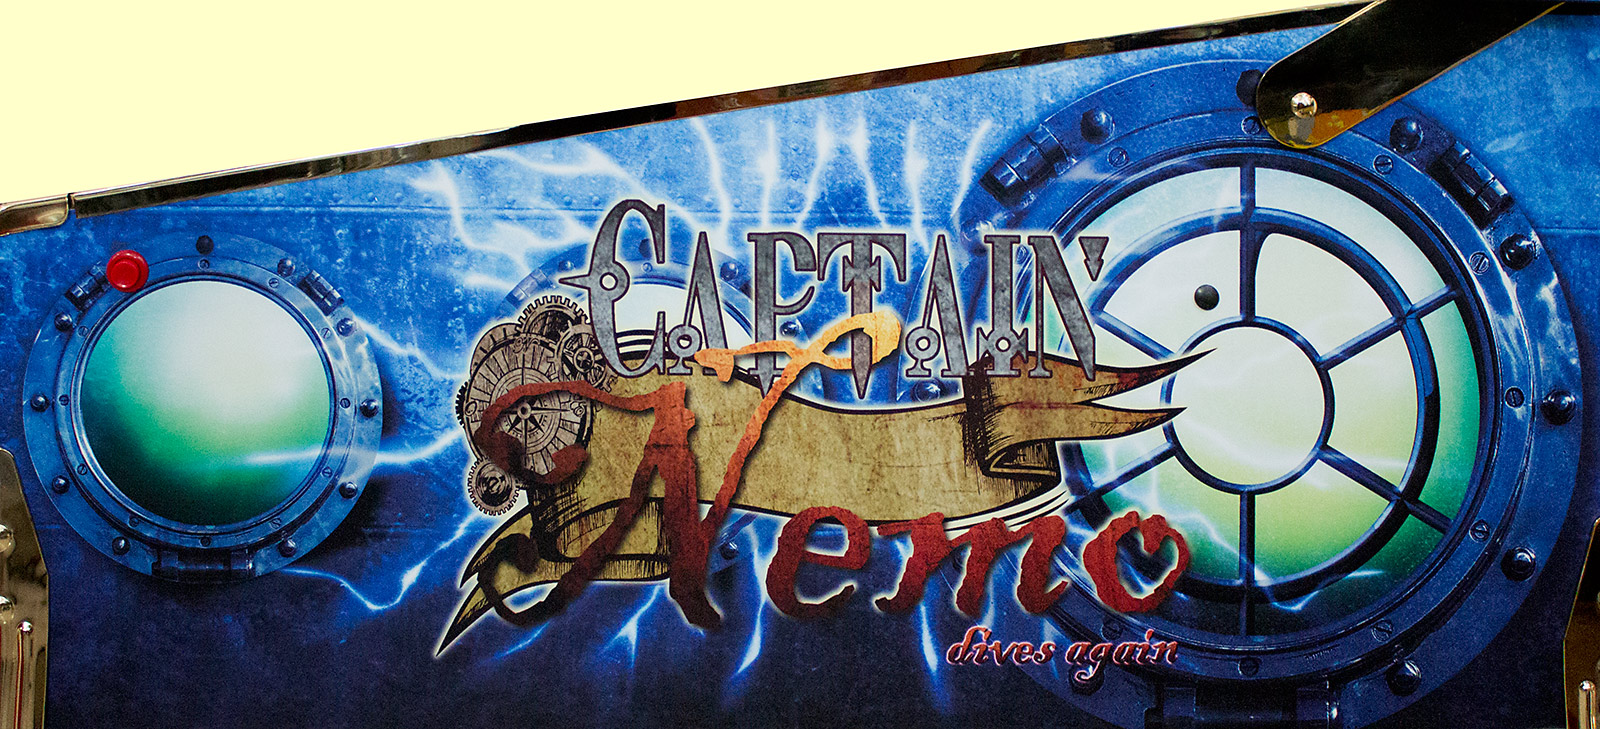
| Date: 1st March, 2017 Welcome to the latest in our continuing series of In-Depth Reviews, and today we are delving deep into Quetzal Pinball's Captain Nemo Dives Again. We have been following the development of Captain Nemo Dives Again - which we'll simply refer to as Nemo from here on - since Antonio Ortuño first announced his plans to build thirty machines back in March 2012. It's now five years later and the games are finally being delivered to buyers. Five years does seem to be a common timescale for small-scale boutique game manufacturers to actually deliver their first game. So, we assume you know the structure in these In-Depth Reviews. We're basically going to rip the game to pieces, investigate every aspect and show you every angle, inside and out, starting with the outside and the cabinet artwork.
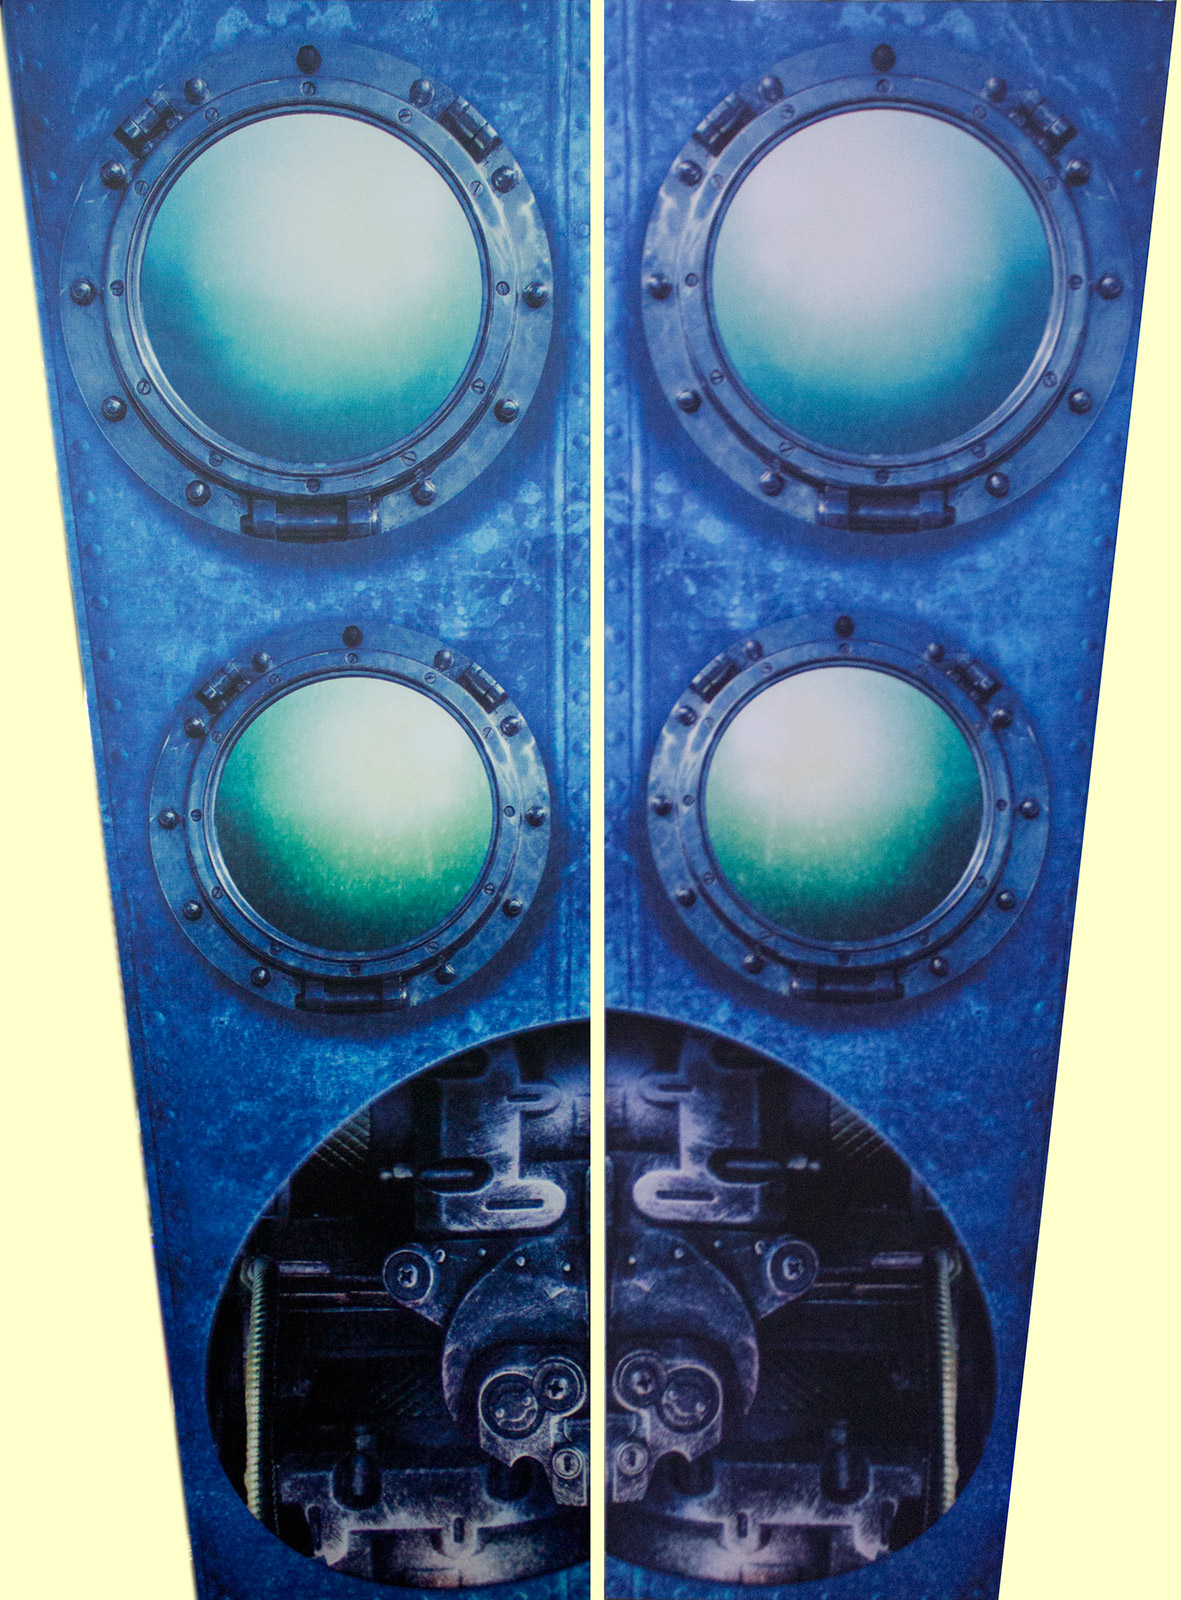
The front of the cabinet is dominated by the standard single-slot coin door but there is still space for a nice frame design surrounding it.
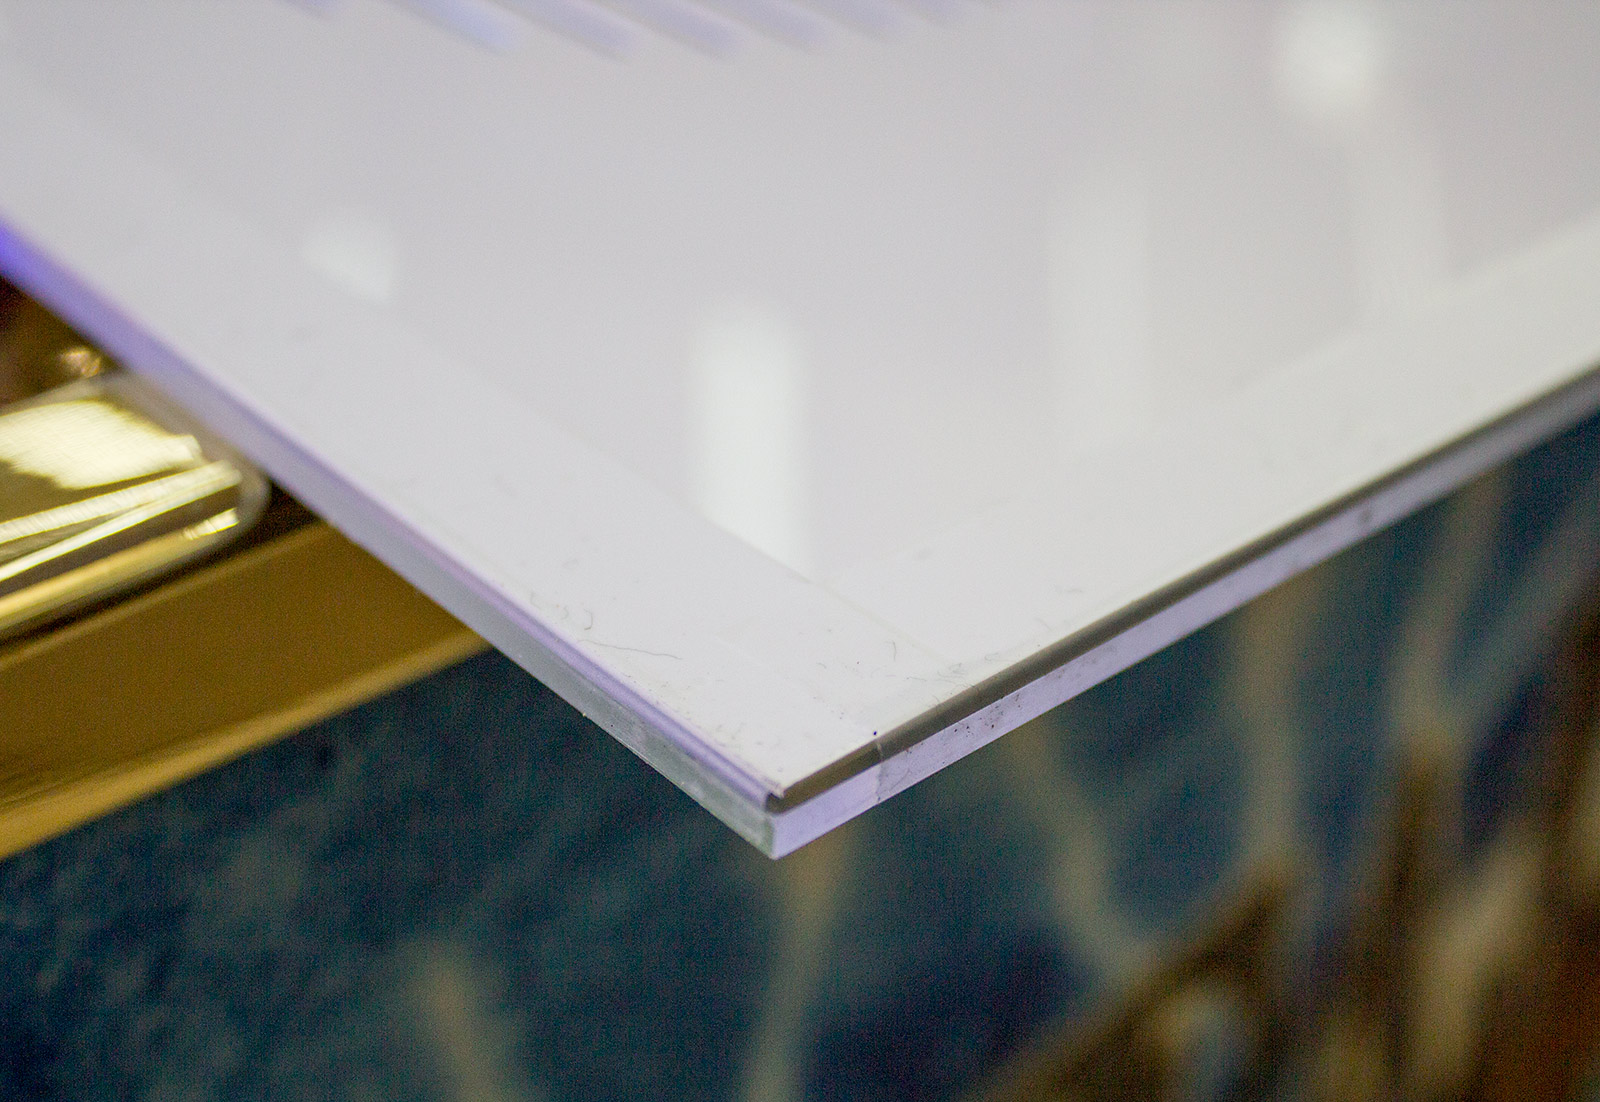
If we had one criticism of the decals, it would be how the exposed edges are white and can sometime show up on the corners. Otherwise though, they look great.
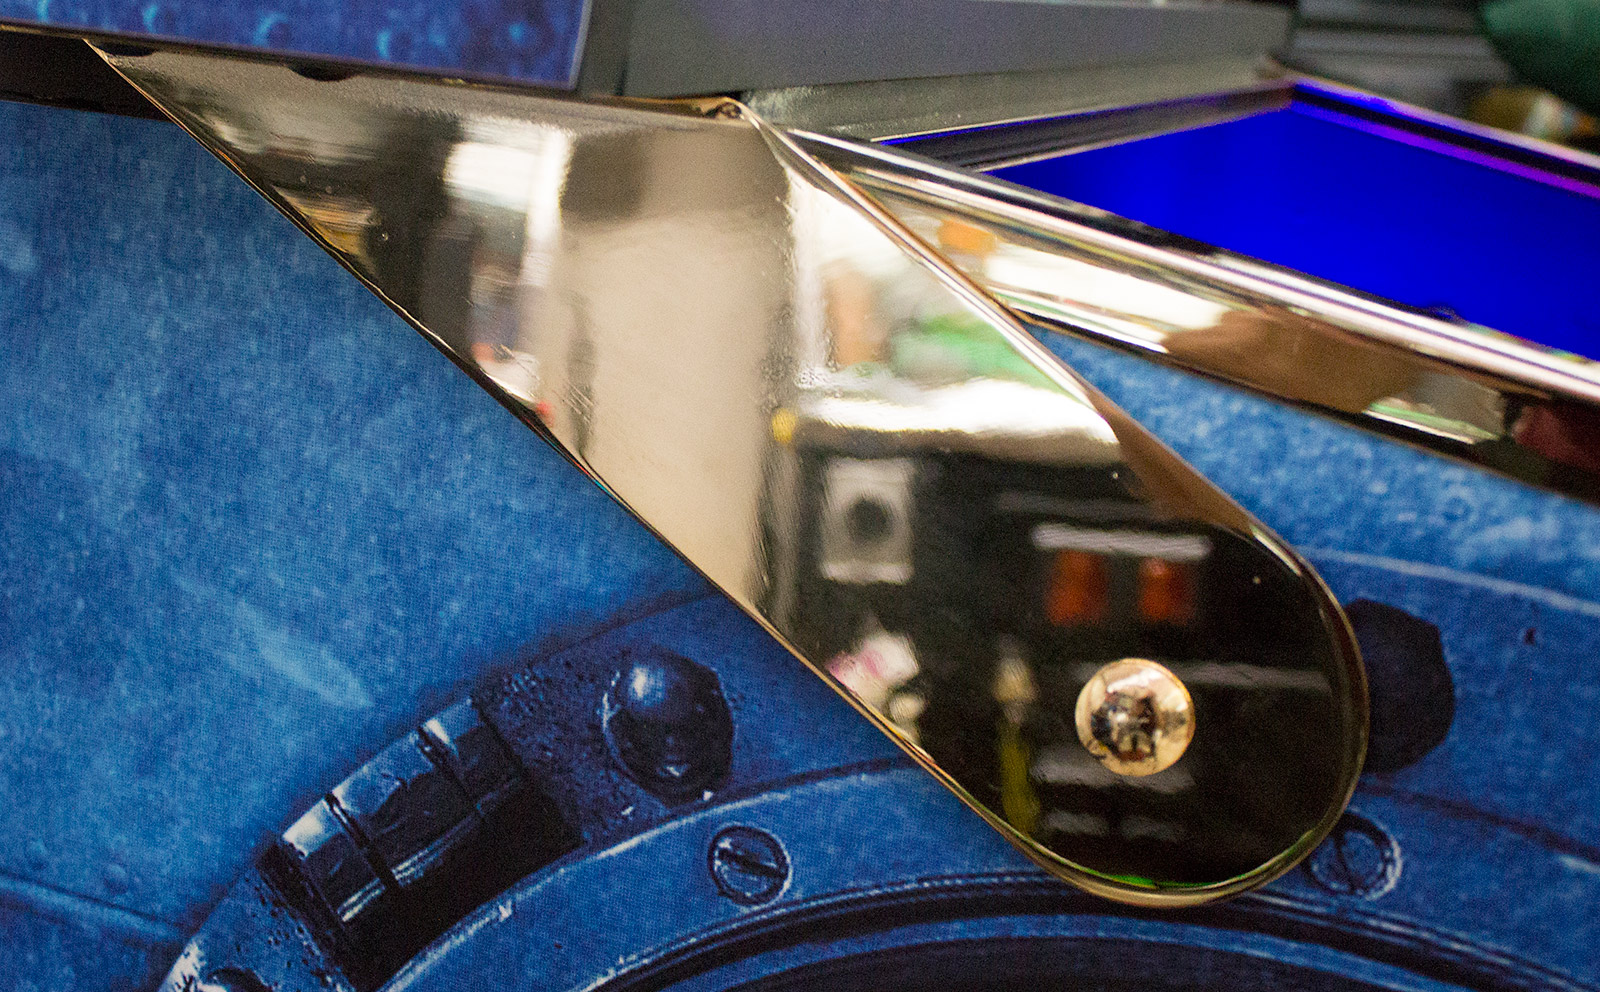
Now would be a good moment to mention how our review machine was specified with gold trim which was available at extra cost at the time of order.
Standard Nemo machines don't have this gold finish, but it does look excellent and is very nicely done as we shall see throughout this review.
The translite brings us to something unusual about the game when compared to other production machines. You might notice how there are four white dots om the translite picture above. These are actually the plastic rivets which appear to hold the translite to the clear acrylic sheet which covers and protects it.
These are used in preference to the more common edging strips which clamp the translite to the glass on all four sides. The lower two of these rivets have plastic 'nipples' which can be used to lift the clear panel/translite sandwich to gain access to the backbox.
However, there are a couple of problems here. Firstly, the translite isn't firmly attached to the clear plastic cover. The rivets don't actually hold the clear sheet to the translite very successfully. It seems a static bond was expected to attach the two parts, only this didn't really work. So, the translite needs to be taped to the clear protective sheet using Scotch Tape or similar.
The clear acrylic sheet is also too thin and can flex too easily, allowing it and the translite to fall out. Then we come to the other problem; the translite doesn't actually transmit much light. The white layer is so thick it blocks almost any light from passing through. It's an easy problem to remedy - make the white layer thinner - but as it stands the translite is too dark. We'll look at this a little more when we examine what's in the backbox.
Moving away from the visible part of the game and poking our camera around the back we find some interesting features.
First of all, there's a fan mounted on the back of the main cabinet. It's an unfortunate consequence of using PC components for a game design that cooling is an important factor, and Nemo is no different in this regard. In fact, there's an additional vent on the top of the backbox too.
It may be unobtrusive and nearly silent, but this cabinet fan, when combined with others we shall see shortly, does provide some ambient noise when the game is otherwise silent. It really is minimal but it exists and, as with all games using the same type of cooling, in a home environment it could irritate. Power is supplied by an IEC connector, and there are two lifting recesses at the very bottom of the cabinet which are very welcome nods to those who regularly move machines around.
We'll examine what's actually inside the backbox and cabinet towards the end of this review, but now let's move on to the part of the machine were the real action takes place. To do that we need to dive under the glass.
The final artwork pieces are found on the metal bottom apron.
The two side decals on the apron show the same rococo design, with the central decal featuring the game logo and the machine number out of the thirty machines produced.
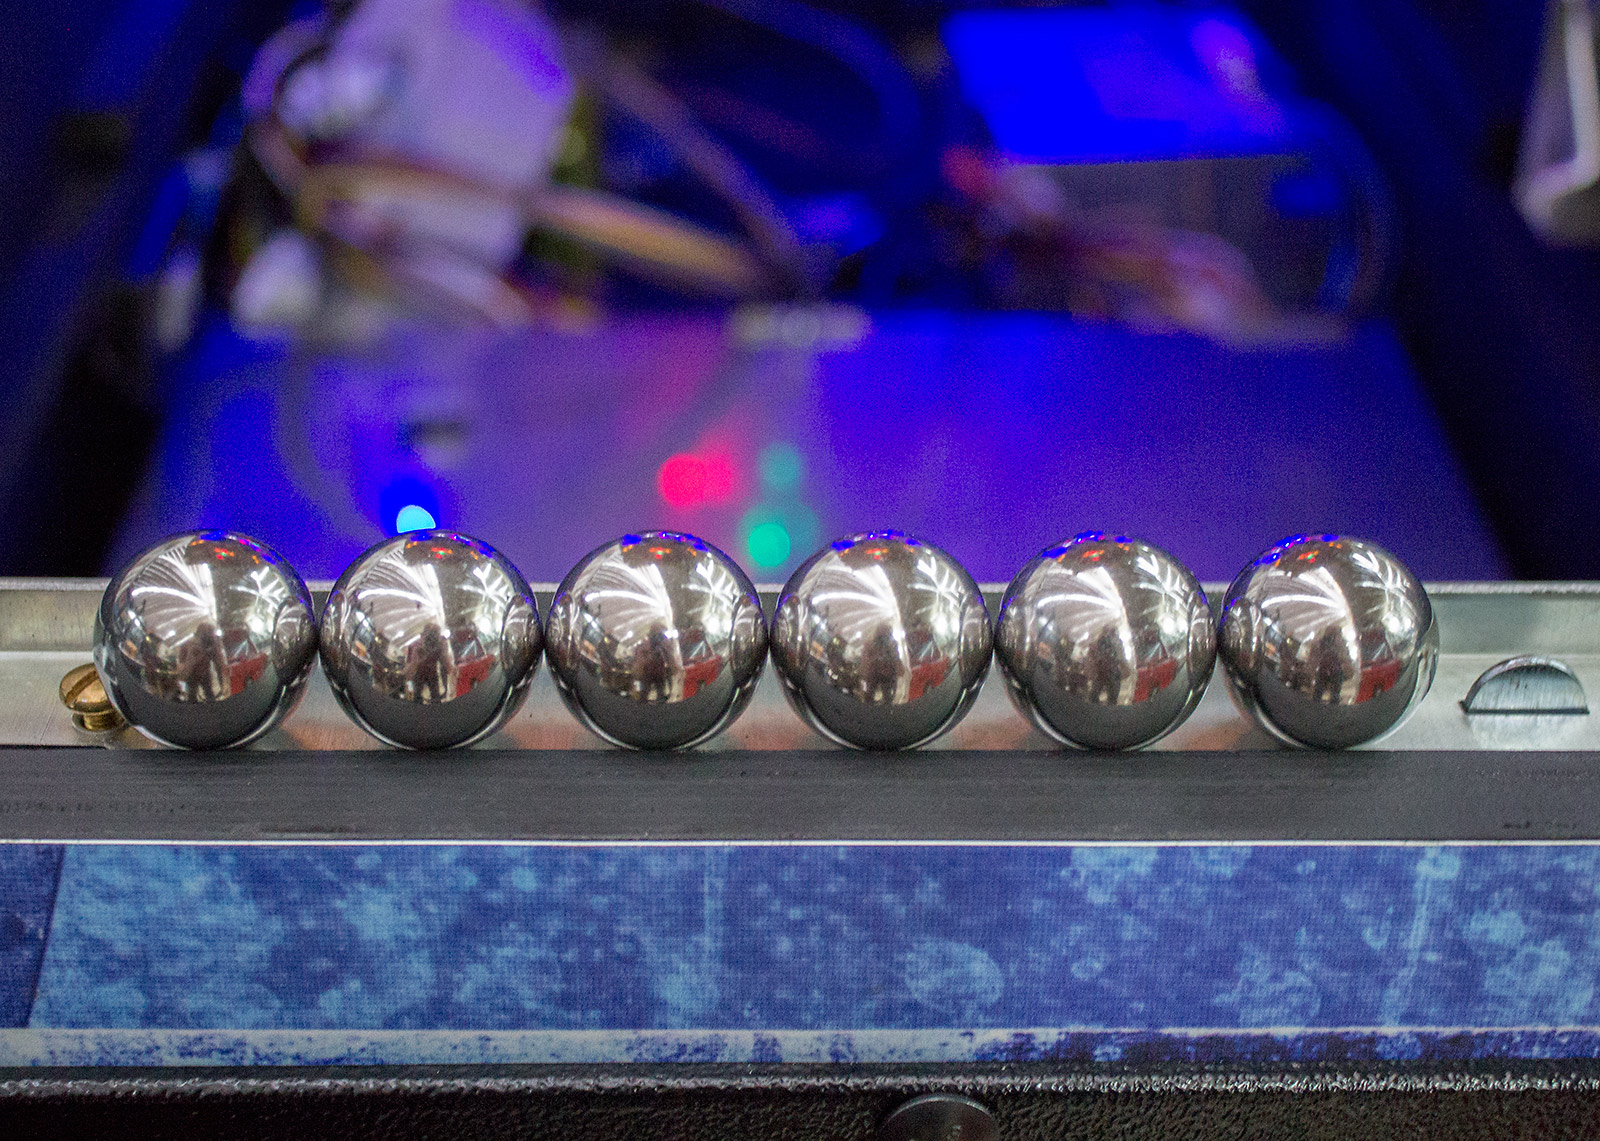
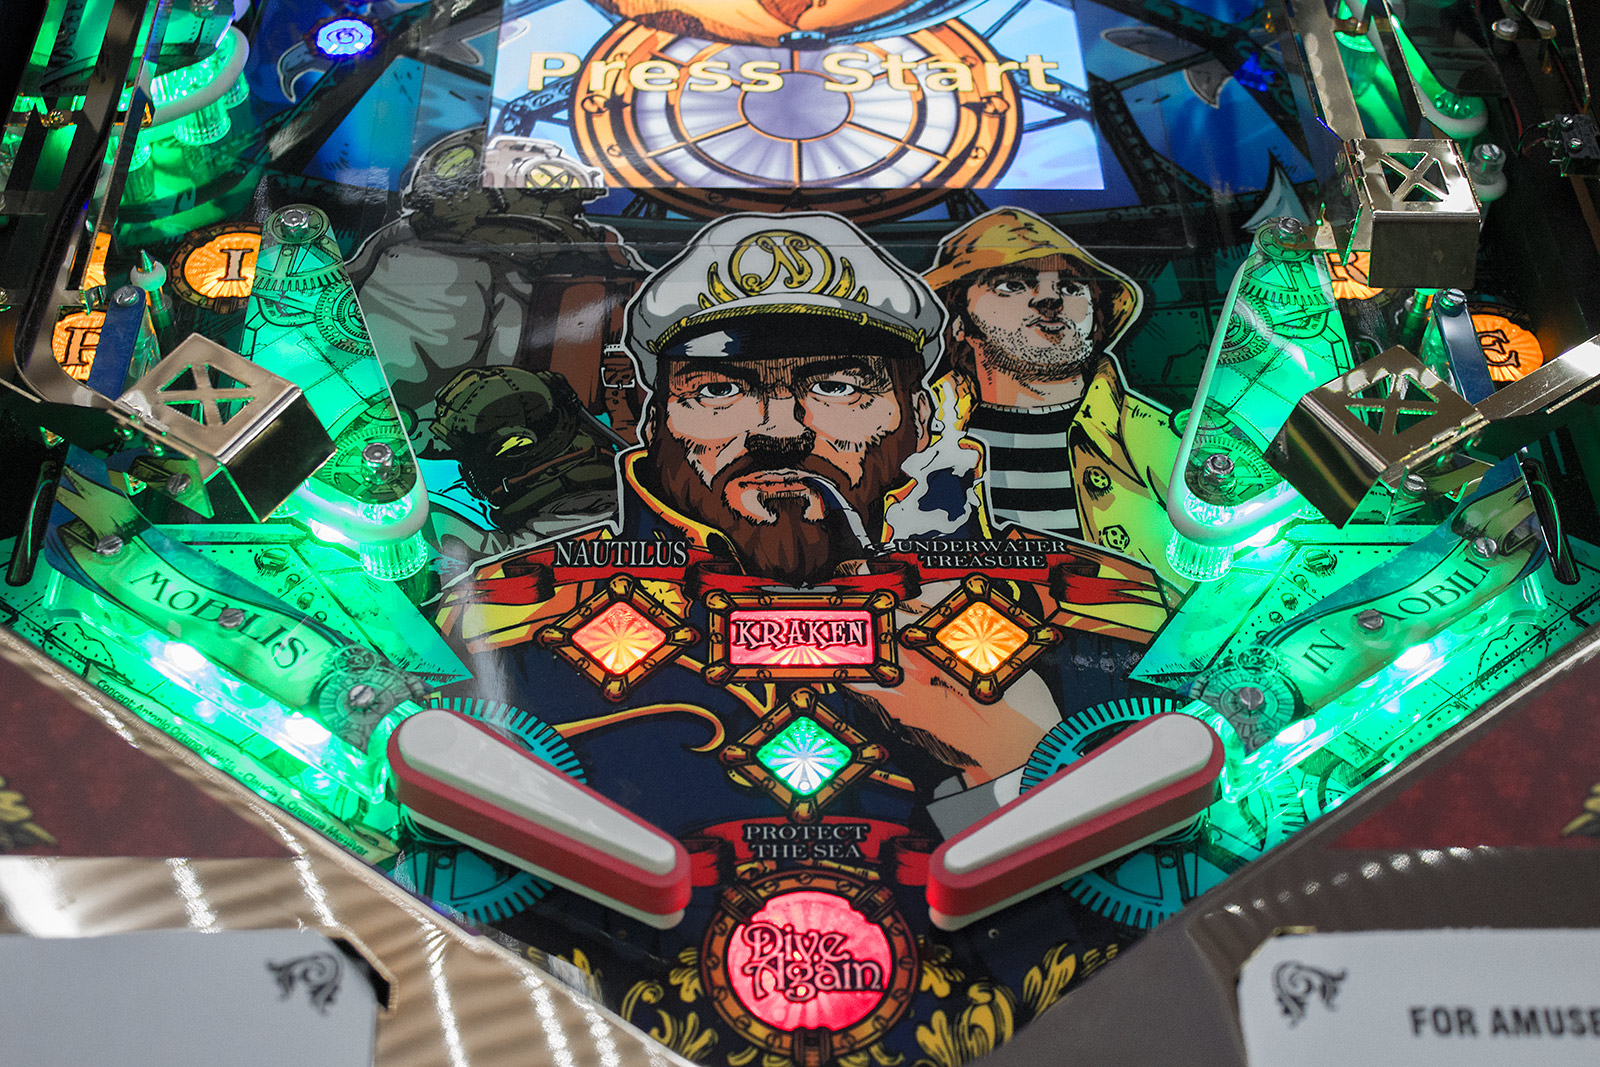
Nemo is a two-flippered six ball game, with the flippers in the usual place, front and centre, and it's there that we start our tour of the playfield.
The game is supplied with white flipper bats and red flipper rubbers - real rubber, not one of the polyurethane alternatives. The flipper bats do not carry any logo or branding at the pivot point.
A large red Dive Again (shoot again) insert sits between the flippers, and the playfield is drilled with flipper alignment holes which should help with setting the flipper bats to the correct angle if you ever need to do that.
Any balls which pass between the flippers soon find themselves falling into the trough, the entrance to which is covered by the bottom apron.
As is customary in these In-Depth Reviews, we will continue our tour of the playfield features by moving clockwise, pausing only to admire the reflective quality of the gold-plated apron.
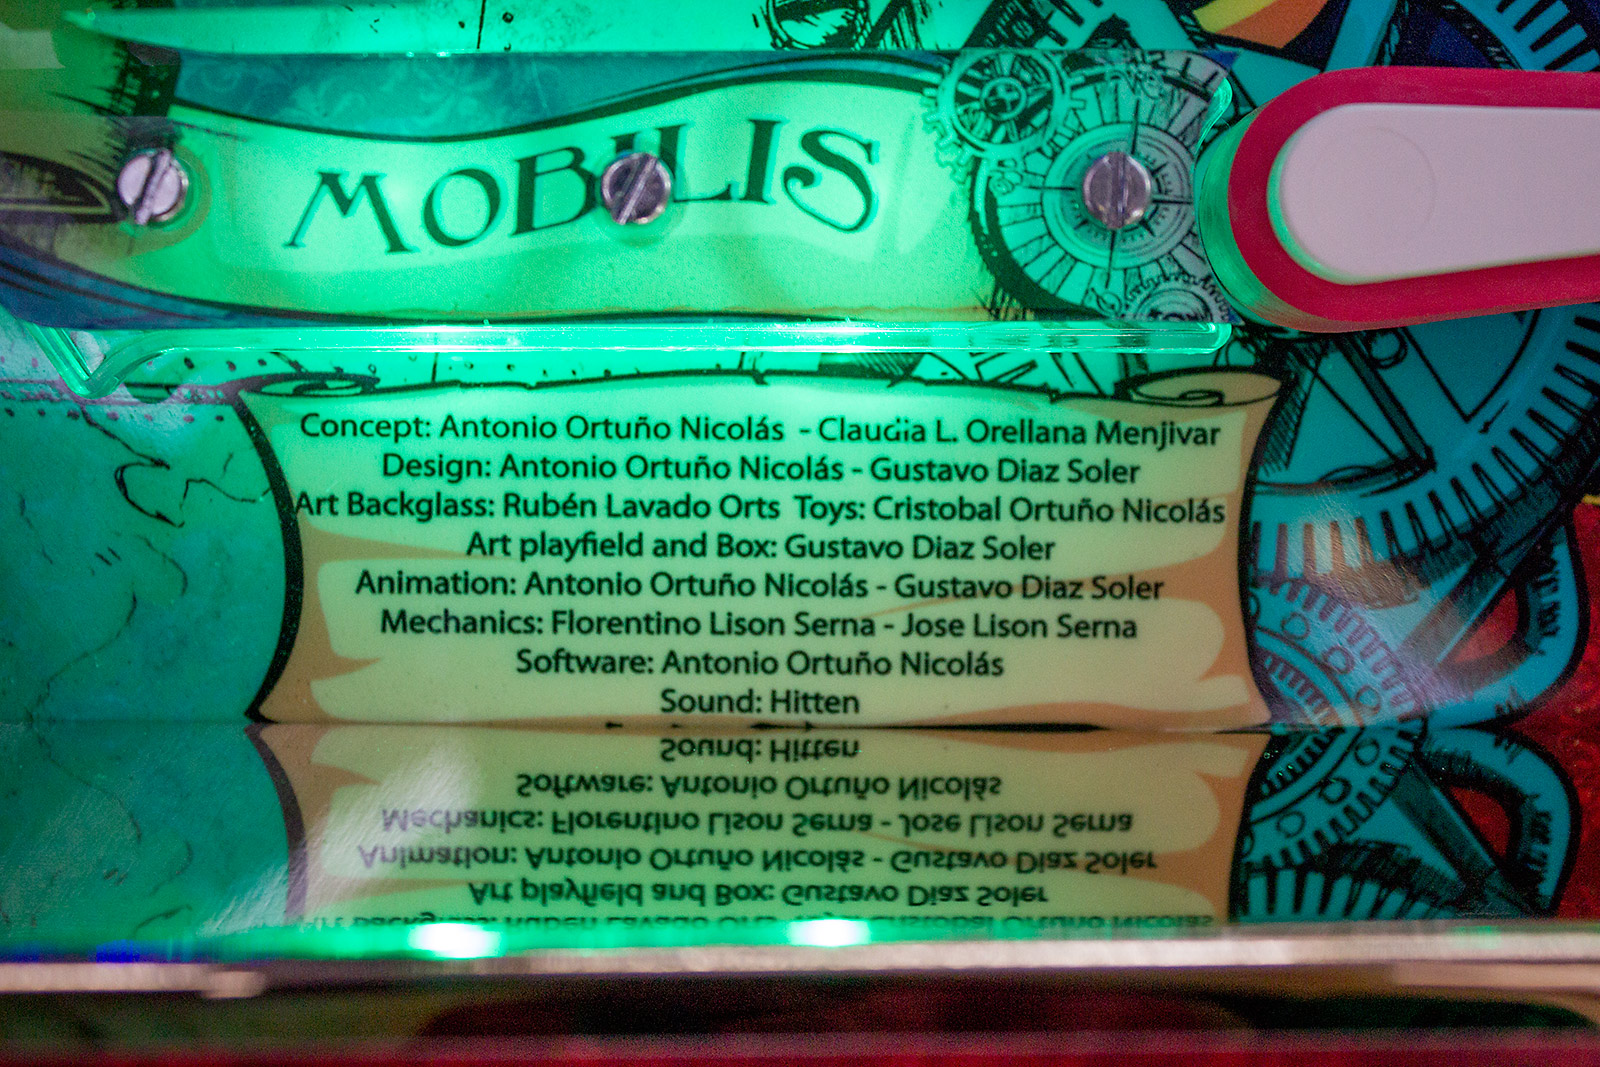
Just above the apron in the left outlane is a panel listing credits for the game design, artwork, toy design, display animations, mechanical design, software and music/sounds.
Incidentally, there is a corresponding copyright notice in the right outlane for Gustavo Díaz, a.k.a. Lord Hiryu who created the artwork, giving the year as 2012- when the original announcement of the game took place.
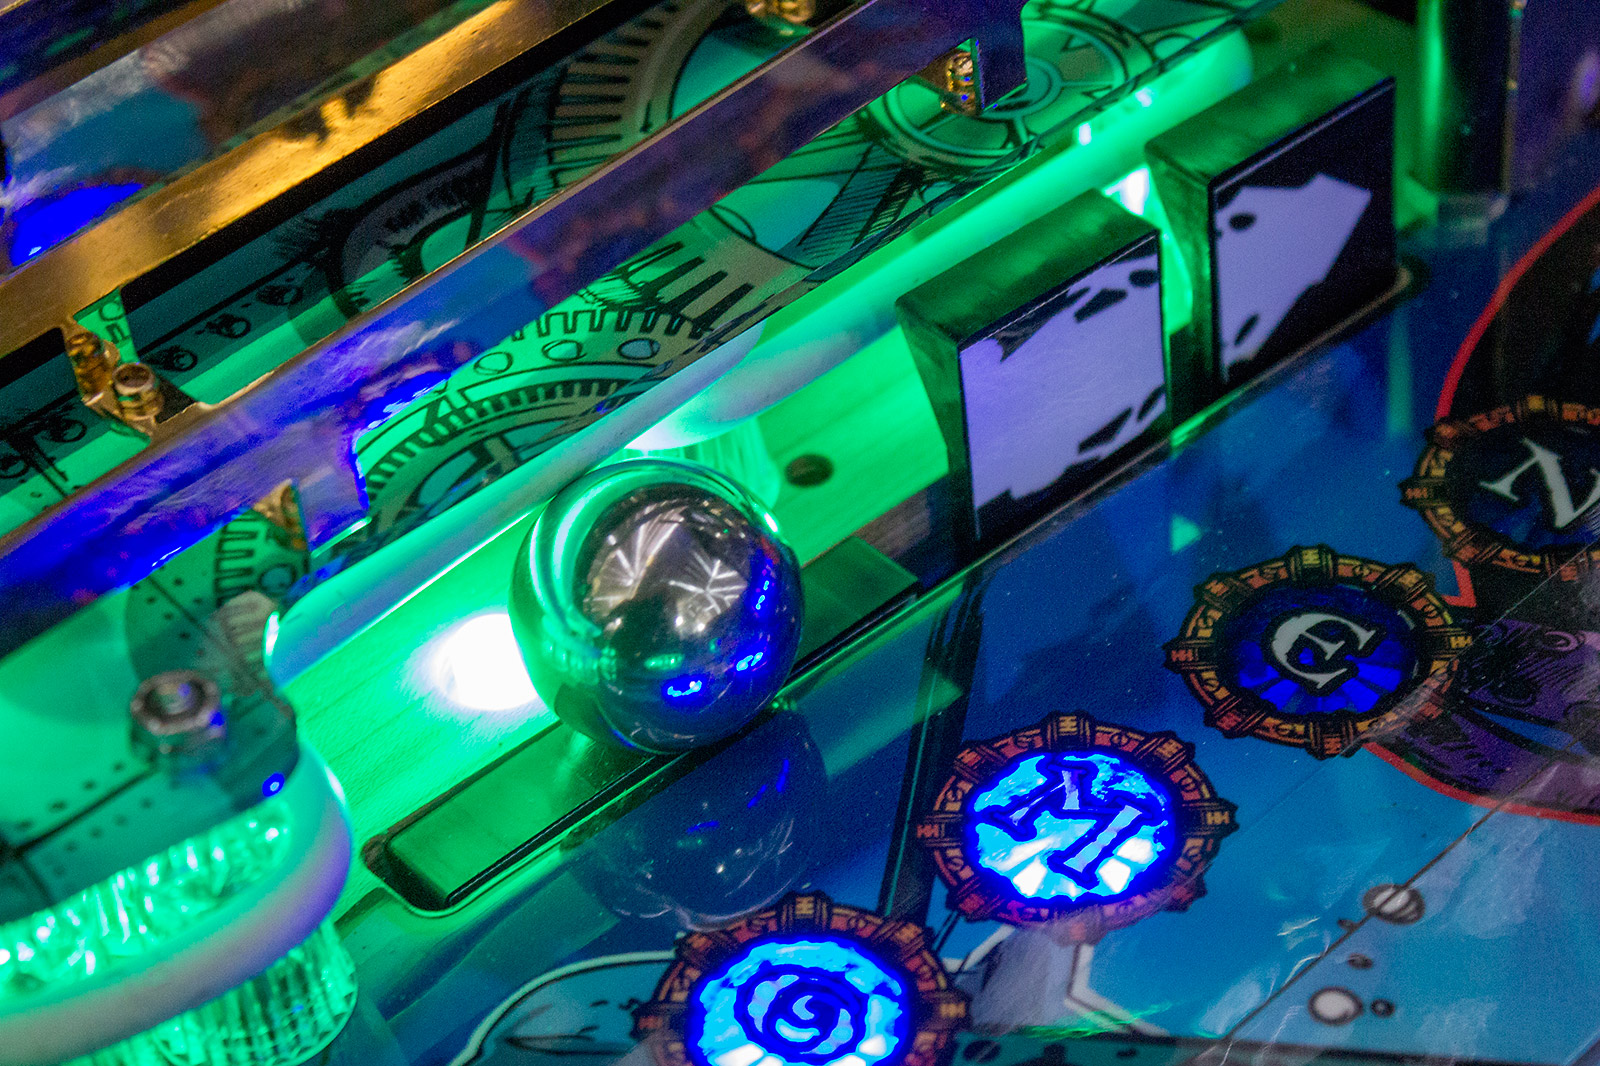
As you can see, the inlane ball guides are lit with pure green LEDs. Lighting throughout the game uses LEDs and most are coloured. The coloured ones are single colours, and 44-style bayonet lamp holders are generally used to mount them. There is one incandescent lamp fitted to the game, but we will come back to that one later.
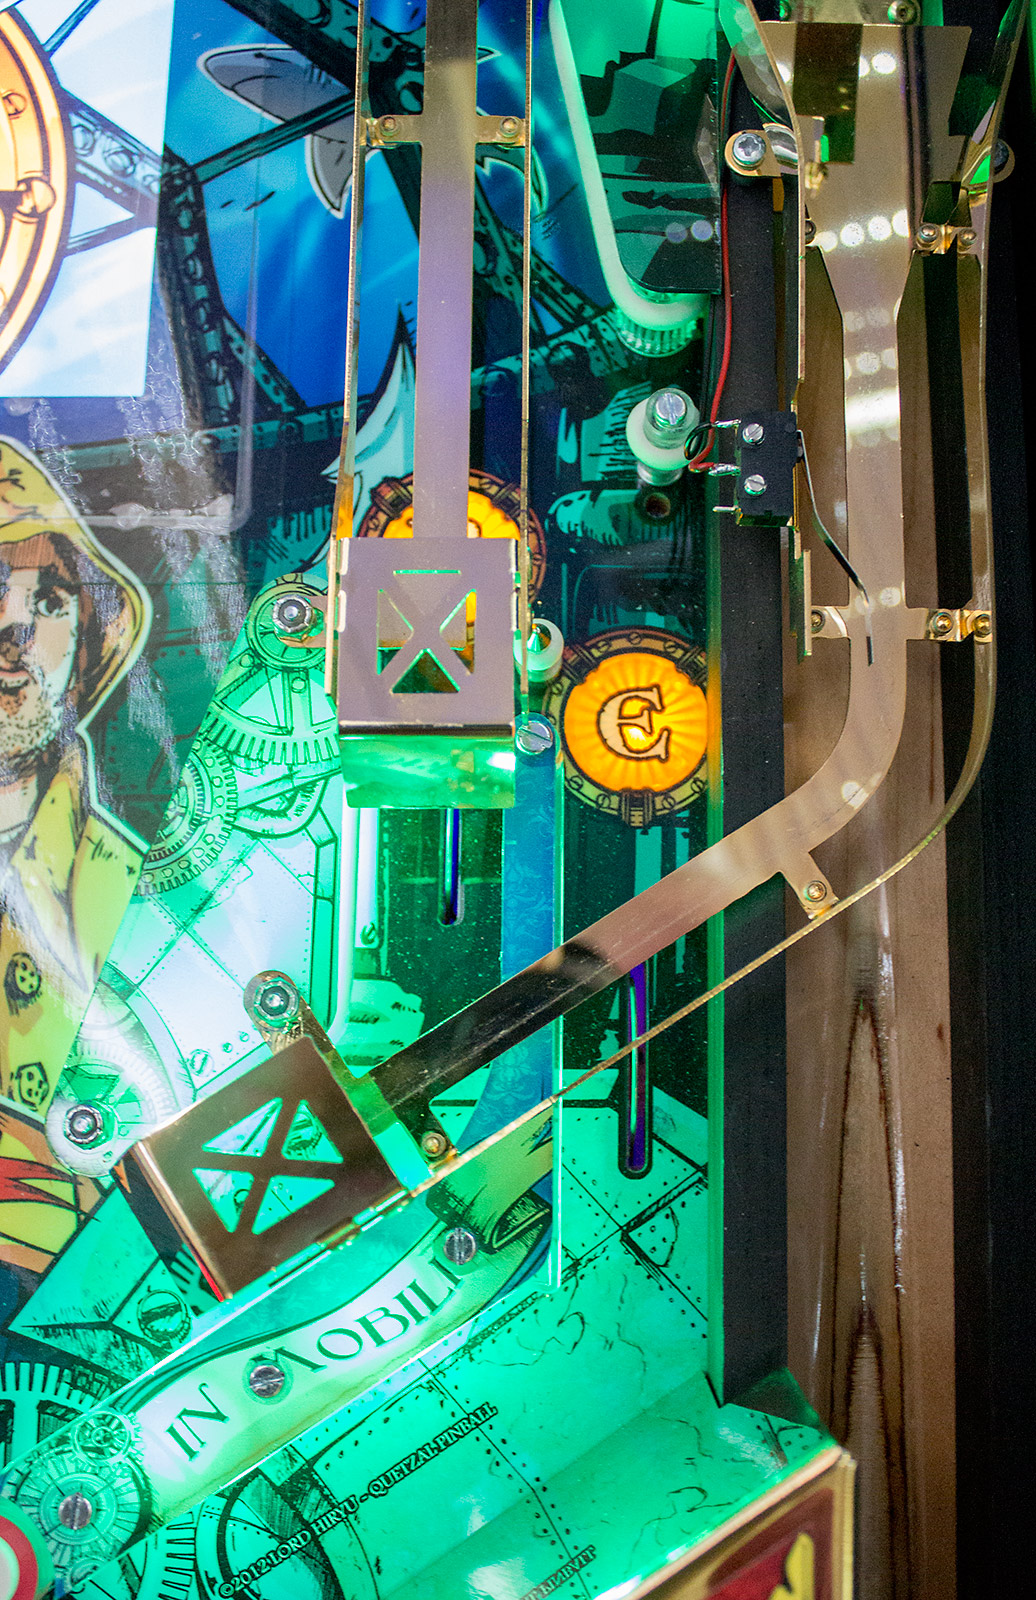
In inlane ball guides are made from clear transparent plastic, topped with a printed butyrate featuring the phrase 'Mobilis in Mobili' which is the motto of the Nautilus and roughly translate from Latin as 'Movement amidst movement' to describe the vessel's underwater adventures.
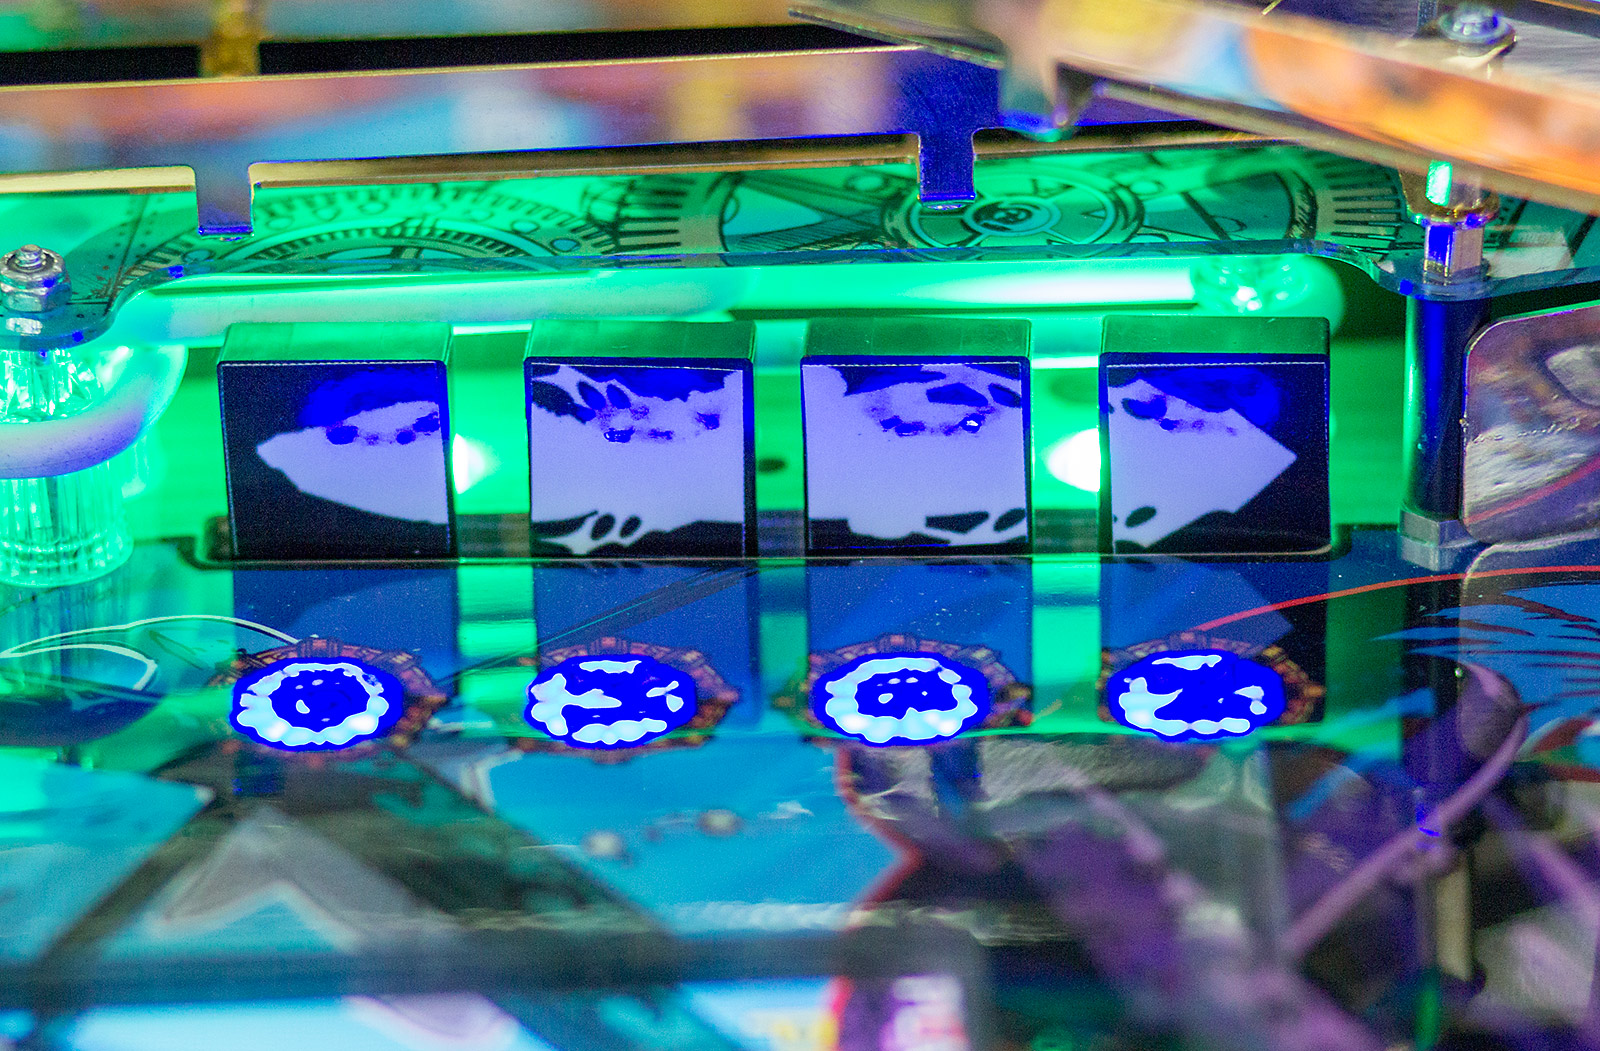
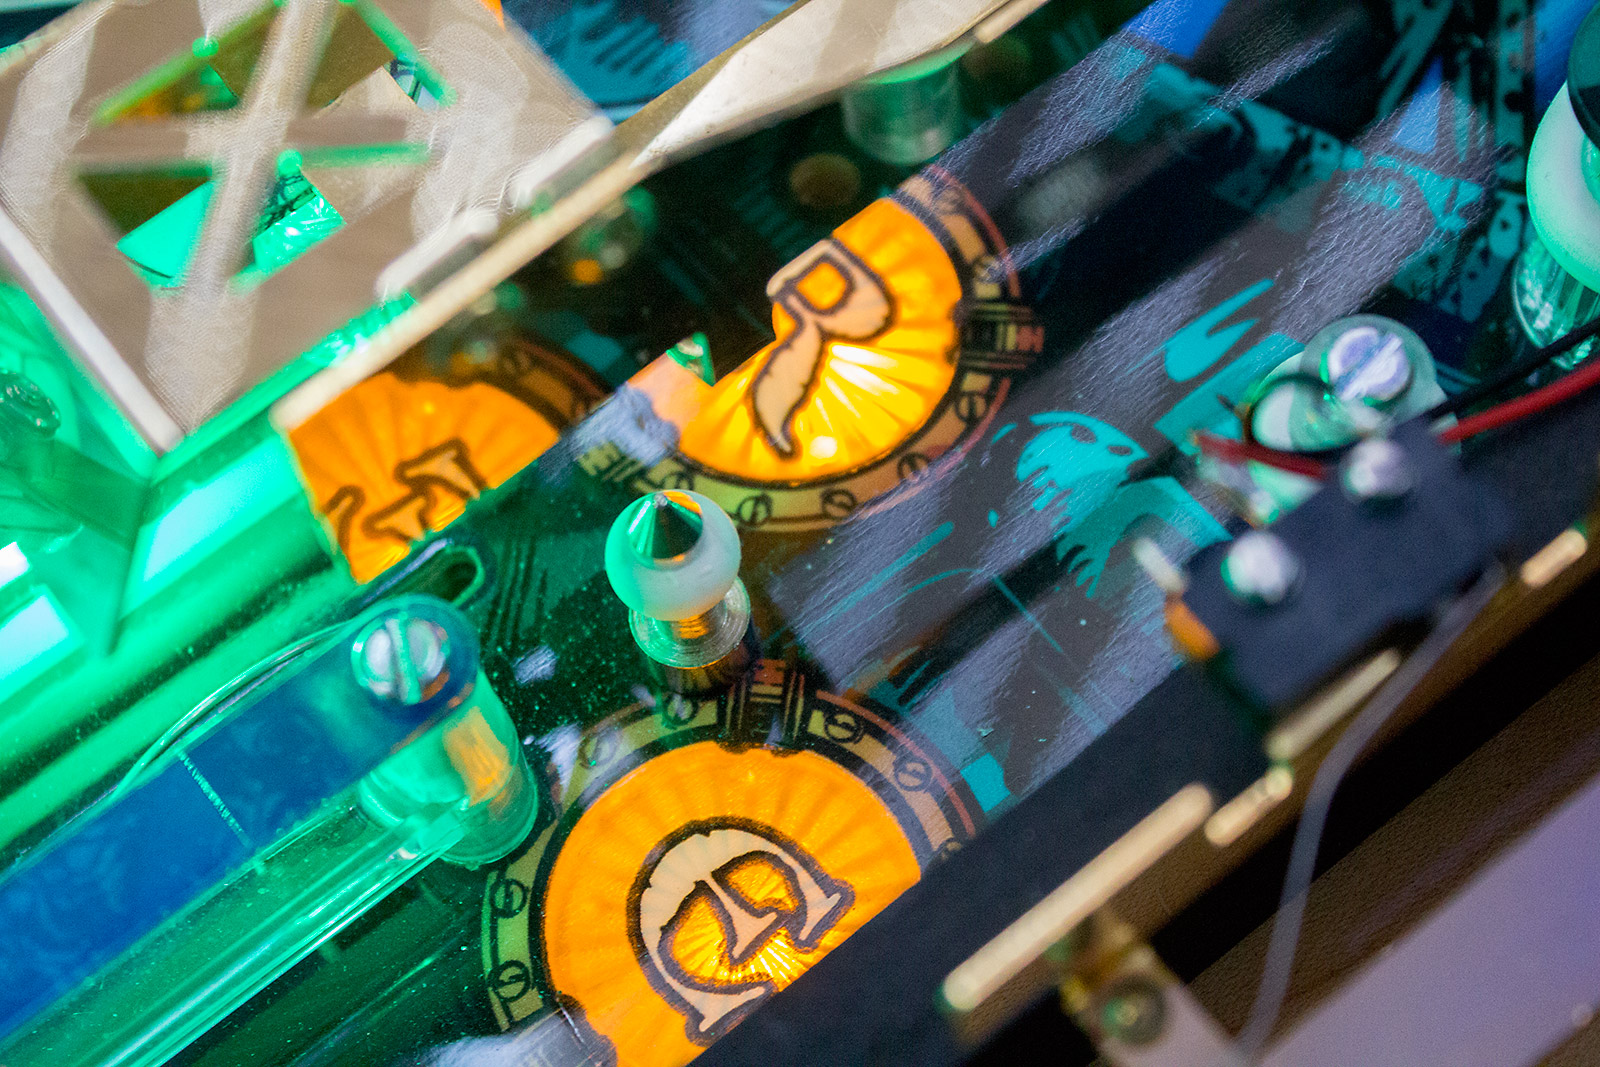
There is one inlane and one outlane on the left side. Both feature traditional mechanical rollover switches to detect the ball and contain a large round insert - 'F' for the outlane and 'I' for the inlane. These combine with two corresponding inserts on the right to spell out F-I-R-E, and they have the lane change ability to rotate the lit and unlit inserts with the flipper buttons.
The left inlane is also where the left ramp finishes. It deposits the ball just below the rollover switch, meaning you can't repeatedly shoot the ramp to light the F-I-R-E letters.
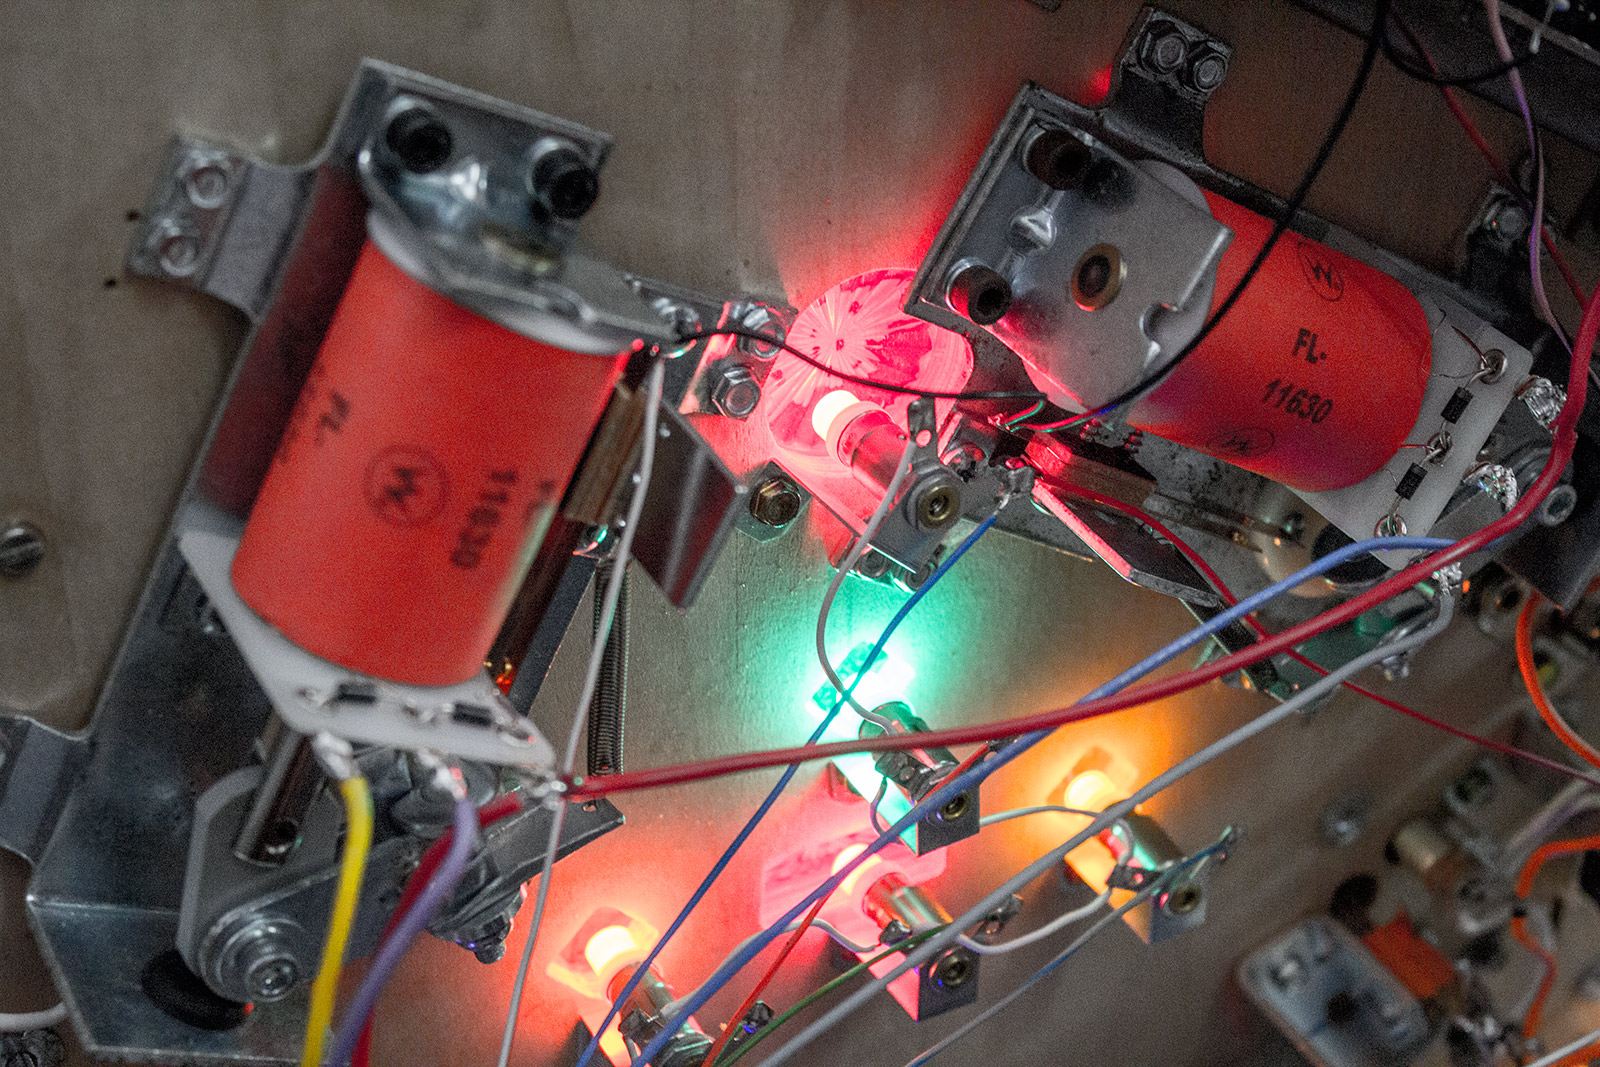
The left slingshot is a pretty basic assembly, with two leaf switches, a kicker arm and two single-colour green LEDs, surrounded by a white rubber ring stretched around three clear star posts, with the whole lot covered by a single printed slingshot plastic.
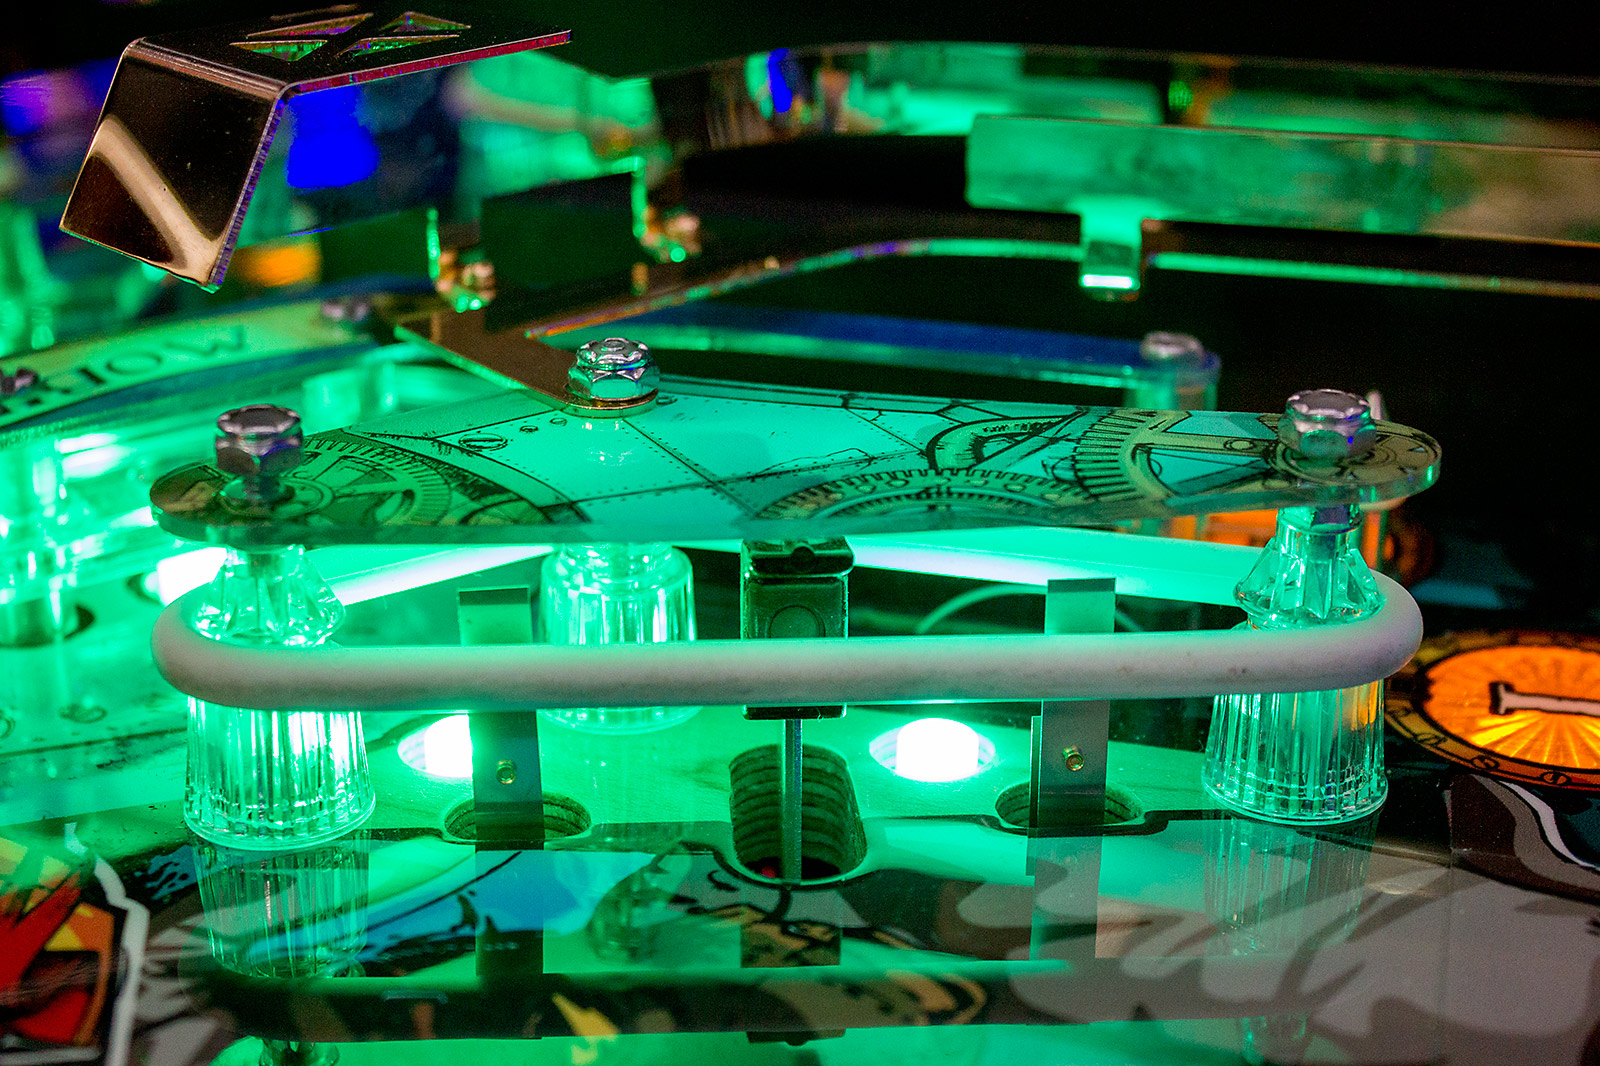
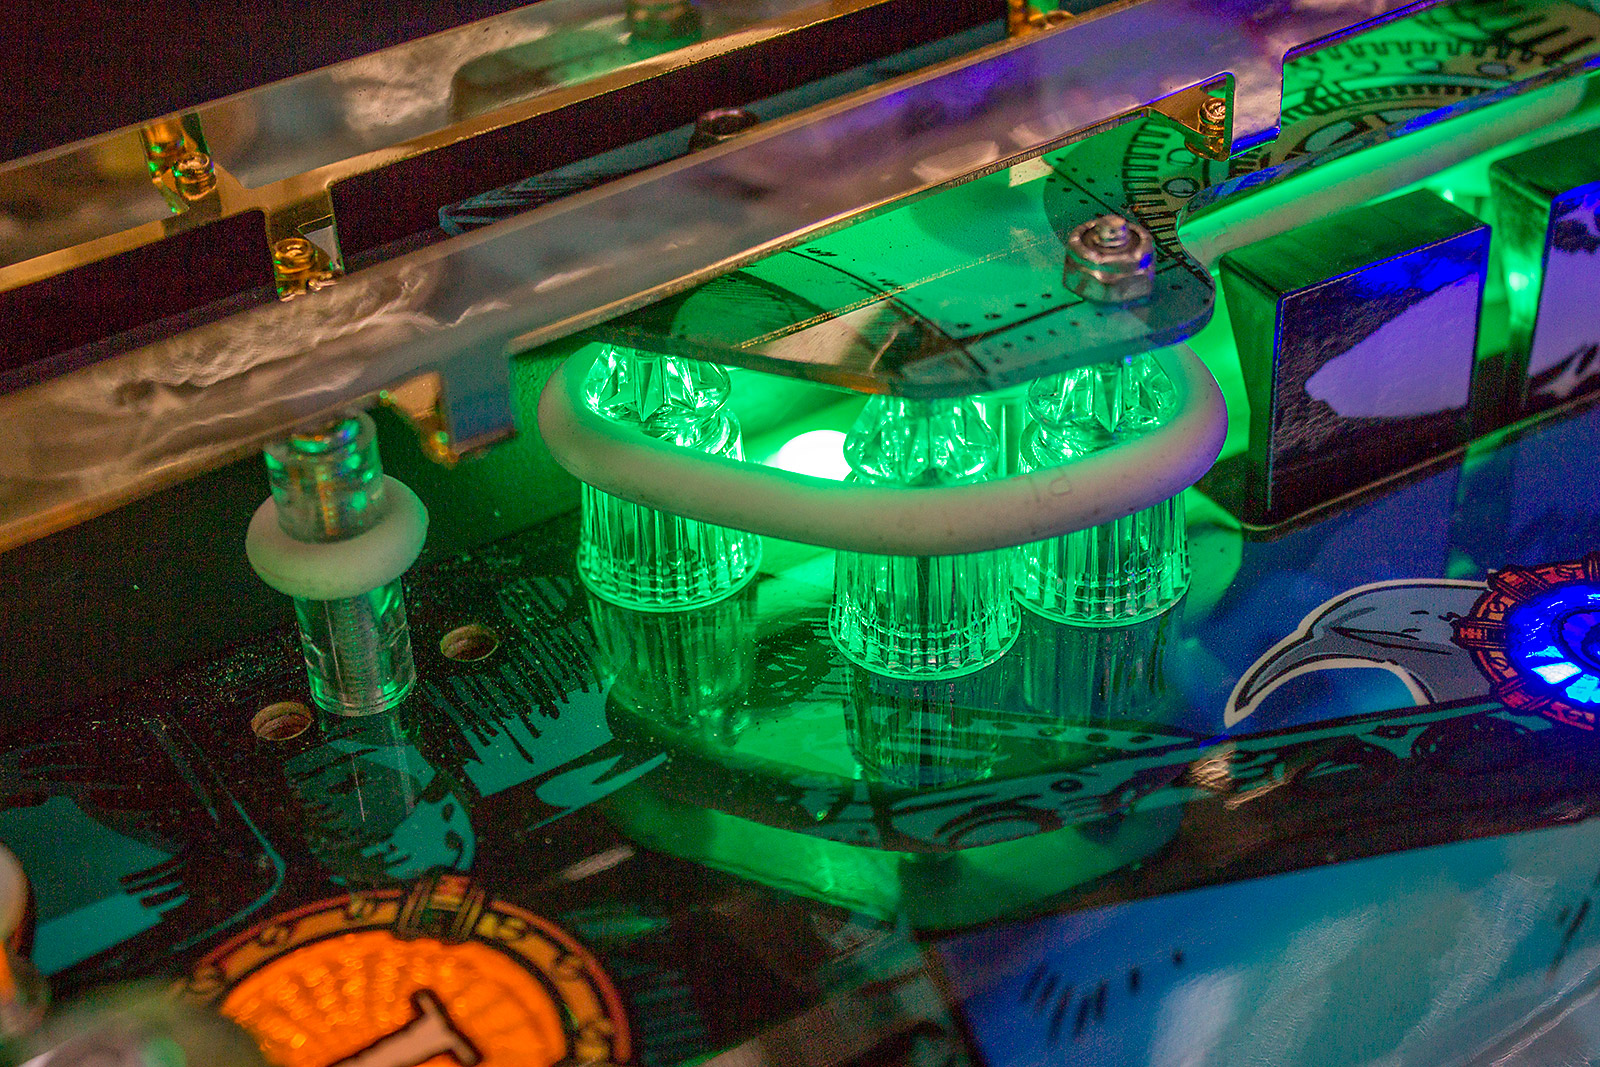
Above the left outlane is an adjustable post with three positions to vary the width of the outlane entrance and thus the game's difficulty. Above that is a cluster of clear star posts which form a rebound area designed to add some randomness to the ball's movement and make it harder to control.
The next feature on Nemo's playfield is the bank of drop targets
These four drop targets spell out N-E-M-O and sport an image of the Nautilus stretched across the four targets. Each target has a matching blue circular insert in front, and completing them resets the bank and adds a ball to the next multiball. The individual drop targets are not resettable like they are in, say, The Hobbit. So only the whole bank can be reset to the up position, which it is between balls and between players.
It is possible for the ball to get stuck on top of the drop targets - something which is only cleared when the game resets the targets as part of the ball search routine.
Up the playfield from the drop targets is the entrance to the left lane.
This lane travels up the left side of the playfield in what is often the position for an orbit lane. However, on Nemo this instead leads to a trap hole which in turn drops down to a subway tunnel.
There is a large rectangular insert which lights when the lane is shot.
When the ball makes it all the way to the top of the lane, it passes over a rollover switch and into a trap hole. This leads to a subway which send the ball to the left side of the playfield and into an upkicker.
The upkicker includes a nicely polished piece of curved metal which directs the ball onto a short metal ramp. This ramp joins the left ramp return to deposit the ball in the left inlane, as we saw earlier.
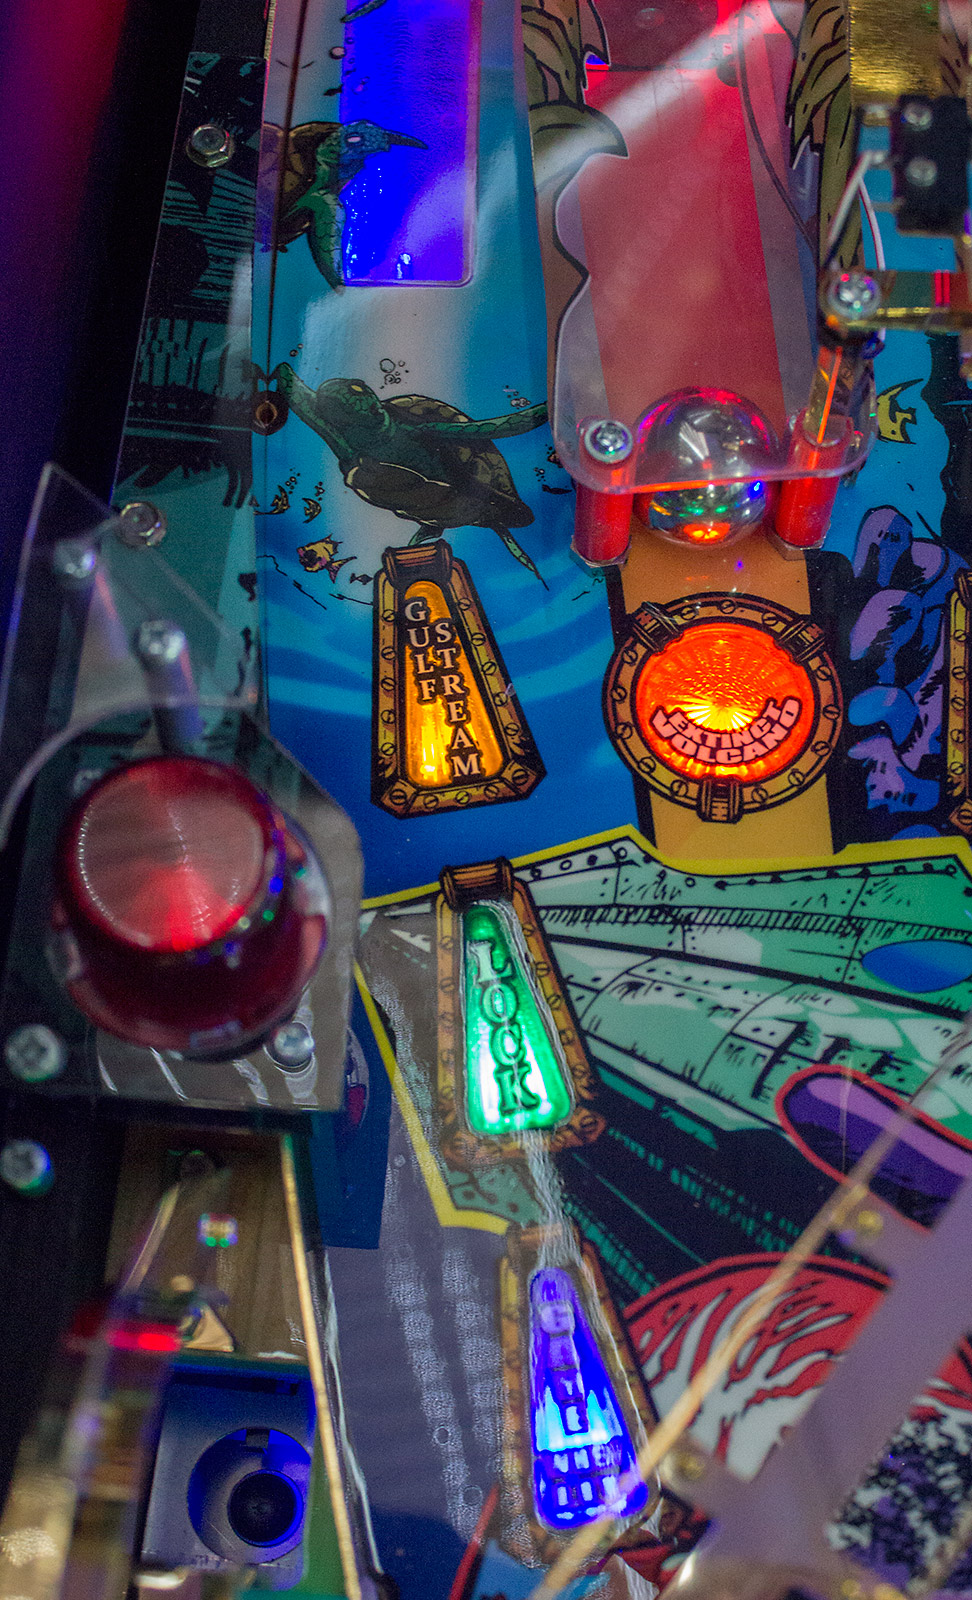
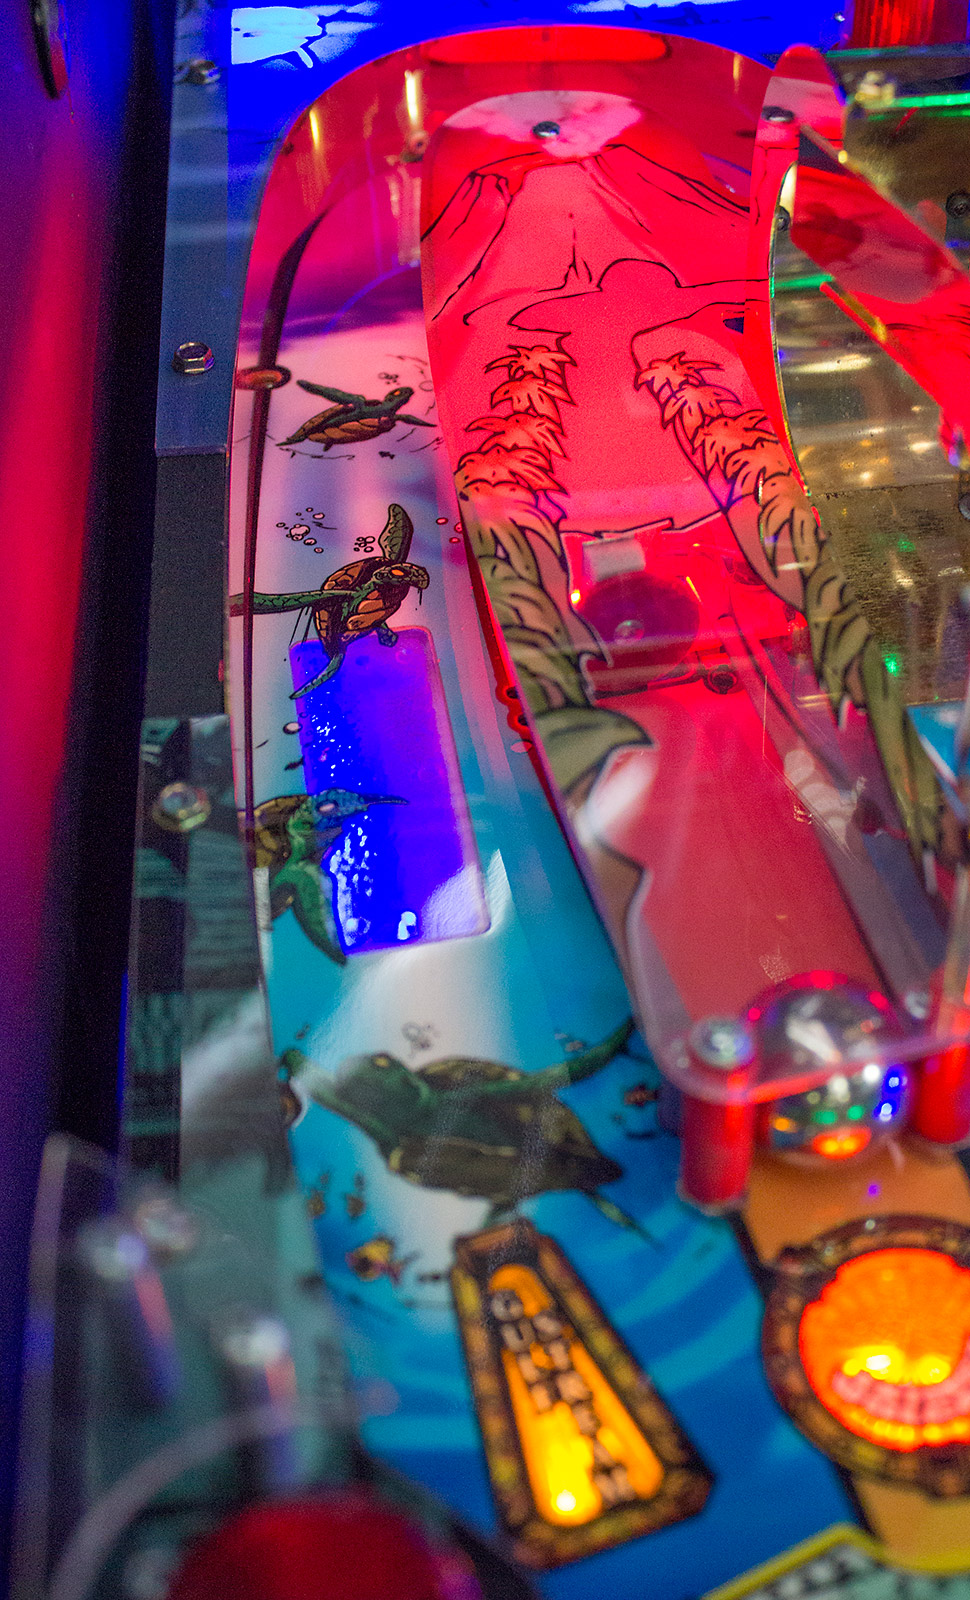
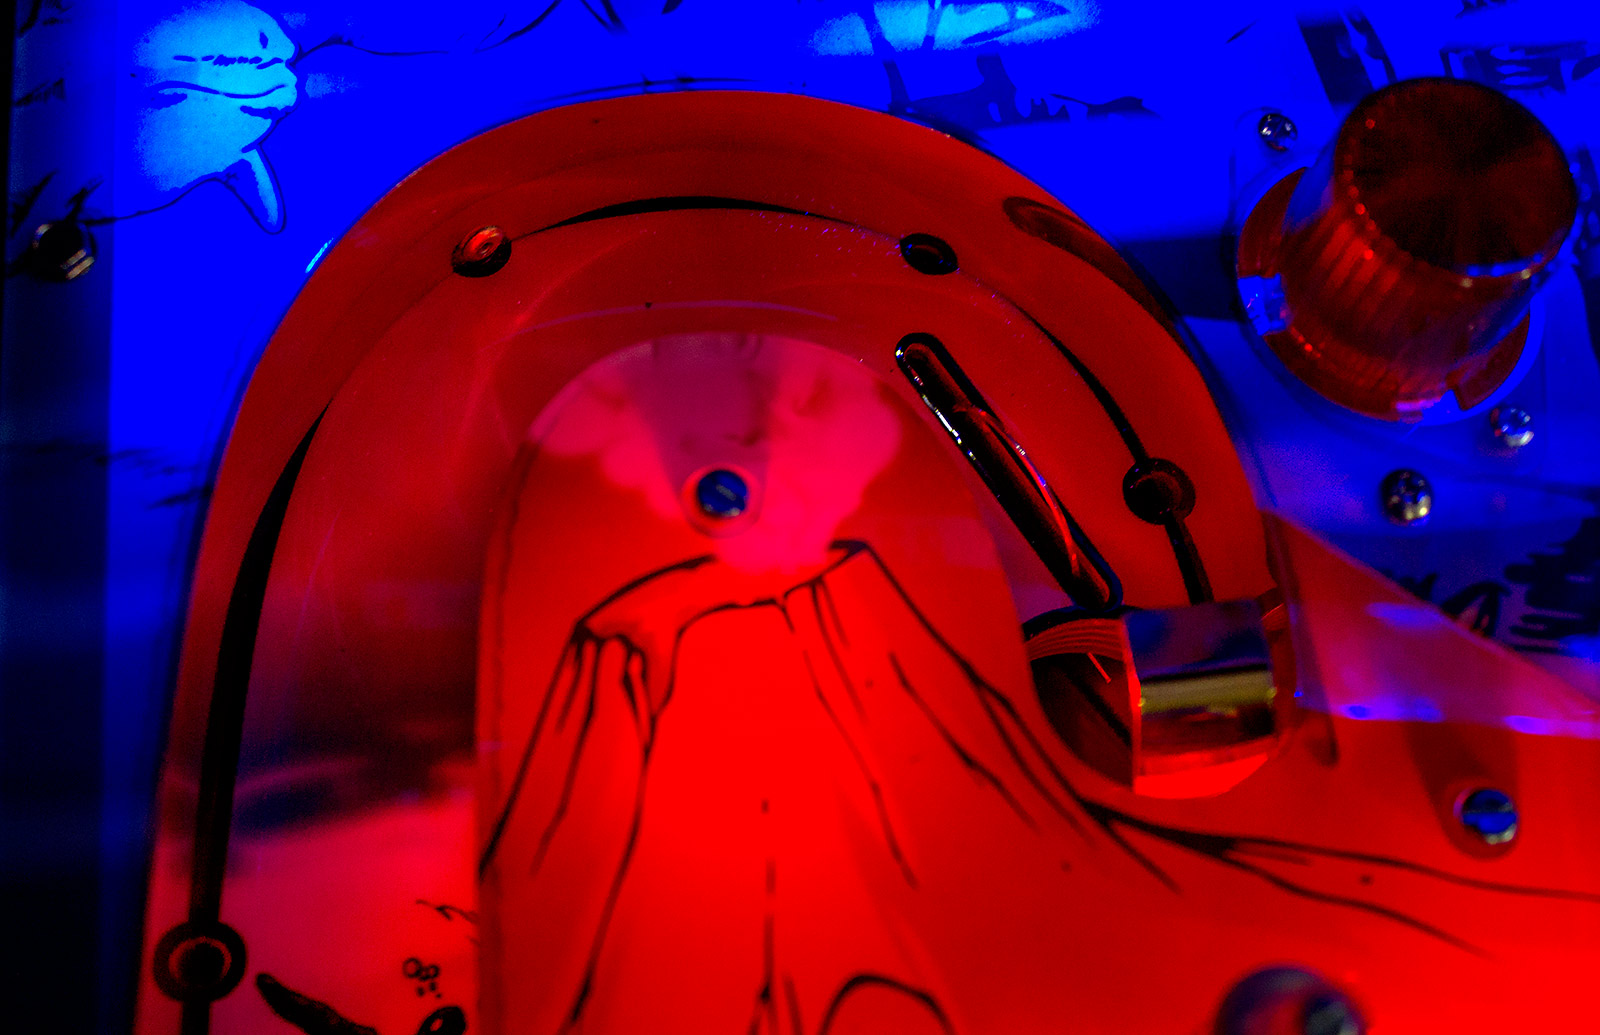
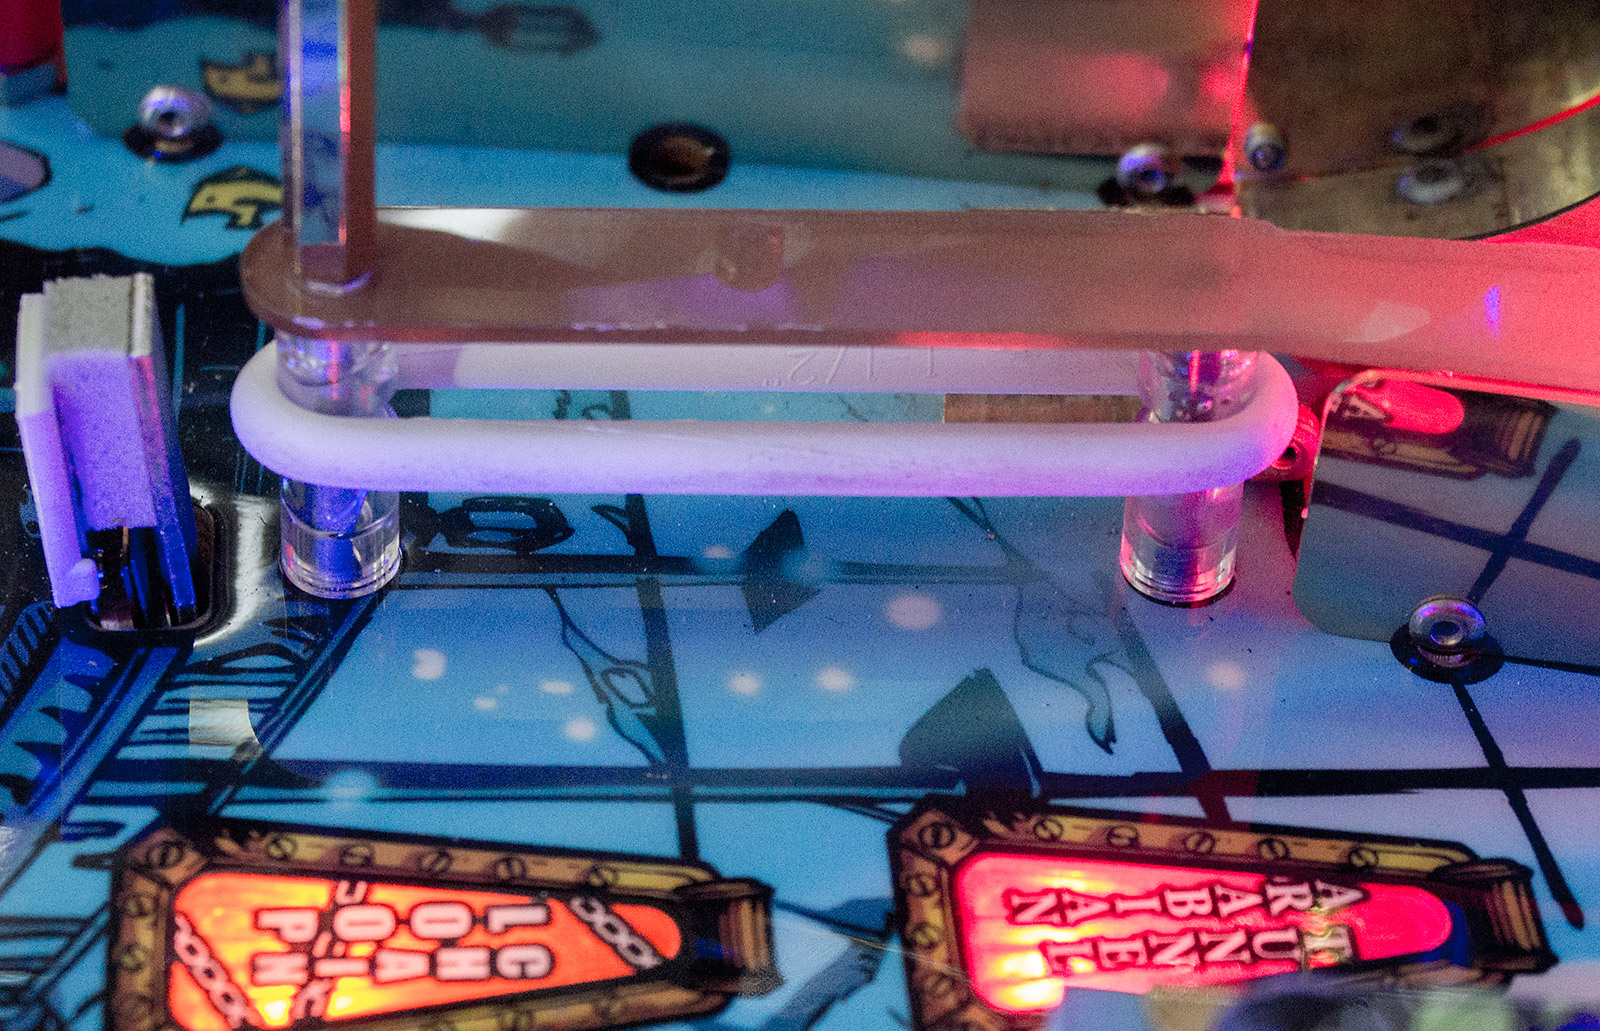
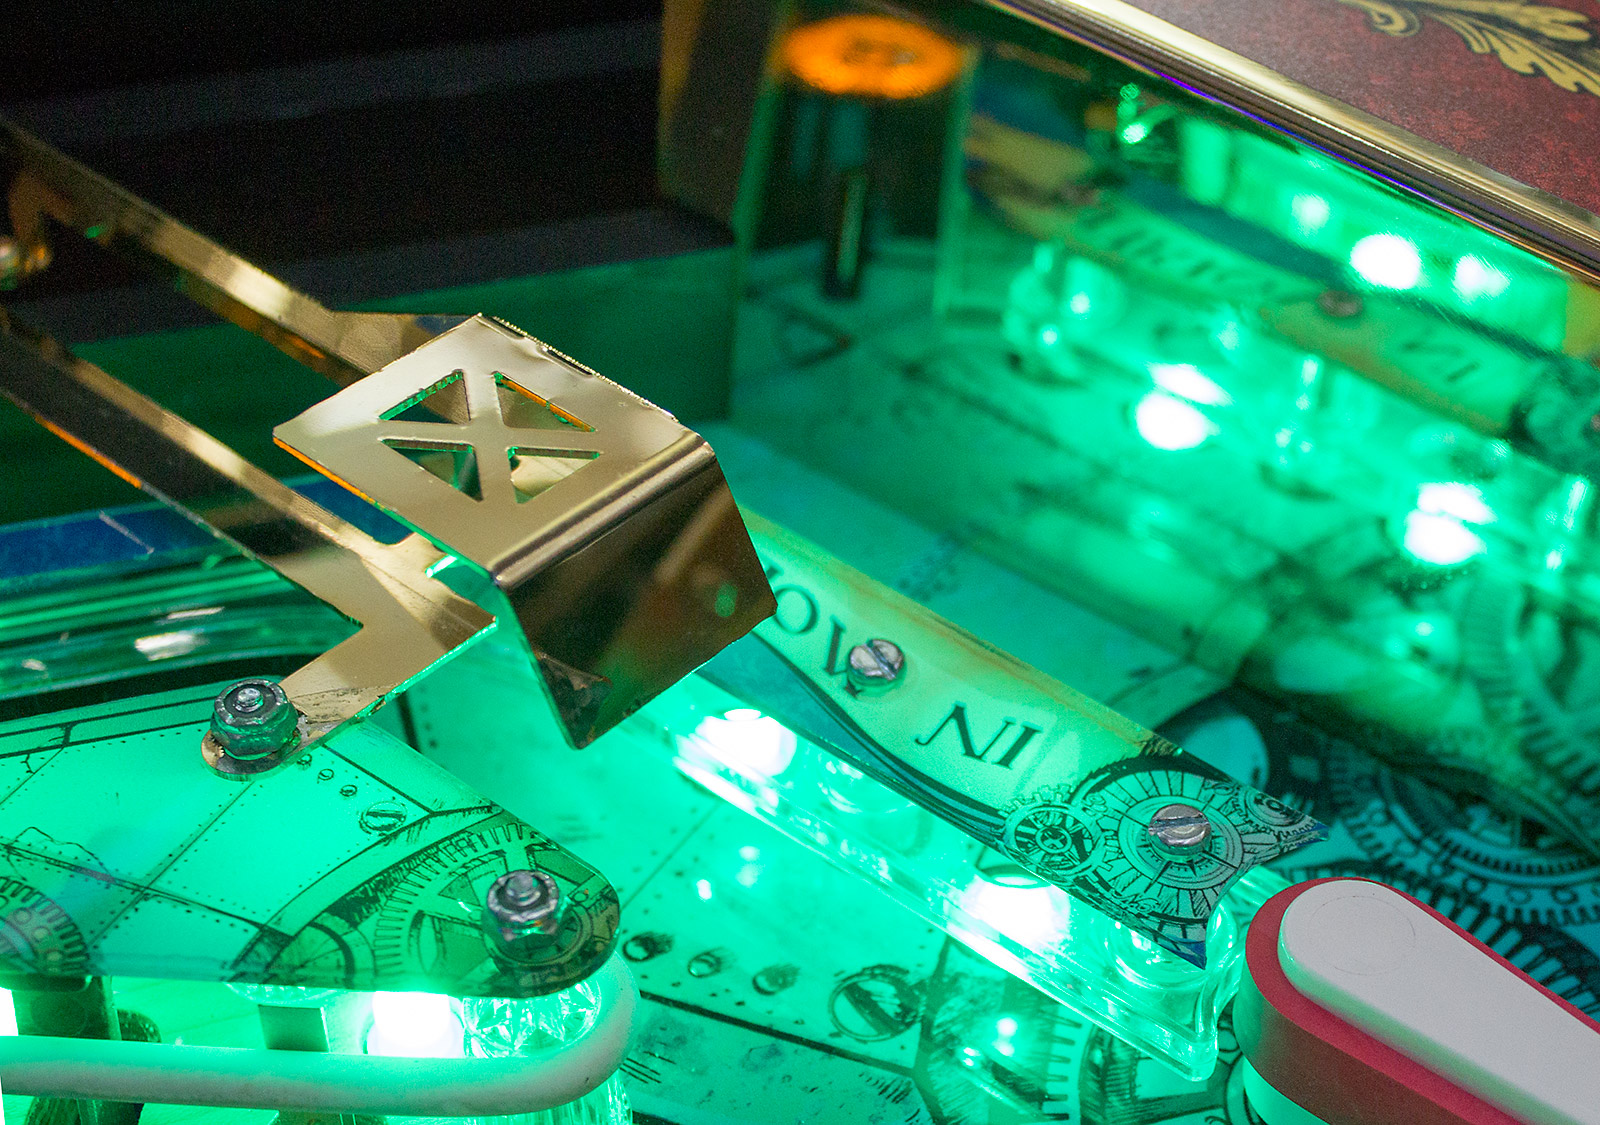
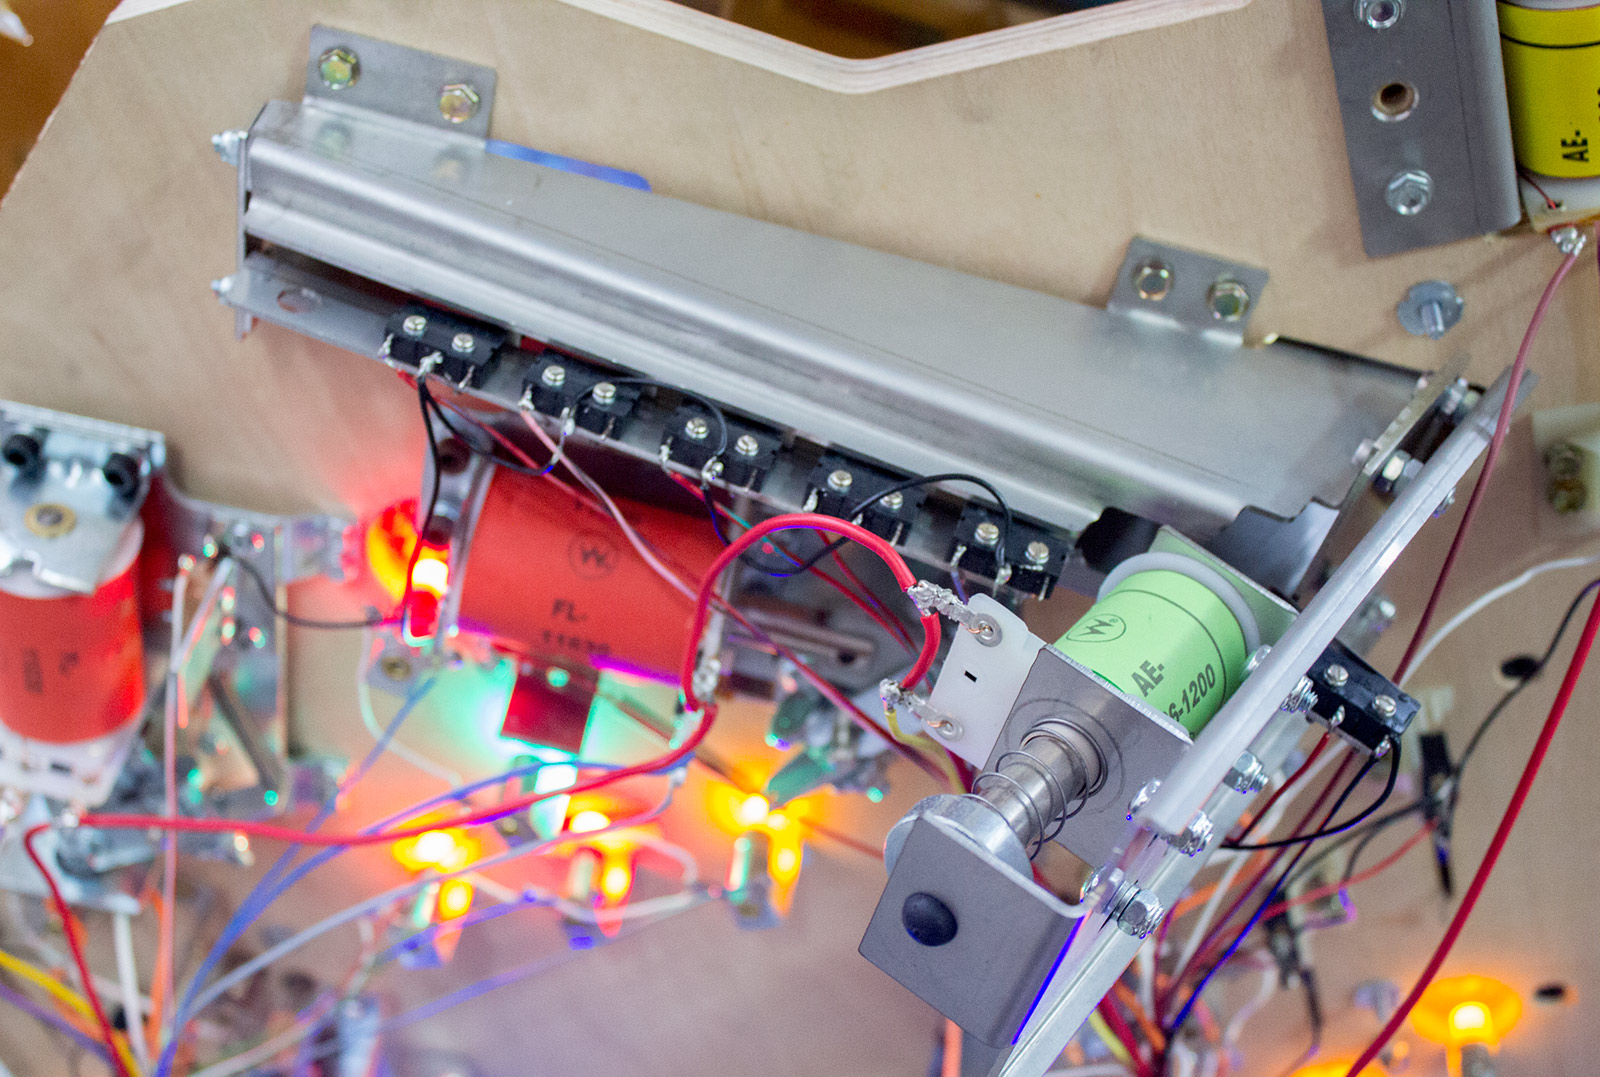
Just to the right of the left lane is the game's Extinct Volcano captive ball shot.
This is another fairly simple mechanism, with just a single ball trapped behind a couple of posts. When shot, the ball travels up a short lane and hits a red circular standup target to register the hit.
Although it looks quite a tight shot, in practice it's pretty easy to shoot the captive ball. However, if you are not playing the appropriate mode and the Extinct Volcano insert isn't lit, it does nothing; not even evoking a sound effect. Our next feature is the first of the game's two ramps - the left ramp.
The ramp is made up from a metal U-turn which leads to an extended open metal rail. All these pieces are shiny metal (gold in this particular machine) and work very effectively despite their unusual design.
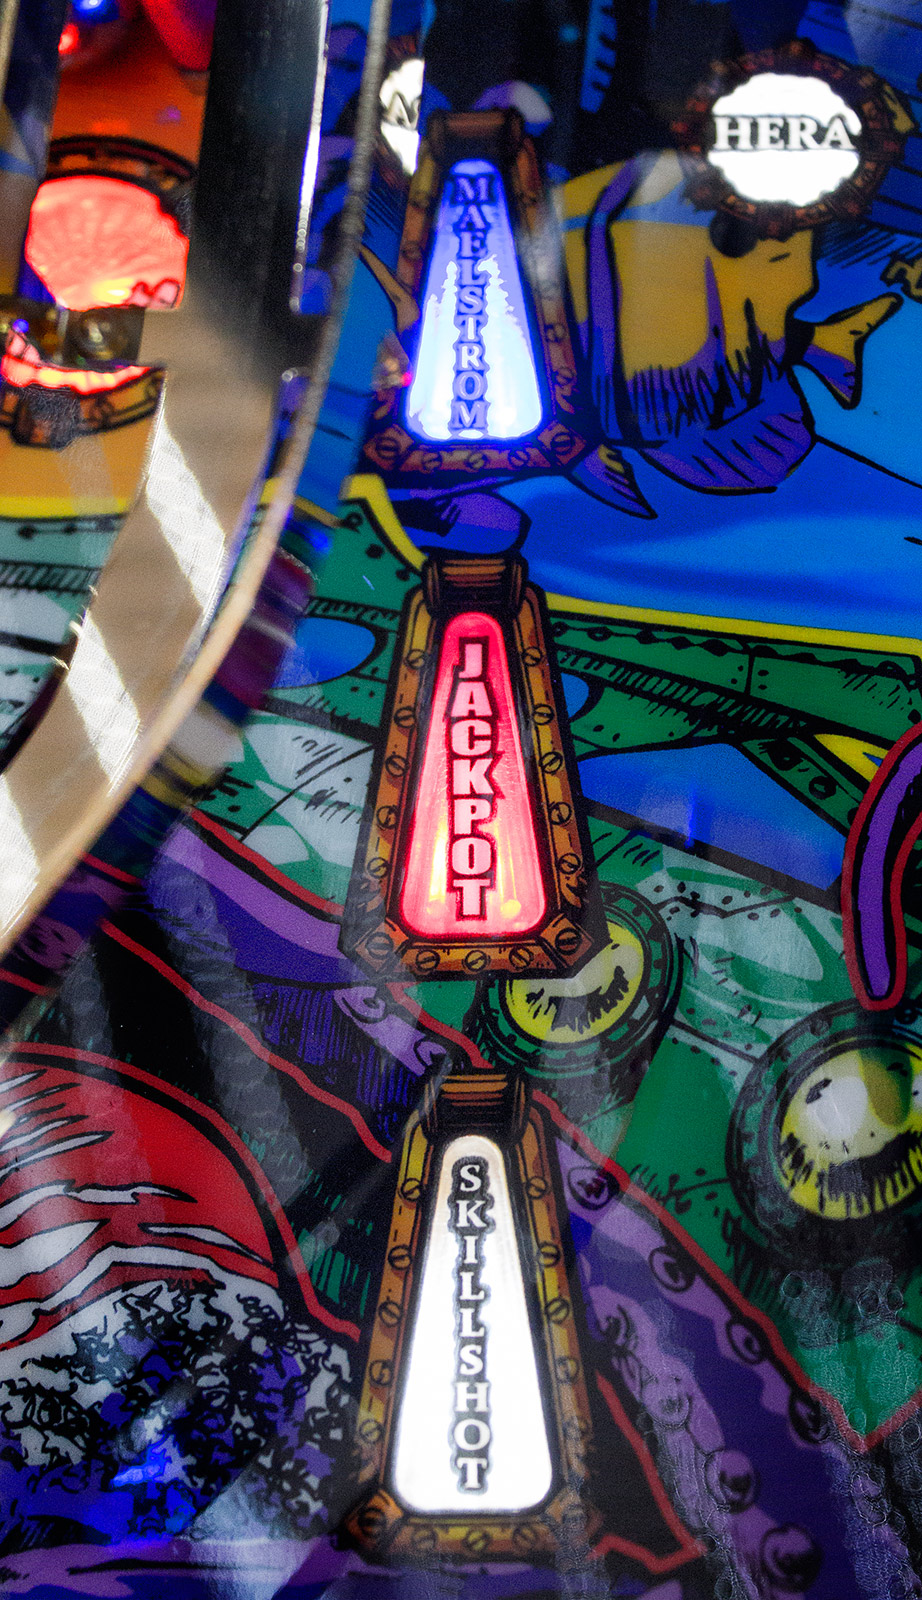
The left ramp is where the skill shot award is collected if it is made directly after the ball is launched. It is also one of the jackpot shots and is one of the two shots during Protect the Sea mode.
The left ramp's U-turn mechanism transfers the ball onto the metal ramp return which joins up with the return from the left lane's upkicker. An attractively laser-cut metal panel prevents the ball falling off the ramp as it joins.
The ramp return then sends the ball down the left side of the playfield, dropping it into the left inlane. It does this after the inlane switch, so there is no sound or lighting effect as the ball returns to the flipper.
While one of the captive ball posts site on the left side of the ramp entrance, on the right side we find the first of two white rectangular standup targets.
The Hera target is paired up with the Cles target on the right side to light lock for multiball at the left lane and the right saucer when both are shot. Our next shot is the centre lane which is a fairly wide shot and easier to make than, say, the equivalent lane on Iron Man.
The centre lane features a white rubber band on the left side of the entrance which makes the shot a little more demanding by rebounding any wayward shots while also providing some lateral movement for balls exiting the pop bumpers on that side.
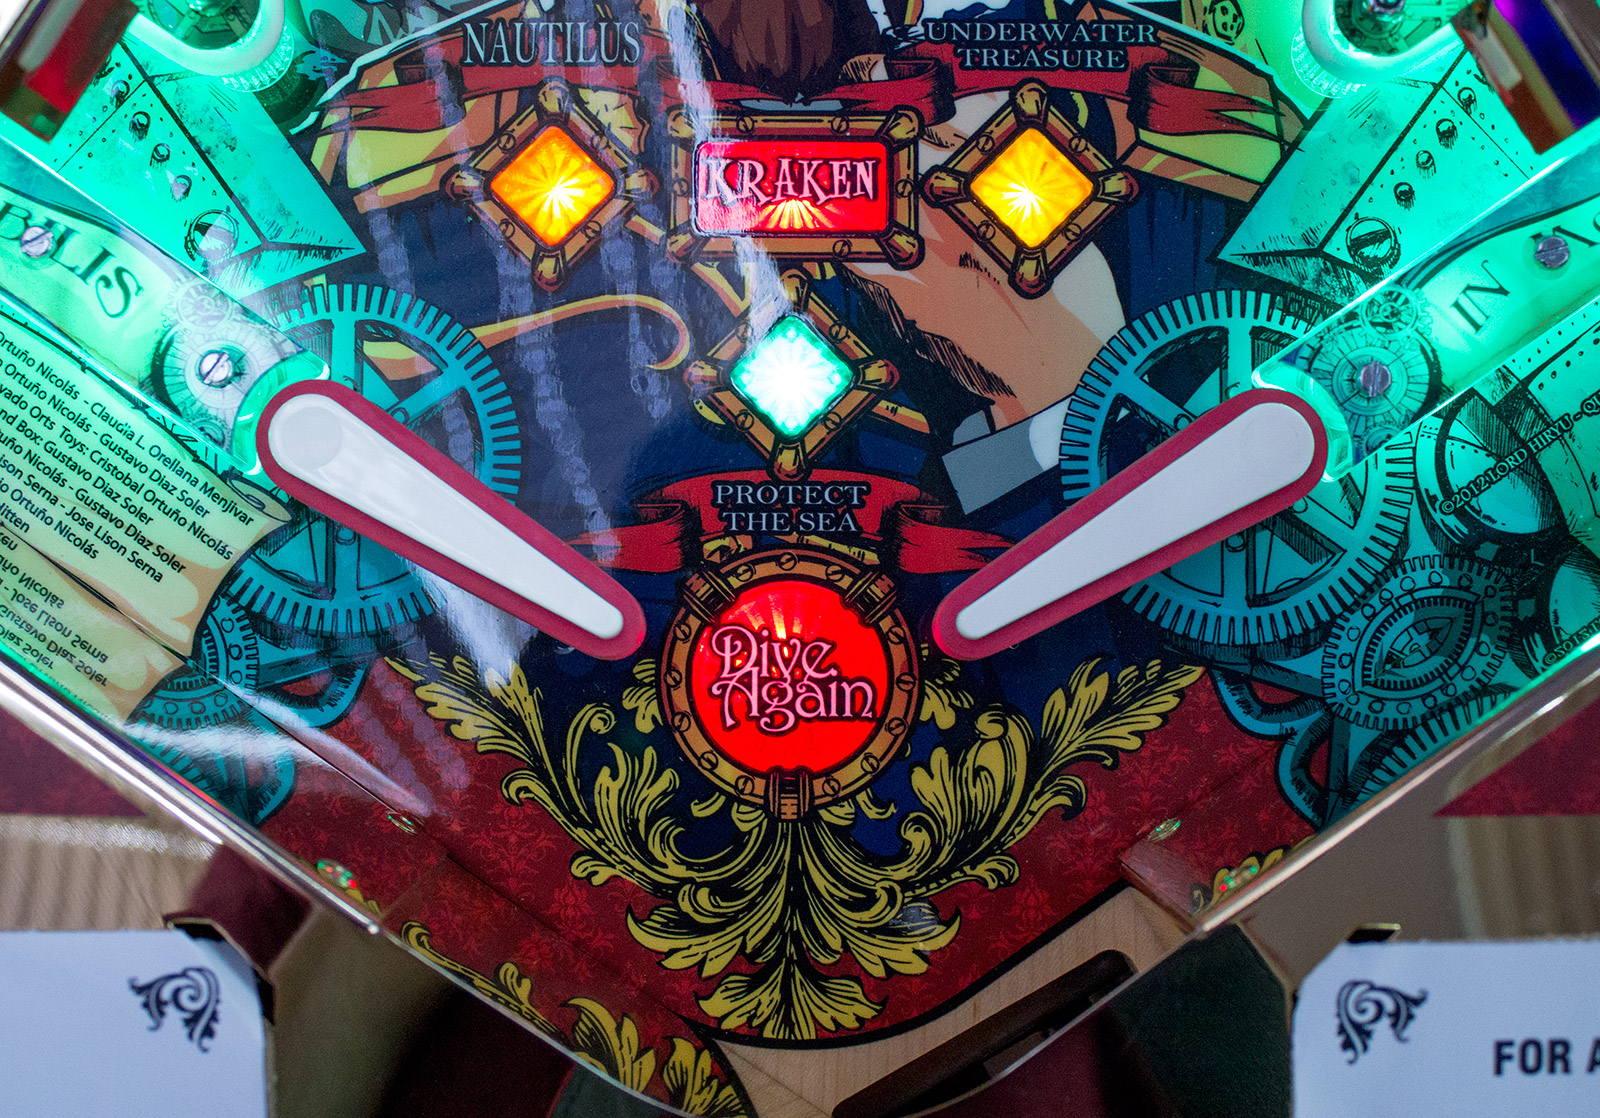
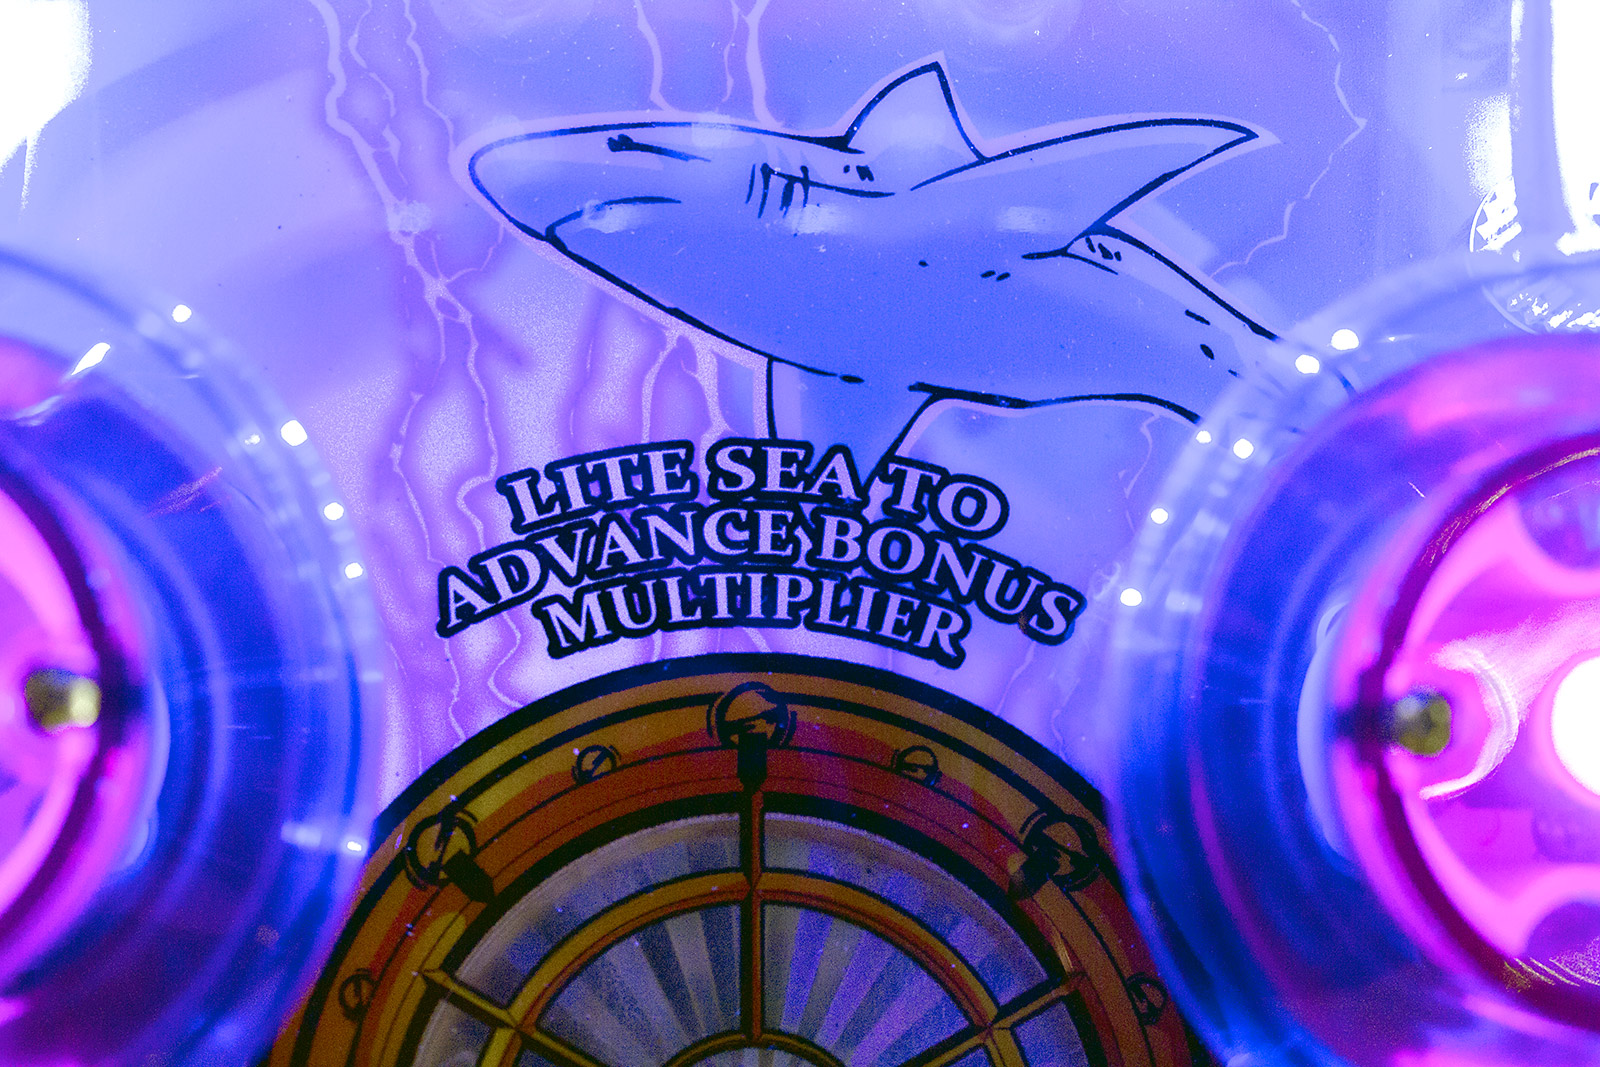
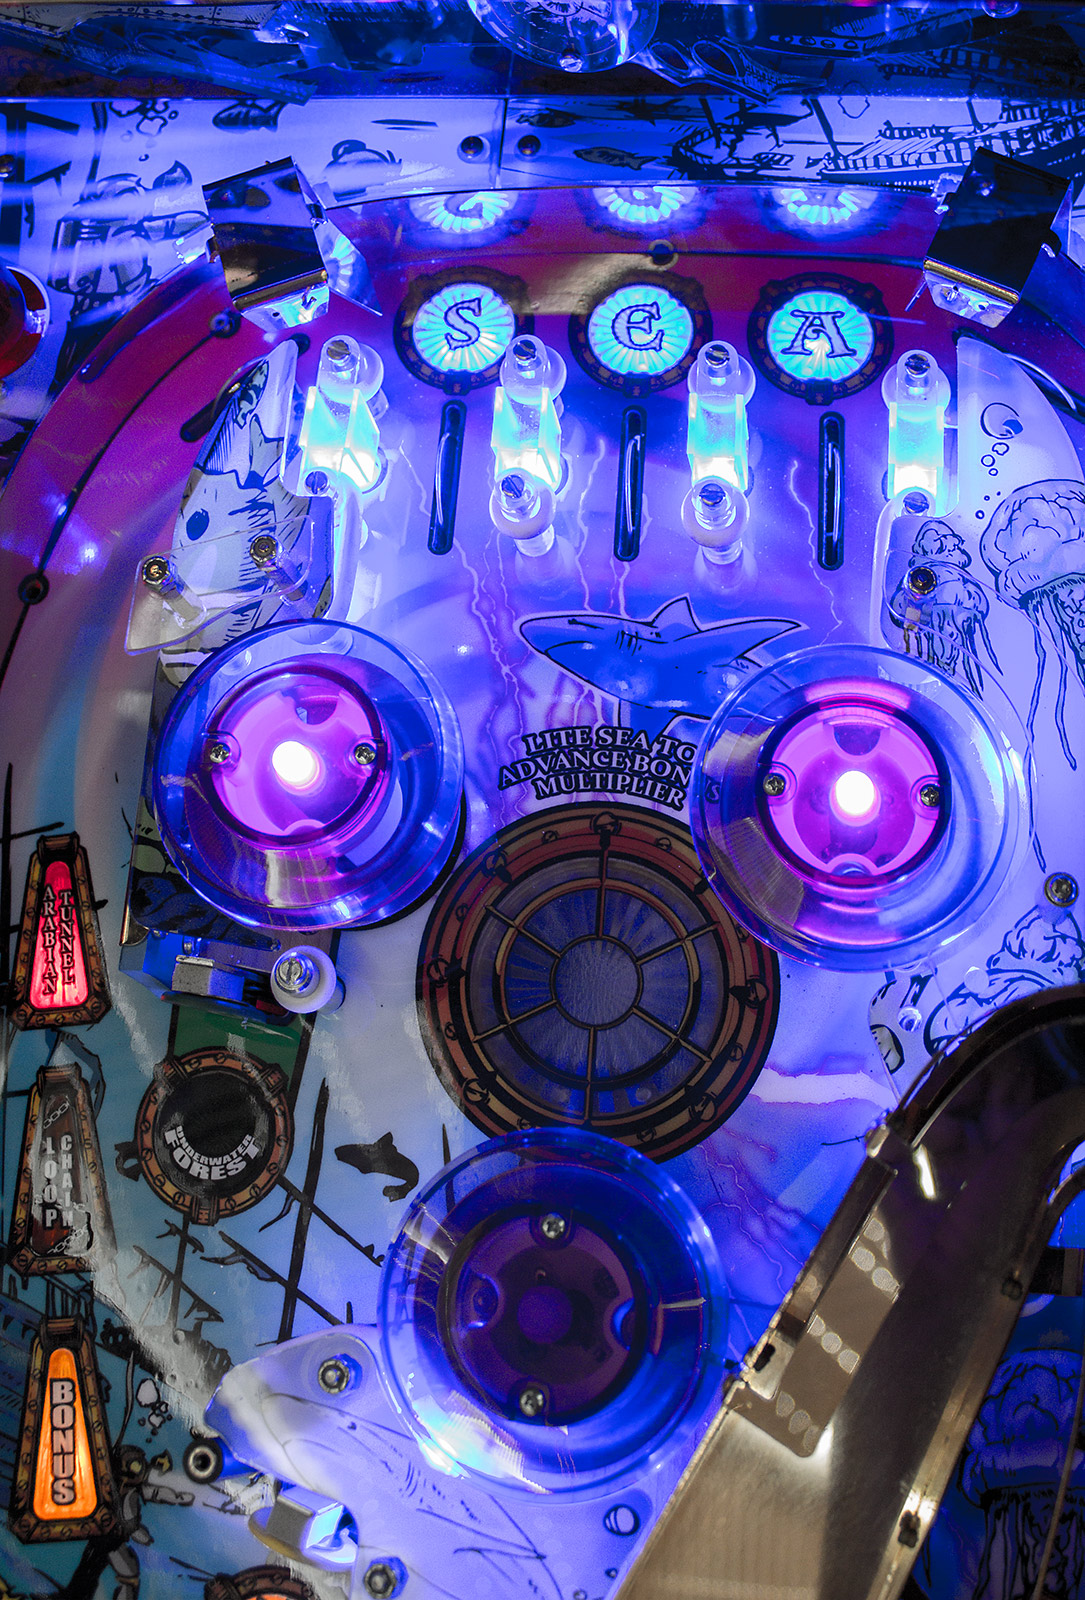
The centre lane leads up to the top of the playfield and to the three S-E-A rollover lanes which are bathed in a pool of blue light.
There are one-way gates on either side of the S-E-A rollover lanes, which means any ball shot up here is guaranteed to enter the lanes. They feature the usual lane change ability, while lighting all three S-E-A inserts extinguishes them all and increases the end-of-ball bonus multiplier.
The top rollover lanes lead to the pop bumper area, which contains the familiar arrangement of three pop bumpers and a central flasher insert.
Although the pop bumpers provide reasonable ball movement action, they rarely send the ball back into the S-E-A lanes. There are two exits from the pop bumpers - to the left into the centre lane, or to the right into the right lane - with the rubber ring in the centre lane helping to prevent the ball heading straight down the middle from that exit. There is a potential ball trap on the lower bumper.
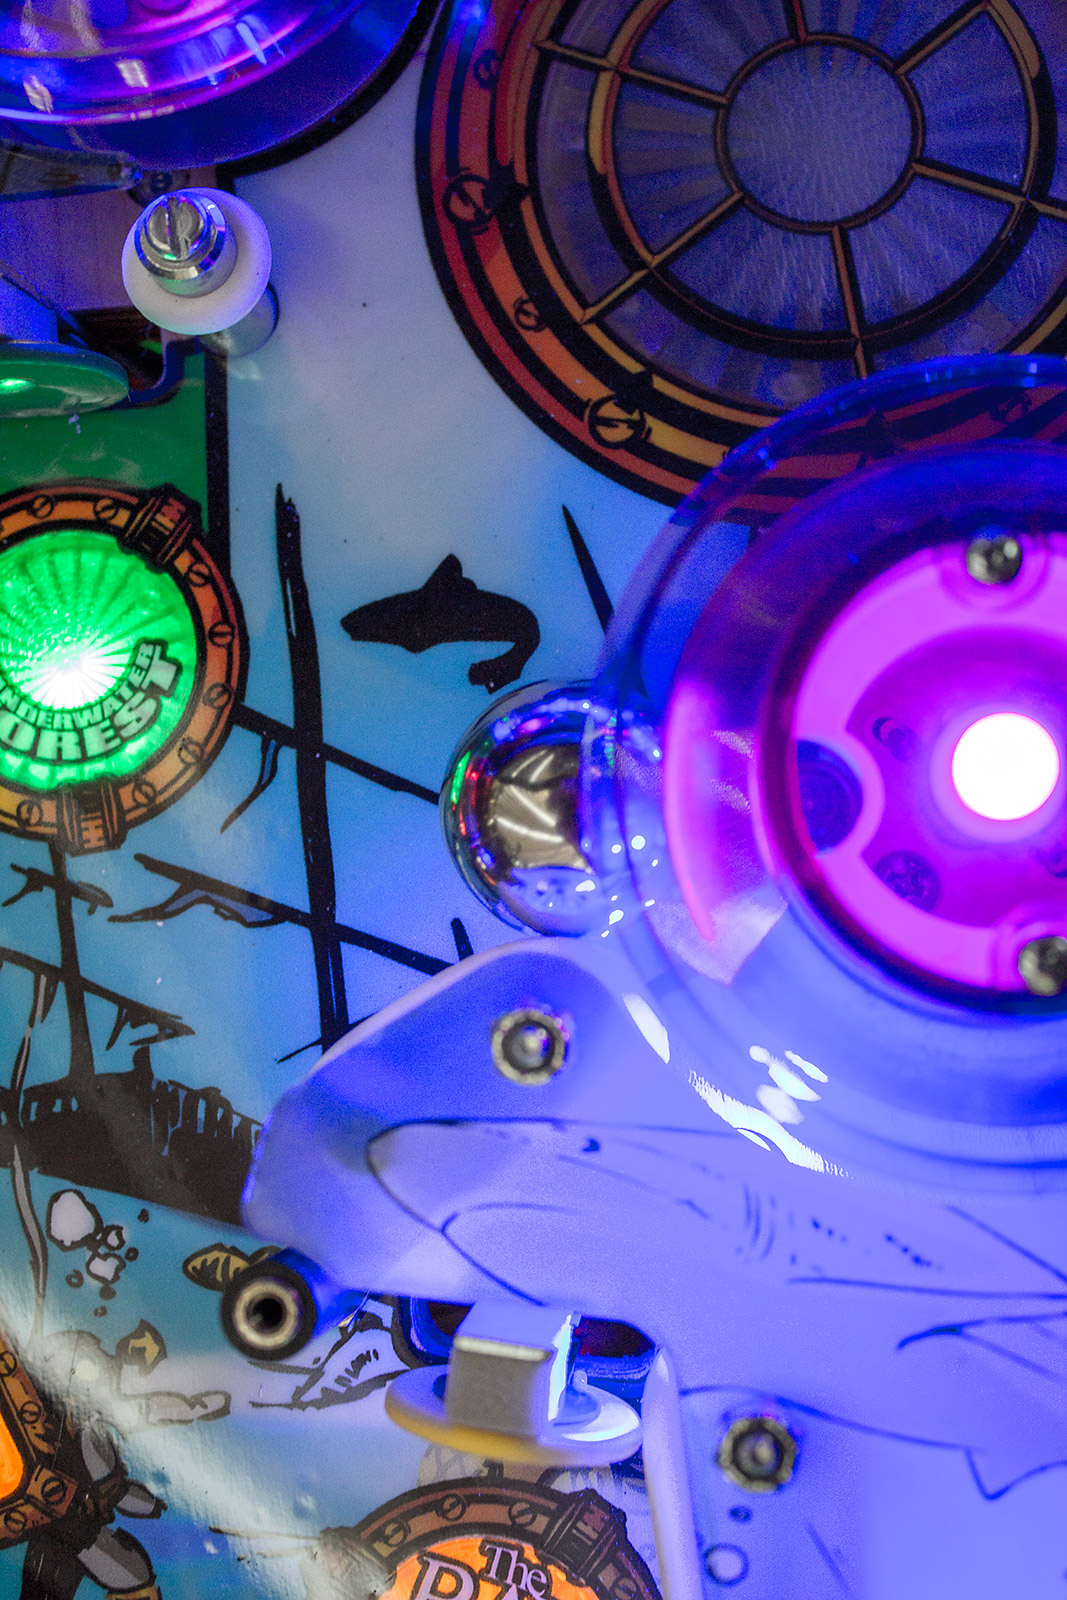
This seemed to happen quite often on our review machine and required a ball search to free it, since it wasn't easily cleared with a gentle tap of the cabinet side. Above the left exit from the pop bumpers is a green circular standup target representing the Underwater Forest.
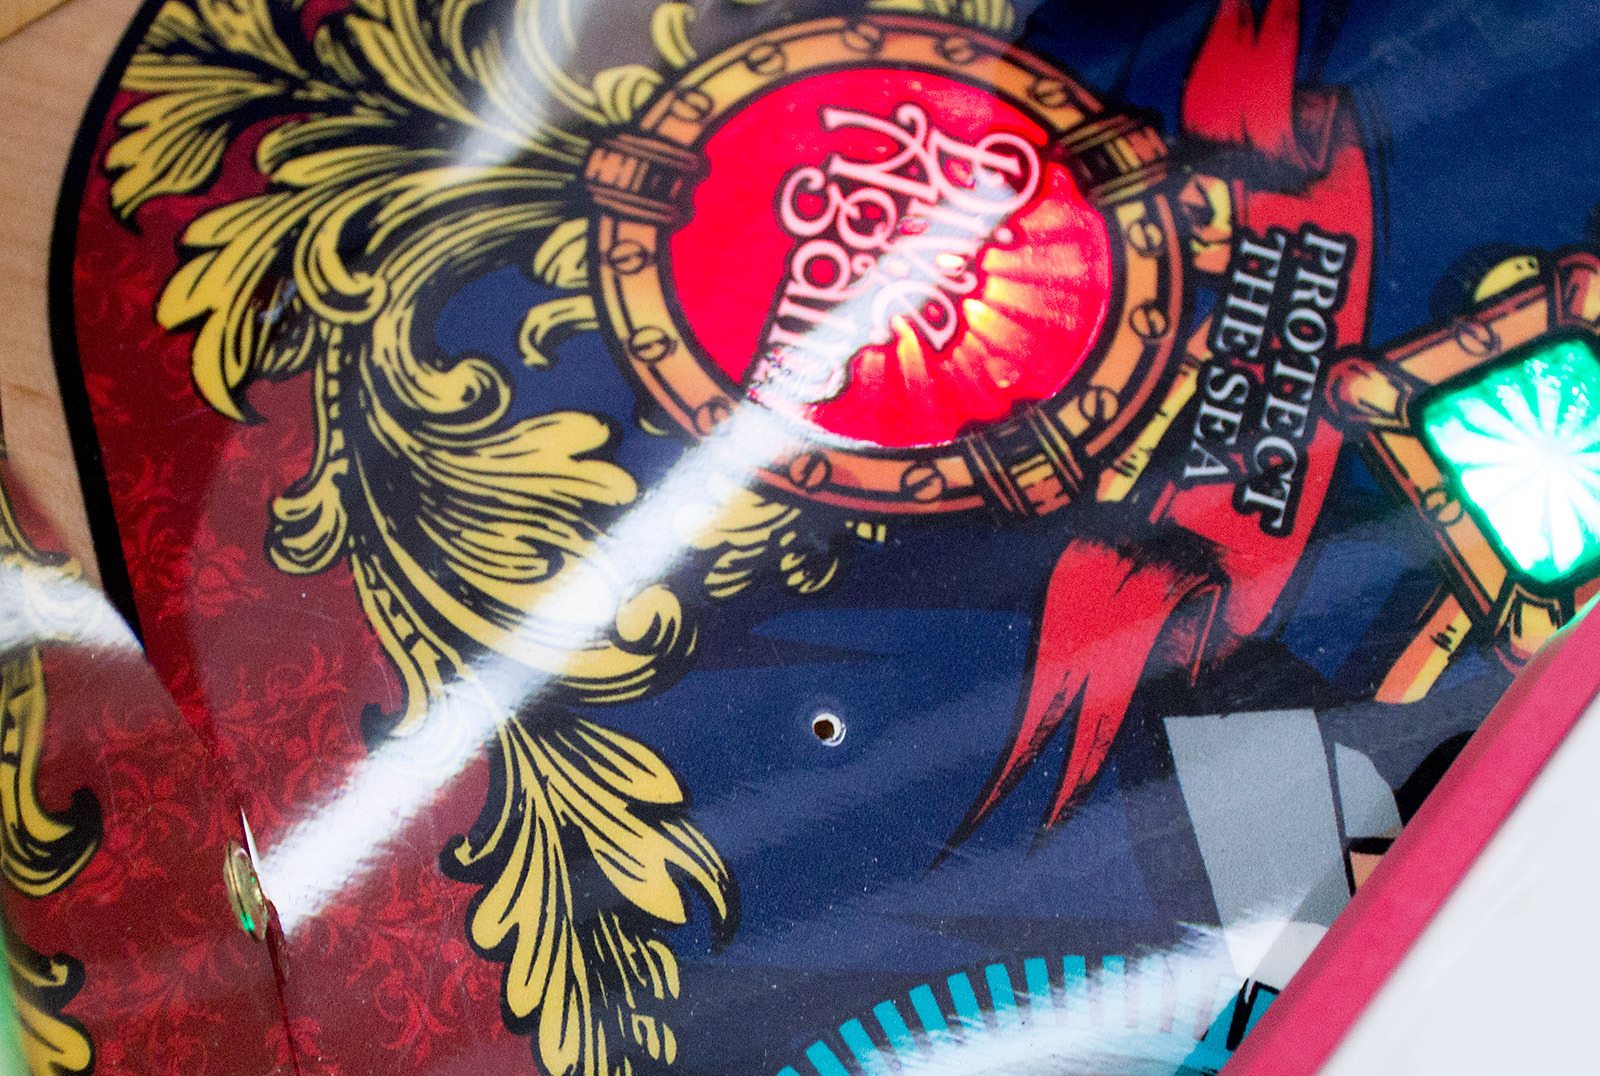
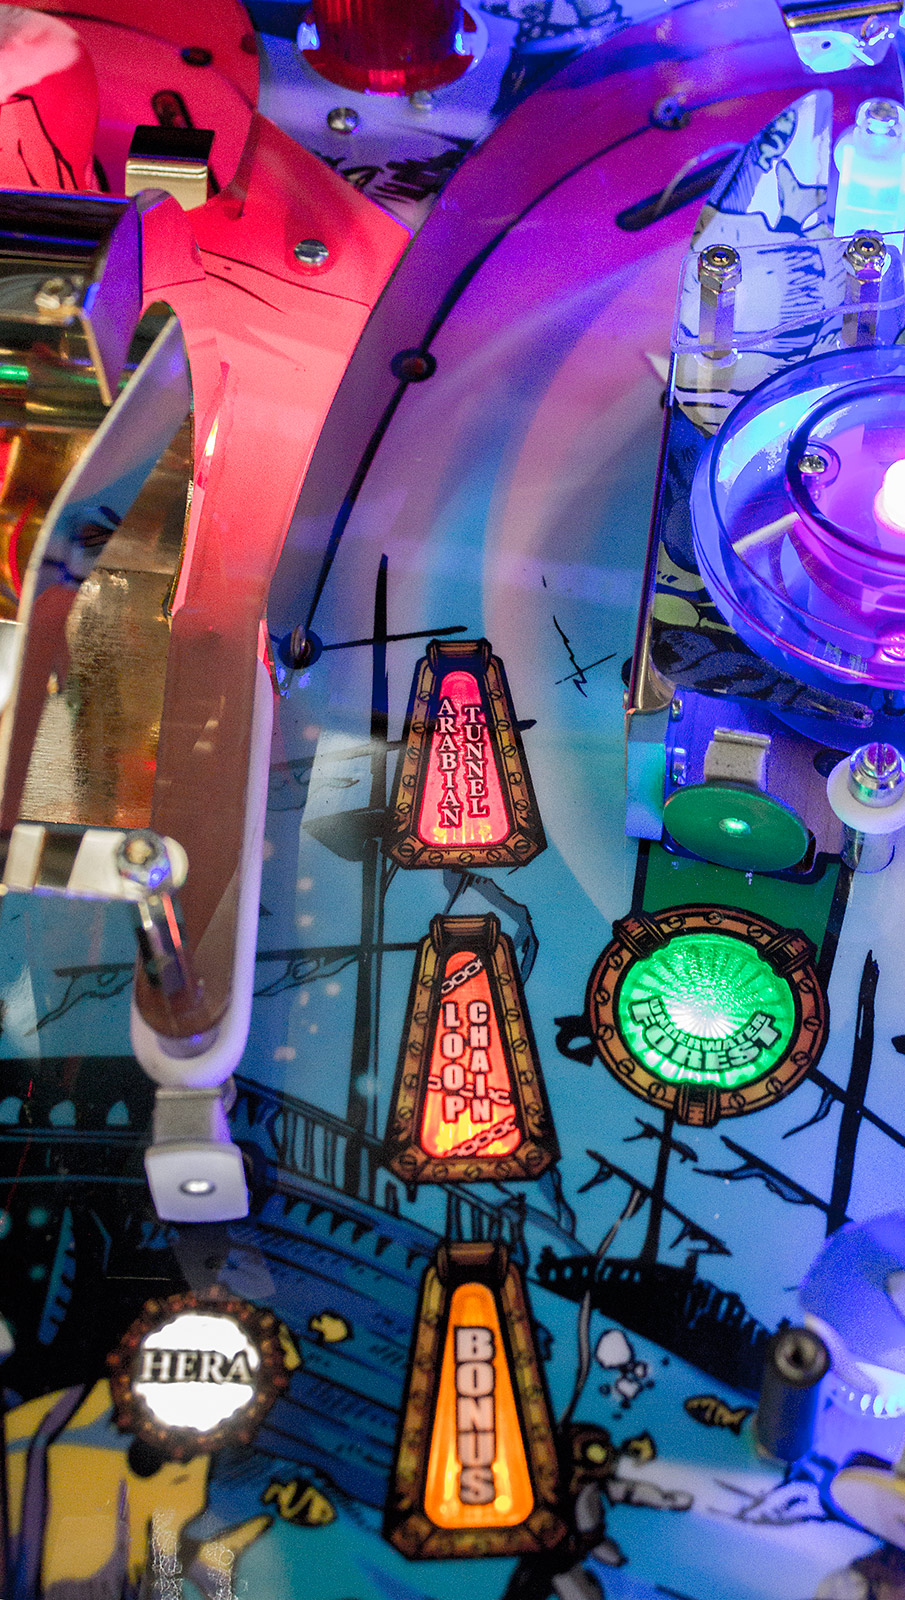
This is used to advance the Underwater Treasures mode and can be surprisingly difficult to hit when needed. The blue rubber pad on the left and white rubber ring on the right mean it has to be an accurate shot to register. A slightly easier target is the Bay of Vigo standup below and to the right which features in the same mode.
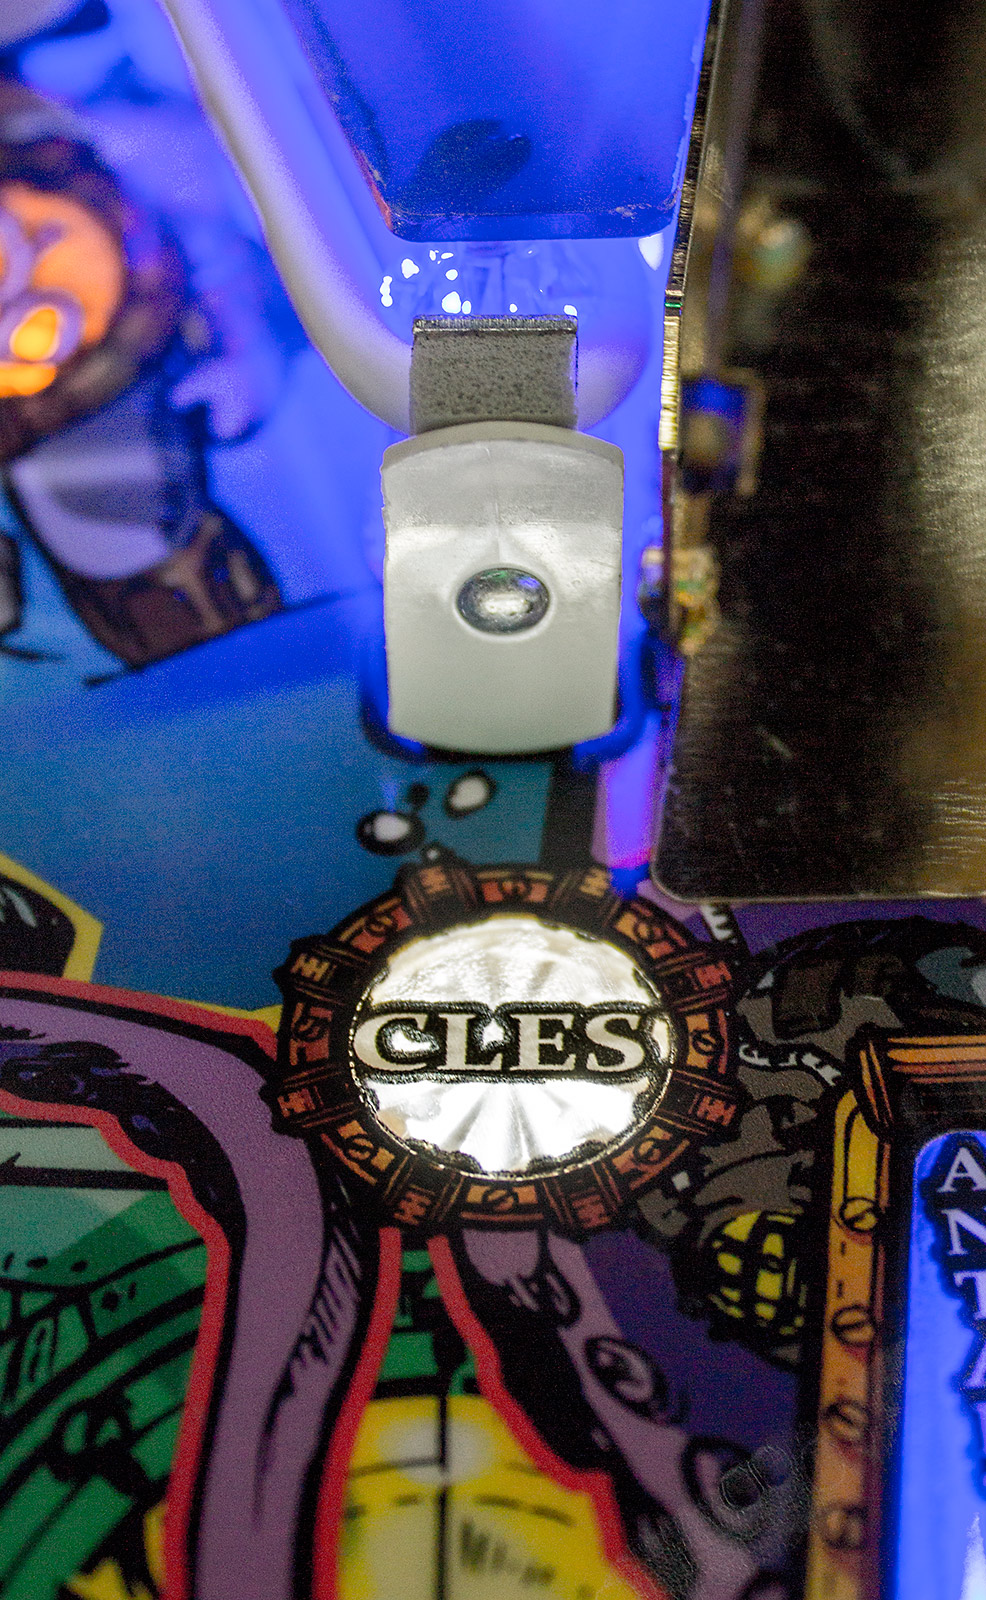
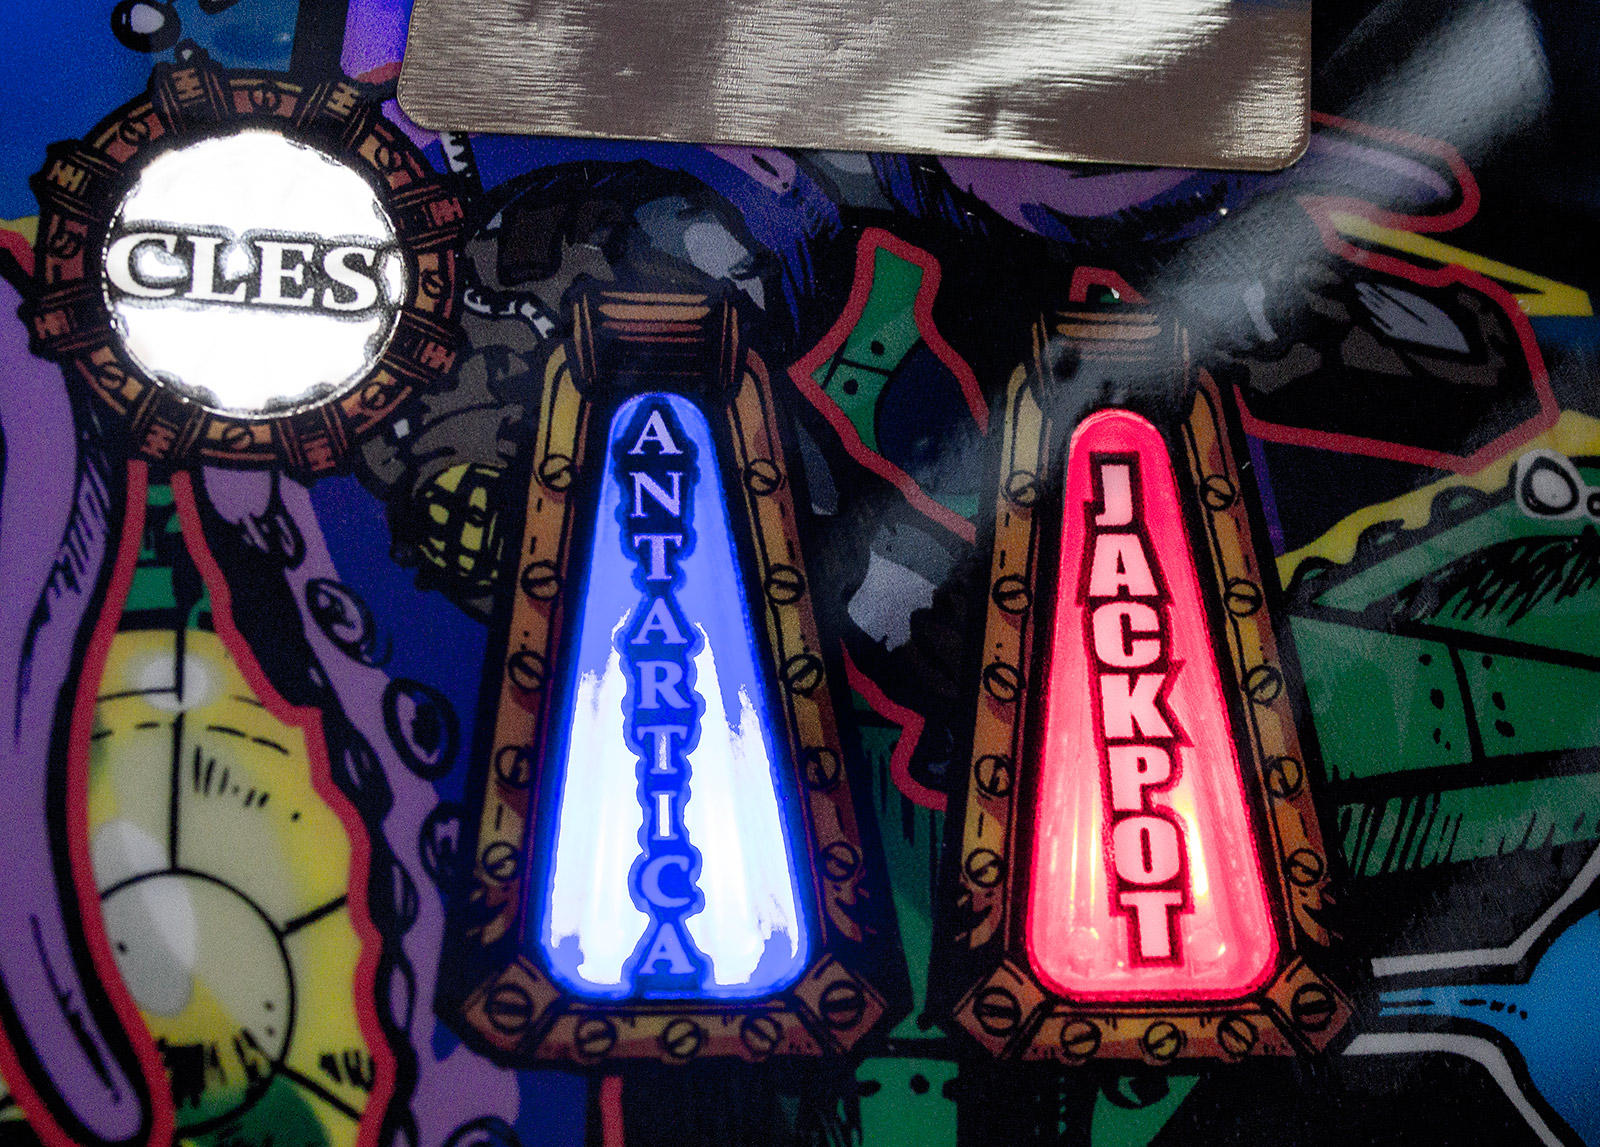
This target is a little more open and accessible than the Underwater Forest one, and like its counterpart it requires multiple hits to complete the feature. Below the Bay of Vigo is the Cles standup we mentioned earlier.
This pairs up with the Hera standup to light lock for the start of multiball. Its insert flashes rapidly until the target is hit, at which point it lights solidly. The Cles standup is positioned on the left side of the entrance to our next feature - the right ramp.
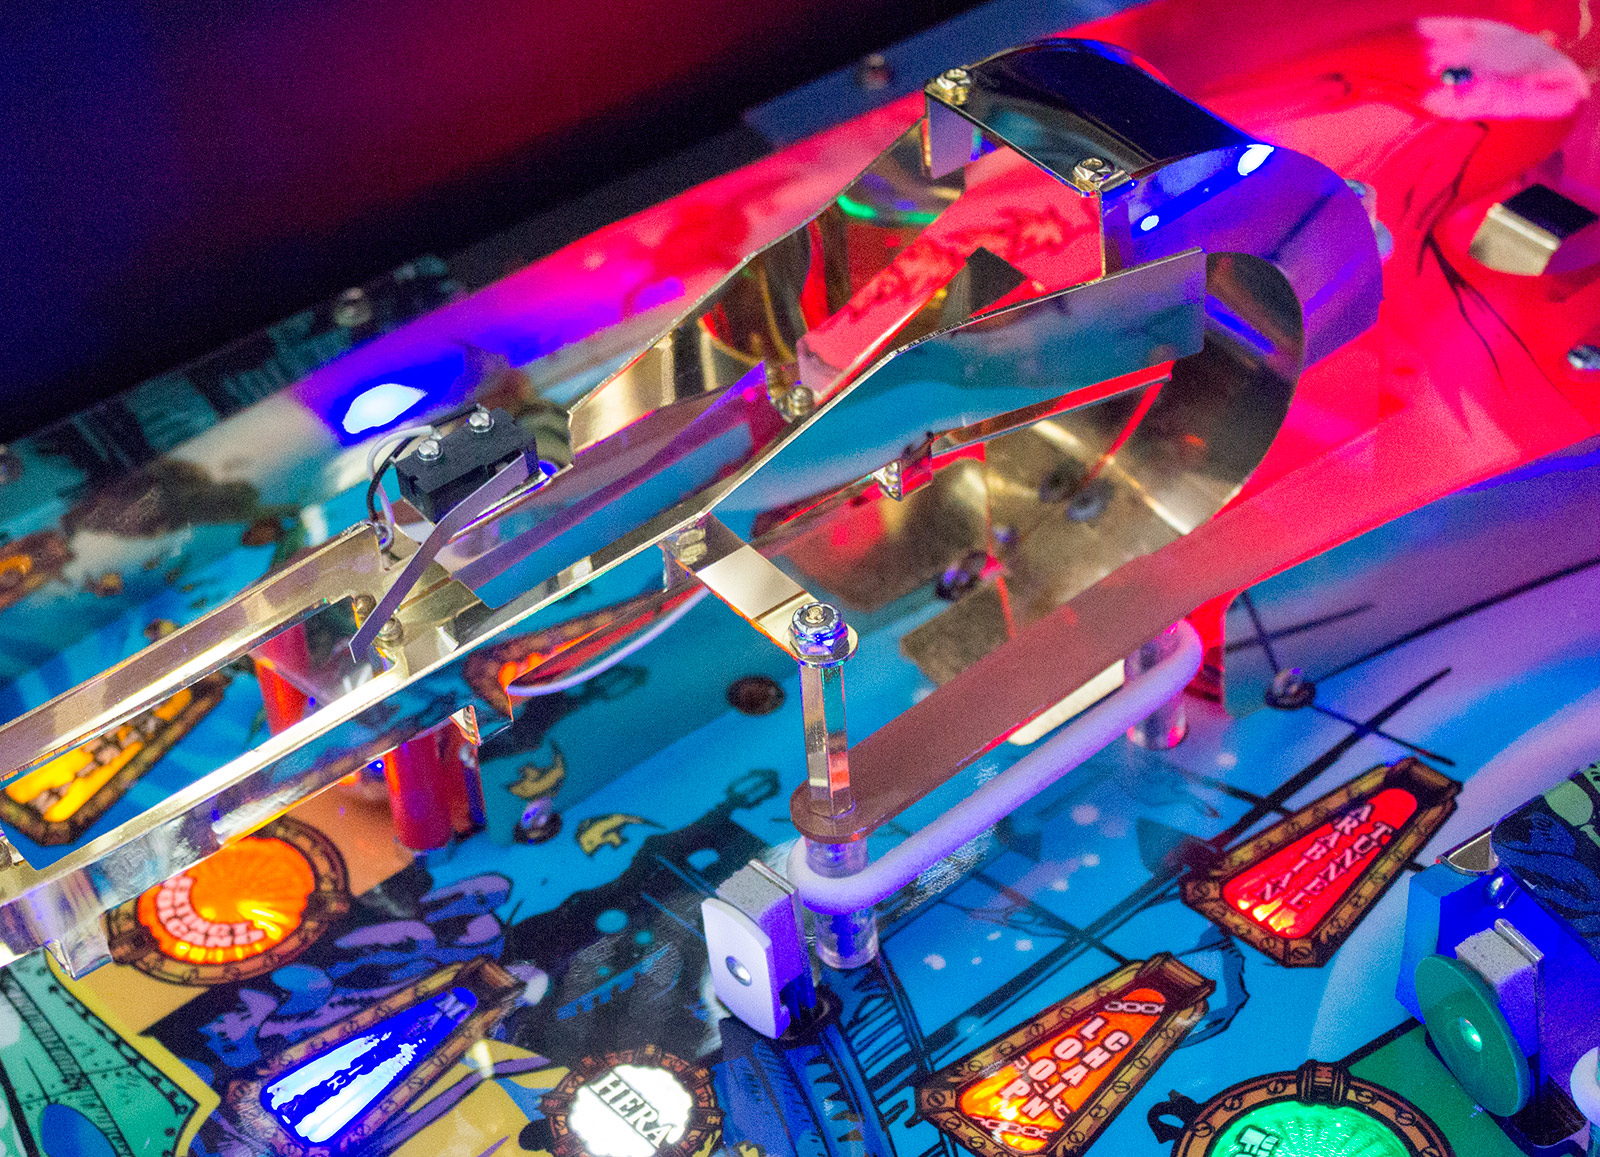
This is another all-metal ramp with even the ramp flap having a shiny finish. Like the left ramp, it can score jackpots in multiball and advances the Protect the Sea feature.
Despite having a pretty tight turn at the top, the right ramp is not a tricky or temperamental shot. The metal construction makes it nice and smooth, and there's some satisfaction to be had comboing the two ramps to advance through the mode rapidly.
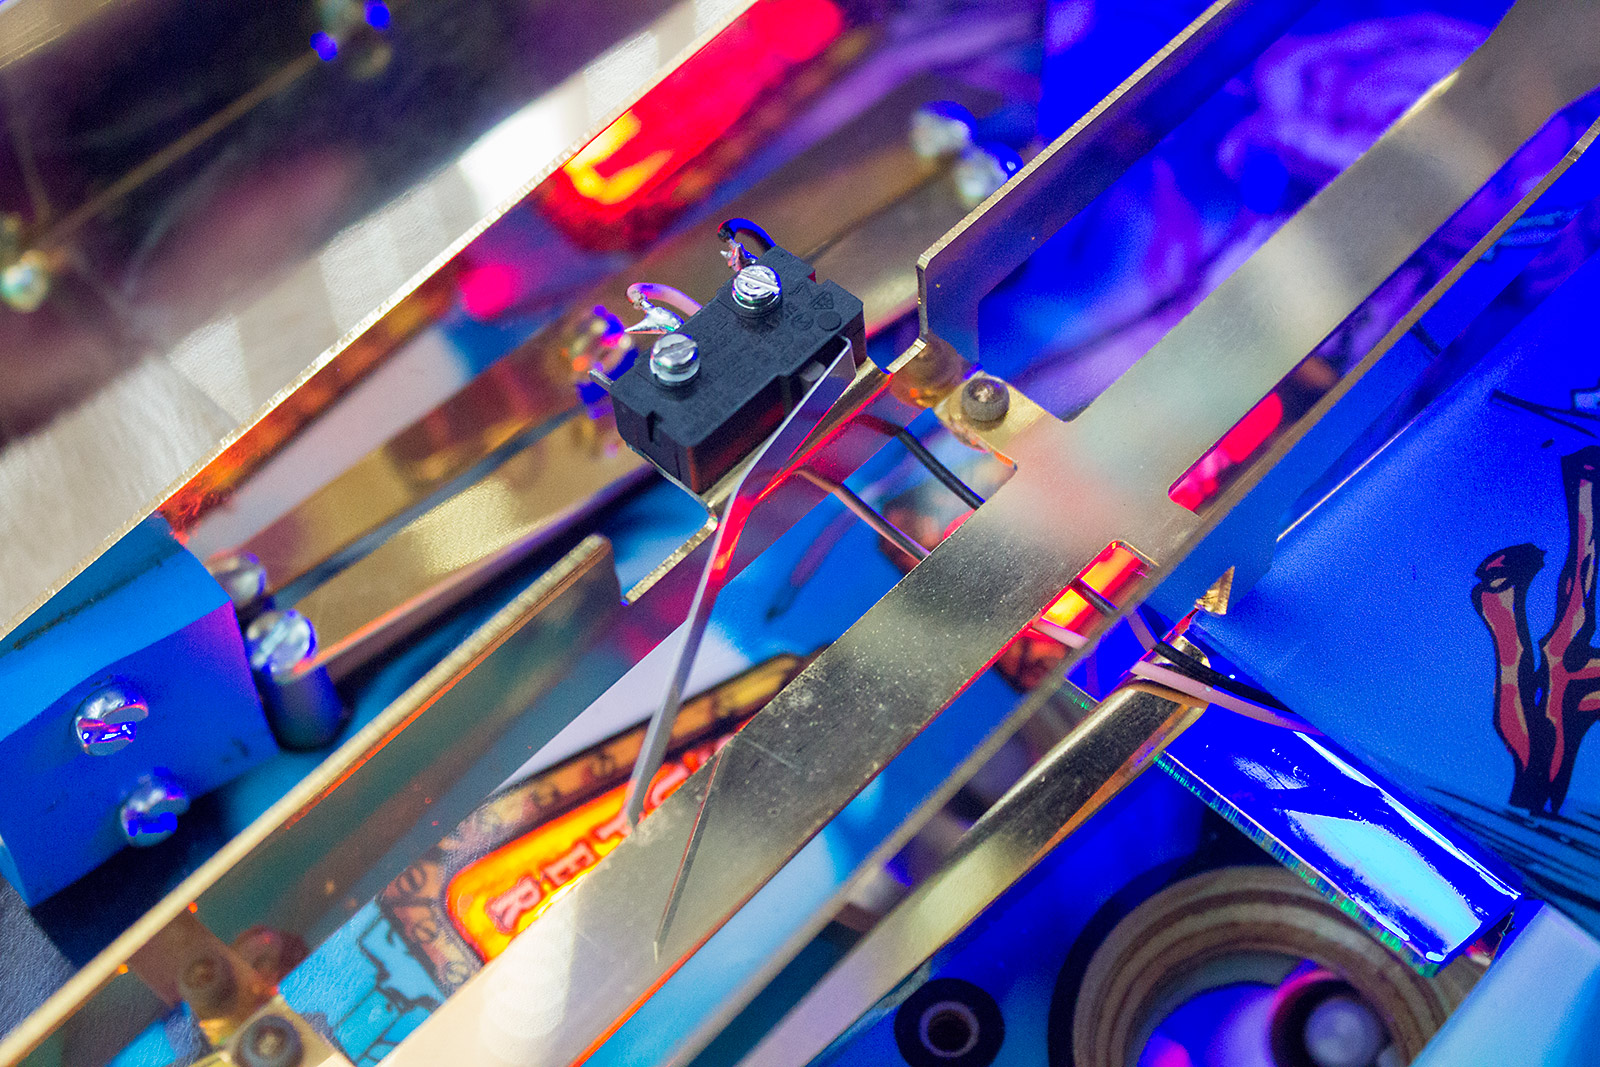
Successful shots to the ramp are recorded by a microswitch mounted on the ramp return which shares the attractive, open design of its left-side companion.
The right ramp return also drops the ball into its respective inlane, however this time it falls above the inlane switch, allowing advancement of the F-I-R-E inserts.
Moving right, we come to our next major shot which is the right lane.
Were it not for the one-way gates at the top, the position of this shot could be thought of as an orbit lane. However, the gates mean it always leads to the S-E-A rollover lanes and the pop bumpers.
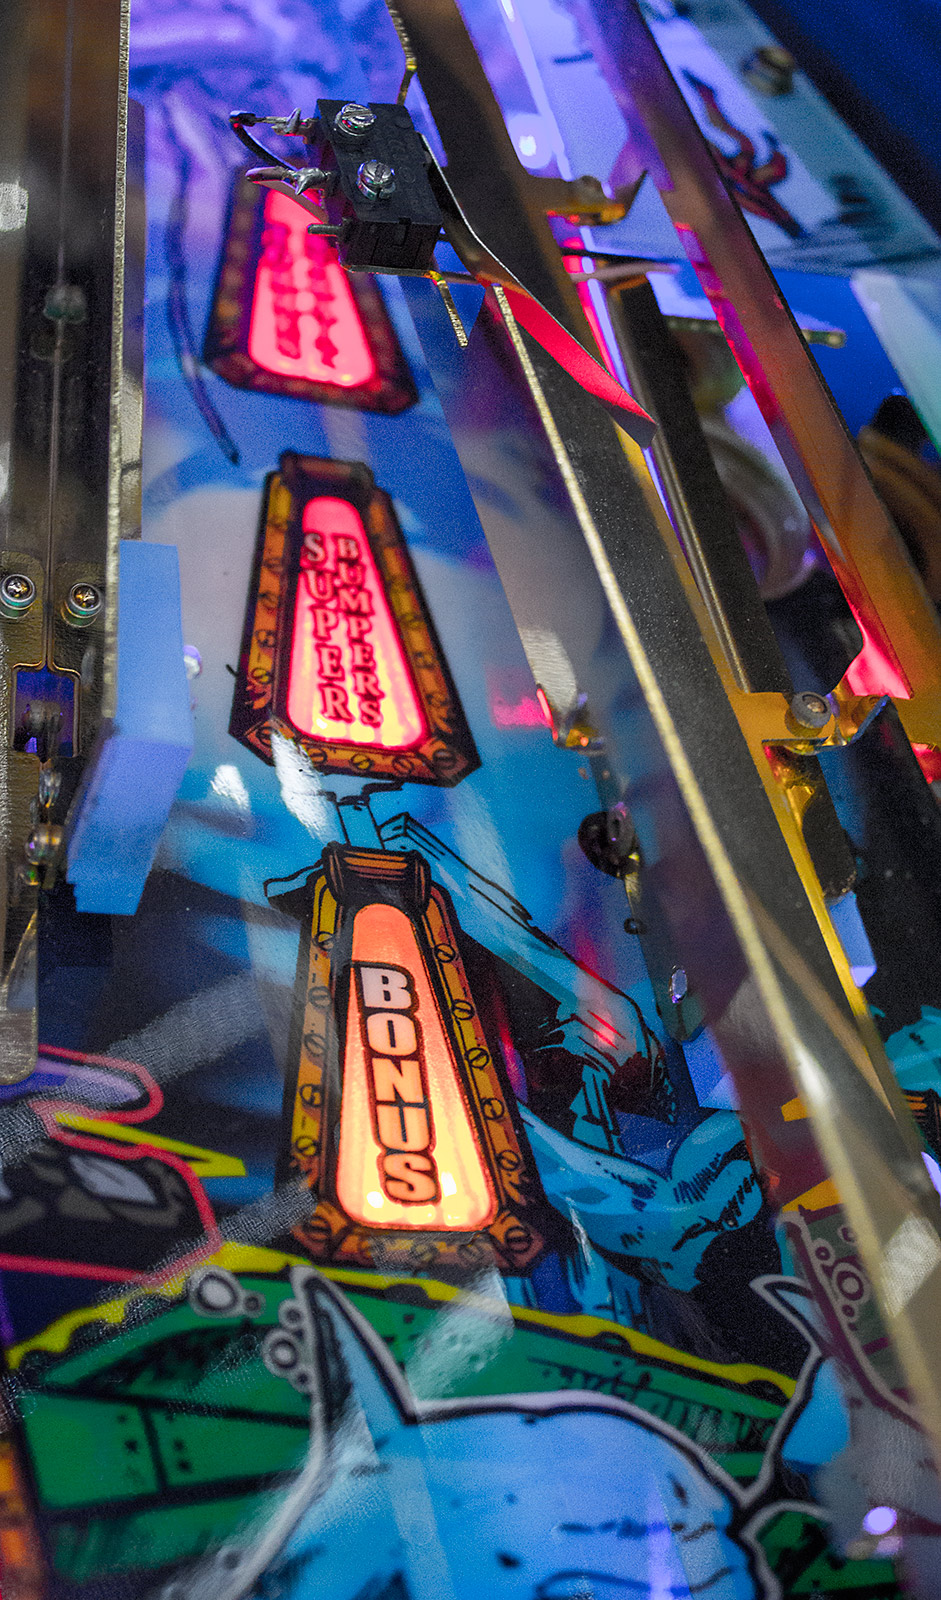
The right lane is one of the shots during Build the Nautilus mode, and also starts Super Bumpers for increased scoring.
The final major shot is on the far right and is an eject hole.
This is a reasonably tricky shot and the ball can bounce out if the shot is too hard. However, even if that happens it will often register and award the lit feature.
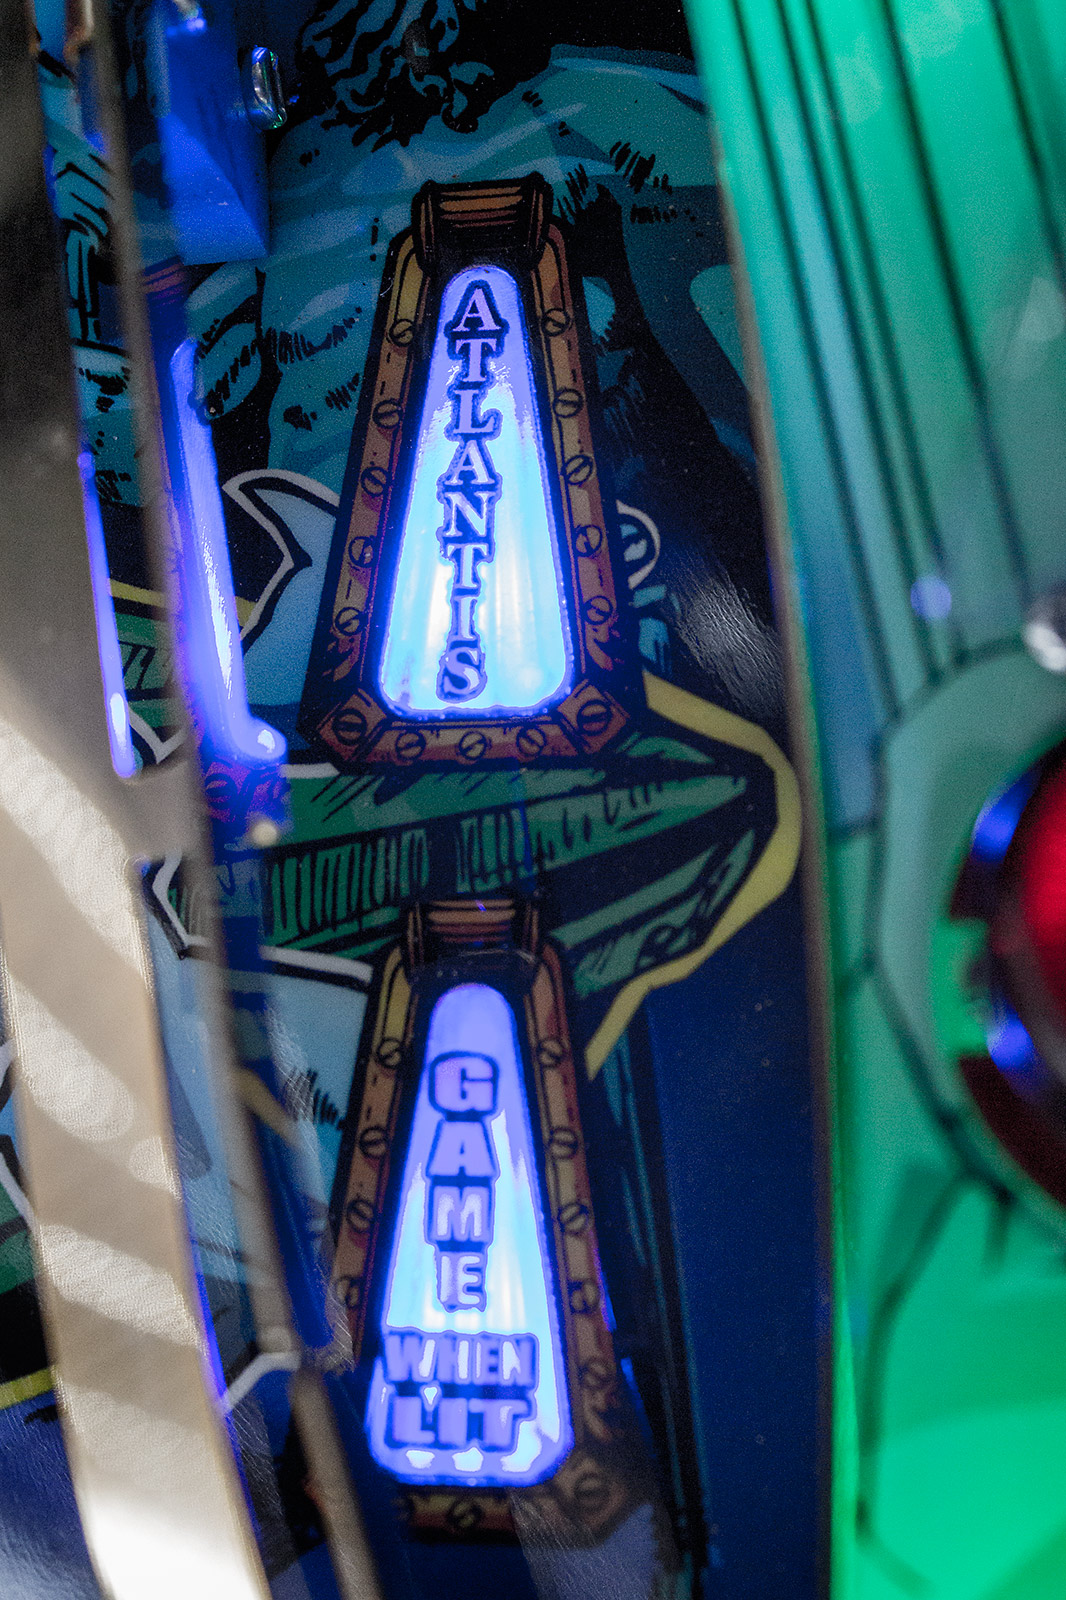
Those features include the start of multiball which happens instantly, without any delay while a display effect completes.
Below the eject hole lane is another rebound area which sits above the right outlane.
As with the left outlane, the right side includes an adjustable post with three positions to vary the width of the lane entrance. The game is shopped with the post in the middle position.
There's just a single inlane and one outlane on the right. These contain the R and E inserts from F-I-R-E
The R insert is mostly covered by the end of the right ramp, and its metal construction also partly obscures the ball as it bounces around, deciding whether to head for the inlane or the outlane.
While the left ramp drops the ball in the left inlane below the rollover switch, that's not possible on the right side due to another ramp occupying that position.
In this case it is the ball launch ramp which claims that area of the playfield, so let's take a look at that feature next.
The ball shooter lane begins in a fairly conventional manner, with a wooden shooter lane and an auto-launch mechanism to propel the ball into play. Rather than shooting the ball up to the rollover lanes as might b expected, the auto-launch instead sends it into another U-turn ramp which feeds the right inlane, much as it does on Indianapolis 500.
This is another attractively-mirrored metallic construction, although it is sometime unable to cope with the speed of the ball as it is launched, allowing it to fly off and drop into the outlane. This is more a function of an over-exuberant ball launch solenoid, and it could maybe do with a slightly weaker coil.
If it is launched successfully, the ball quickly drops into the right inlane and rolls down to the right flipper for a skill shot on the left ramp. The ball moves pretty quickly, so you need to be paying attention or the ball will drain before you've had a chance to flip it.
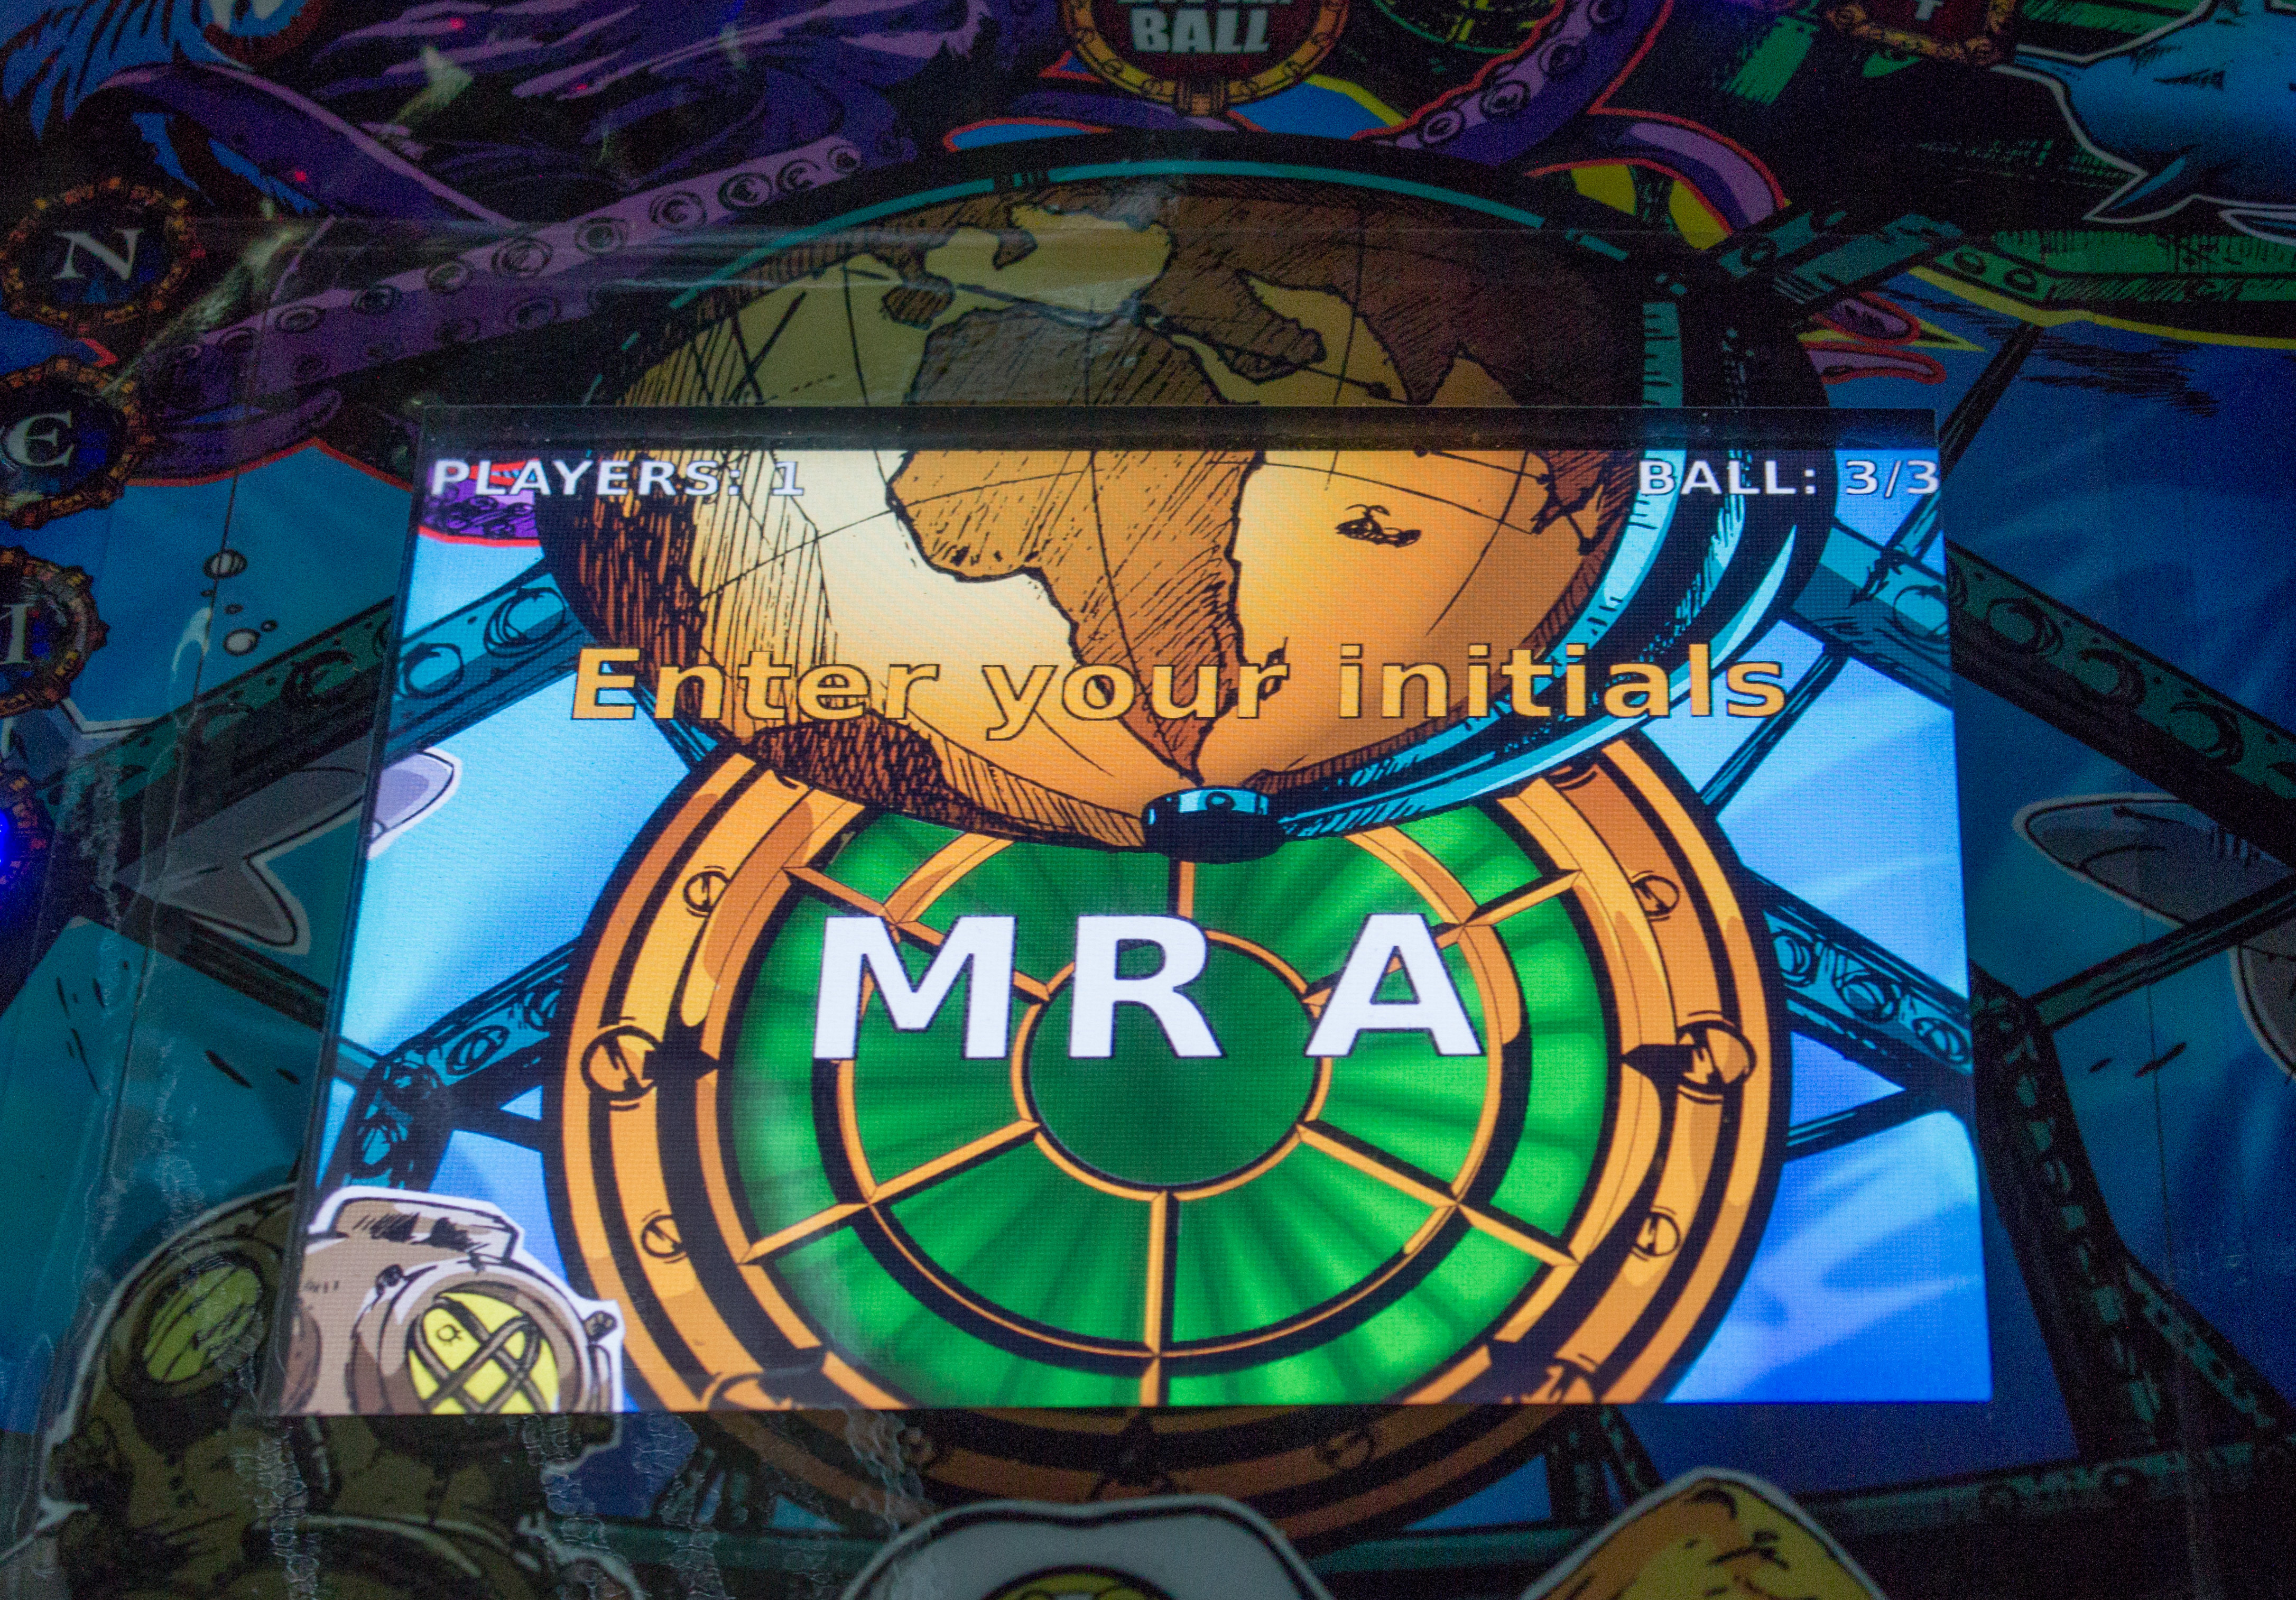
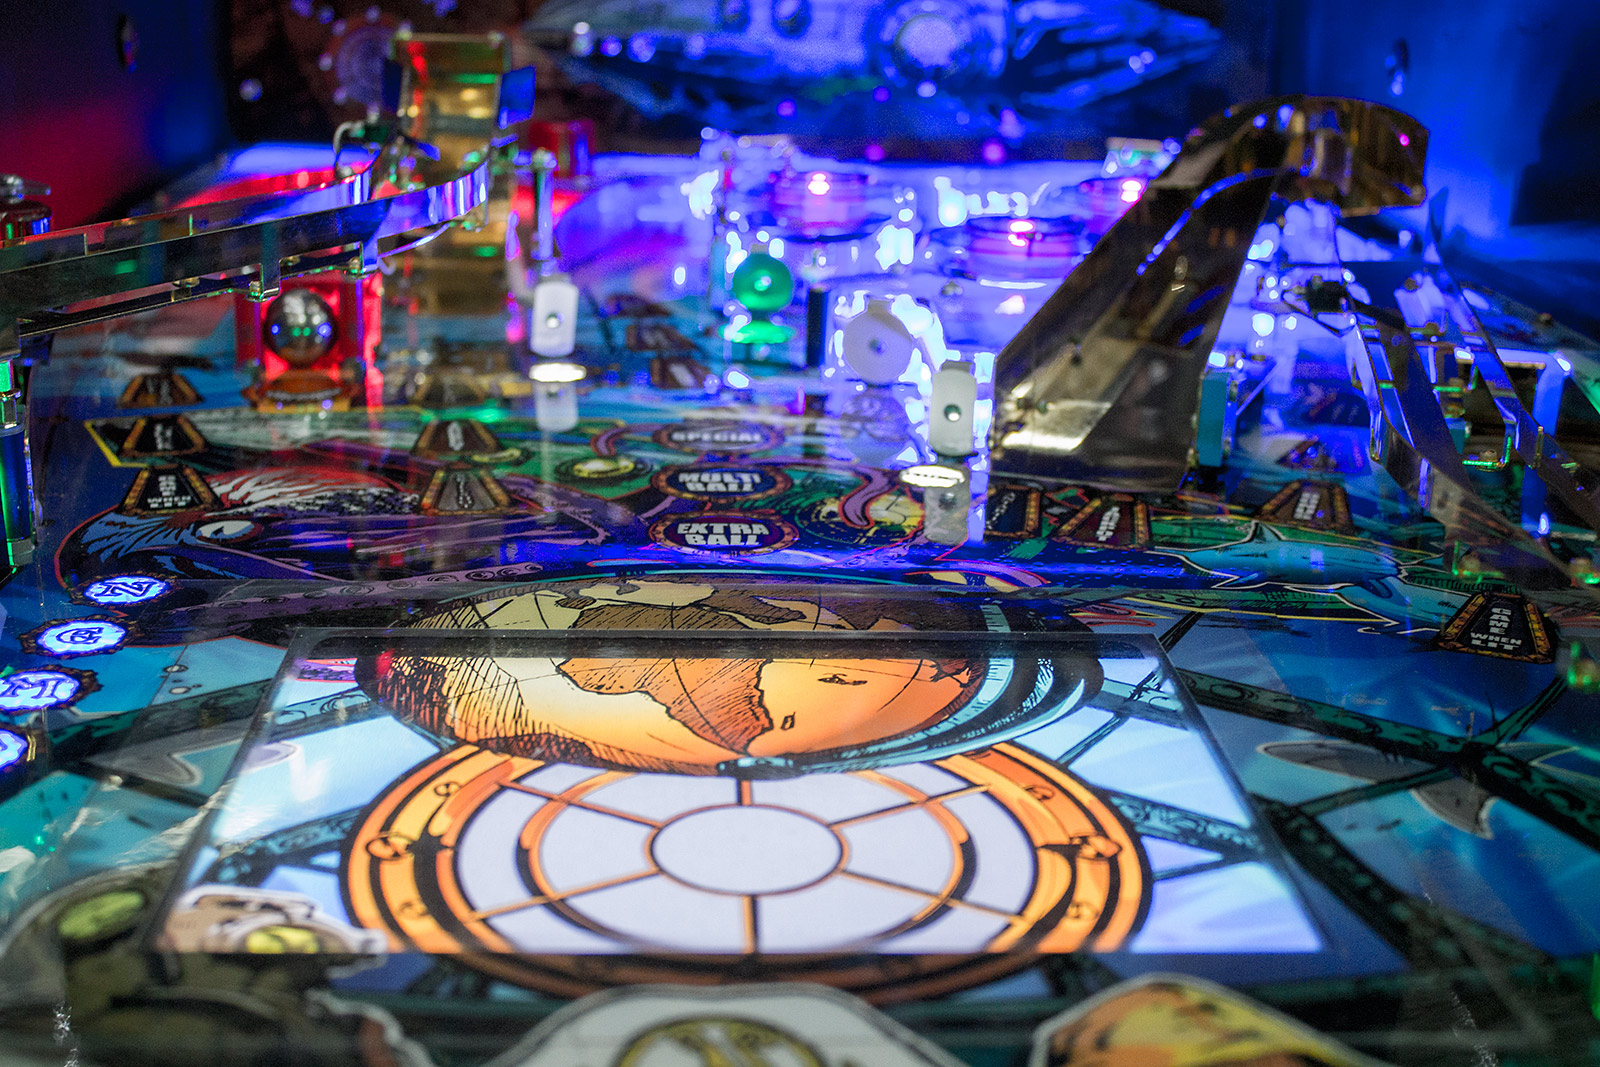
That brings us back to the flippers and means we've looked at all the main shots in the game, but we still have the single largest playfield feature to examine - the LCD panel.
This 9.7-inch LCD panel is the only display in the game and so conveys all the usual information about score, ball number, credits available, mode status and diagnostics menus. The background image for most of the game is a continuation of the surrounding artwork. This helps blend it in, although the display is significantly brighter than the playfield.
The panel has the usual clear plastic window covering it and making it flush with the playfield, but it also has a larger Mylar sheet protecting it. In fact, it looked like there were two Mylar sheets, one larger than the other, with the top one bubbling a little around the edges of the lower one.
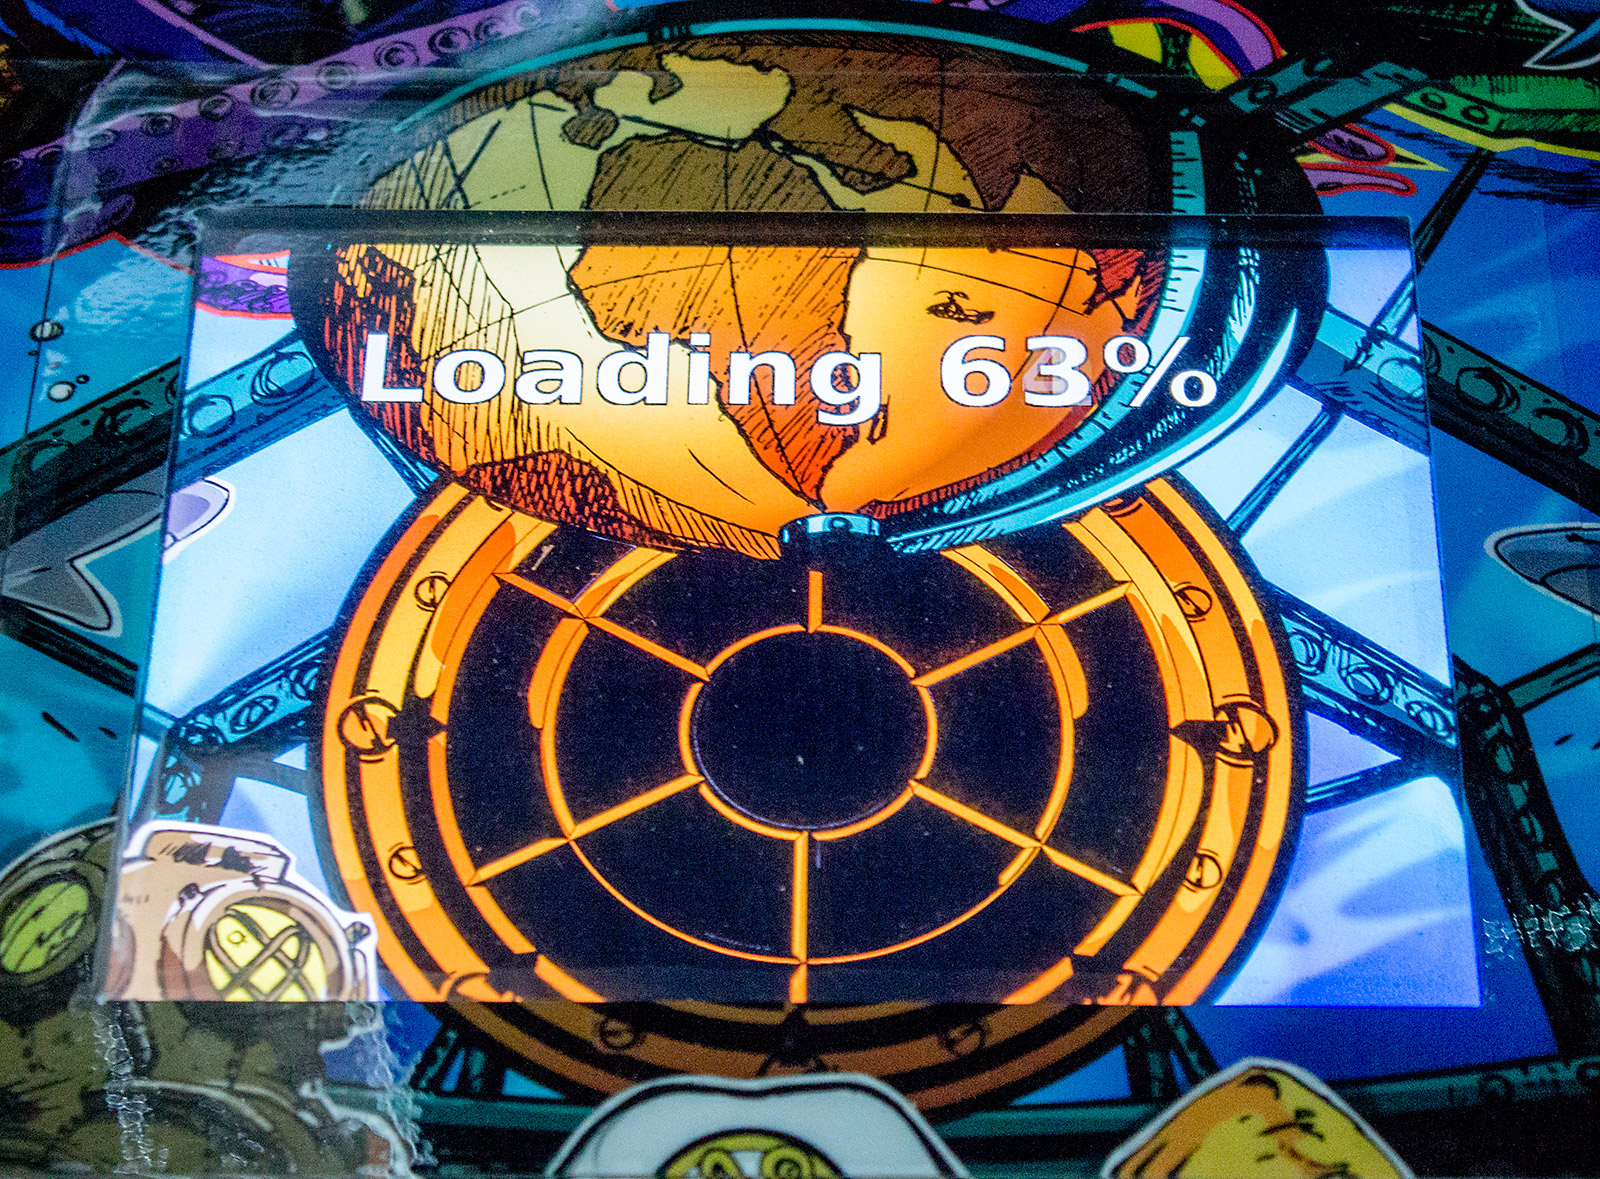
When the game is powered up, the display shows the loading progress.
At the start of a game, the player needs to choose which of the three main modes they wish to play. Each one requires different shots to advance through it.
The completed modes and progress towards the Kraken wizard mode are shown on the playfield's inserts.
Other inserts on the playfield show awards available or collected.
We said just now that the display is the biggest playfield feature, but there's another game feature which is just as large, although it lives on the game's back panel rather than on the playfield. That feature is the Nautilus.
The Nautilus is made from flat plastic sheets which interlock and slide over each other. There is a solenoid behind the model which moves it left and right during certain game events. It's not that exciting, but it adds a little more movement to the game. There's another back panel feature, and this one takes the form of a power meter timer.
There are eight red LEDs arranged in a circle, and at the start of Protect the Sea mode they all light up. Gradually, one-by-one they begin flashing and then extinguishing as your power diminishes. The same information could be shown on the LCD panel, but it's nice to see those bright red LEDs uring you to complete the mode.
To help explain how the game plays, here our ten-minute video of the gameplay, from the initial game start right through to Kraken mode. That completes our look at the playfield. Now it's time to get the keys out and delve inside the game to see how it's put together. A nice touch is the laser-cut Nemo key fob which comes with the game
Let's start with the easy part, and see what's in the backbox. The translite panel is secured with a barrel lock at the top.
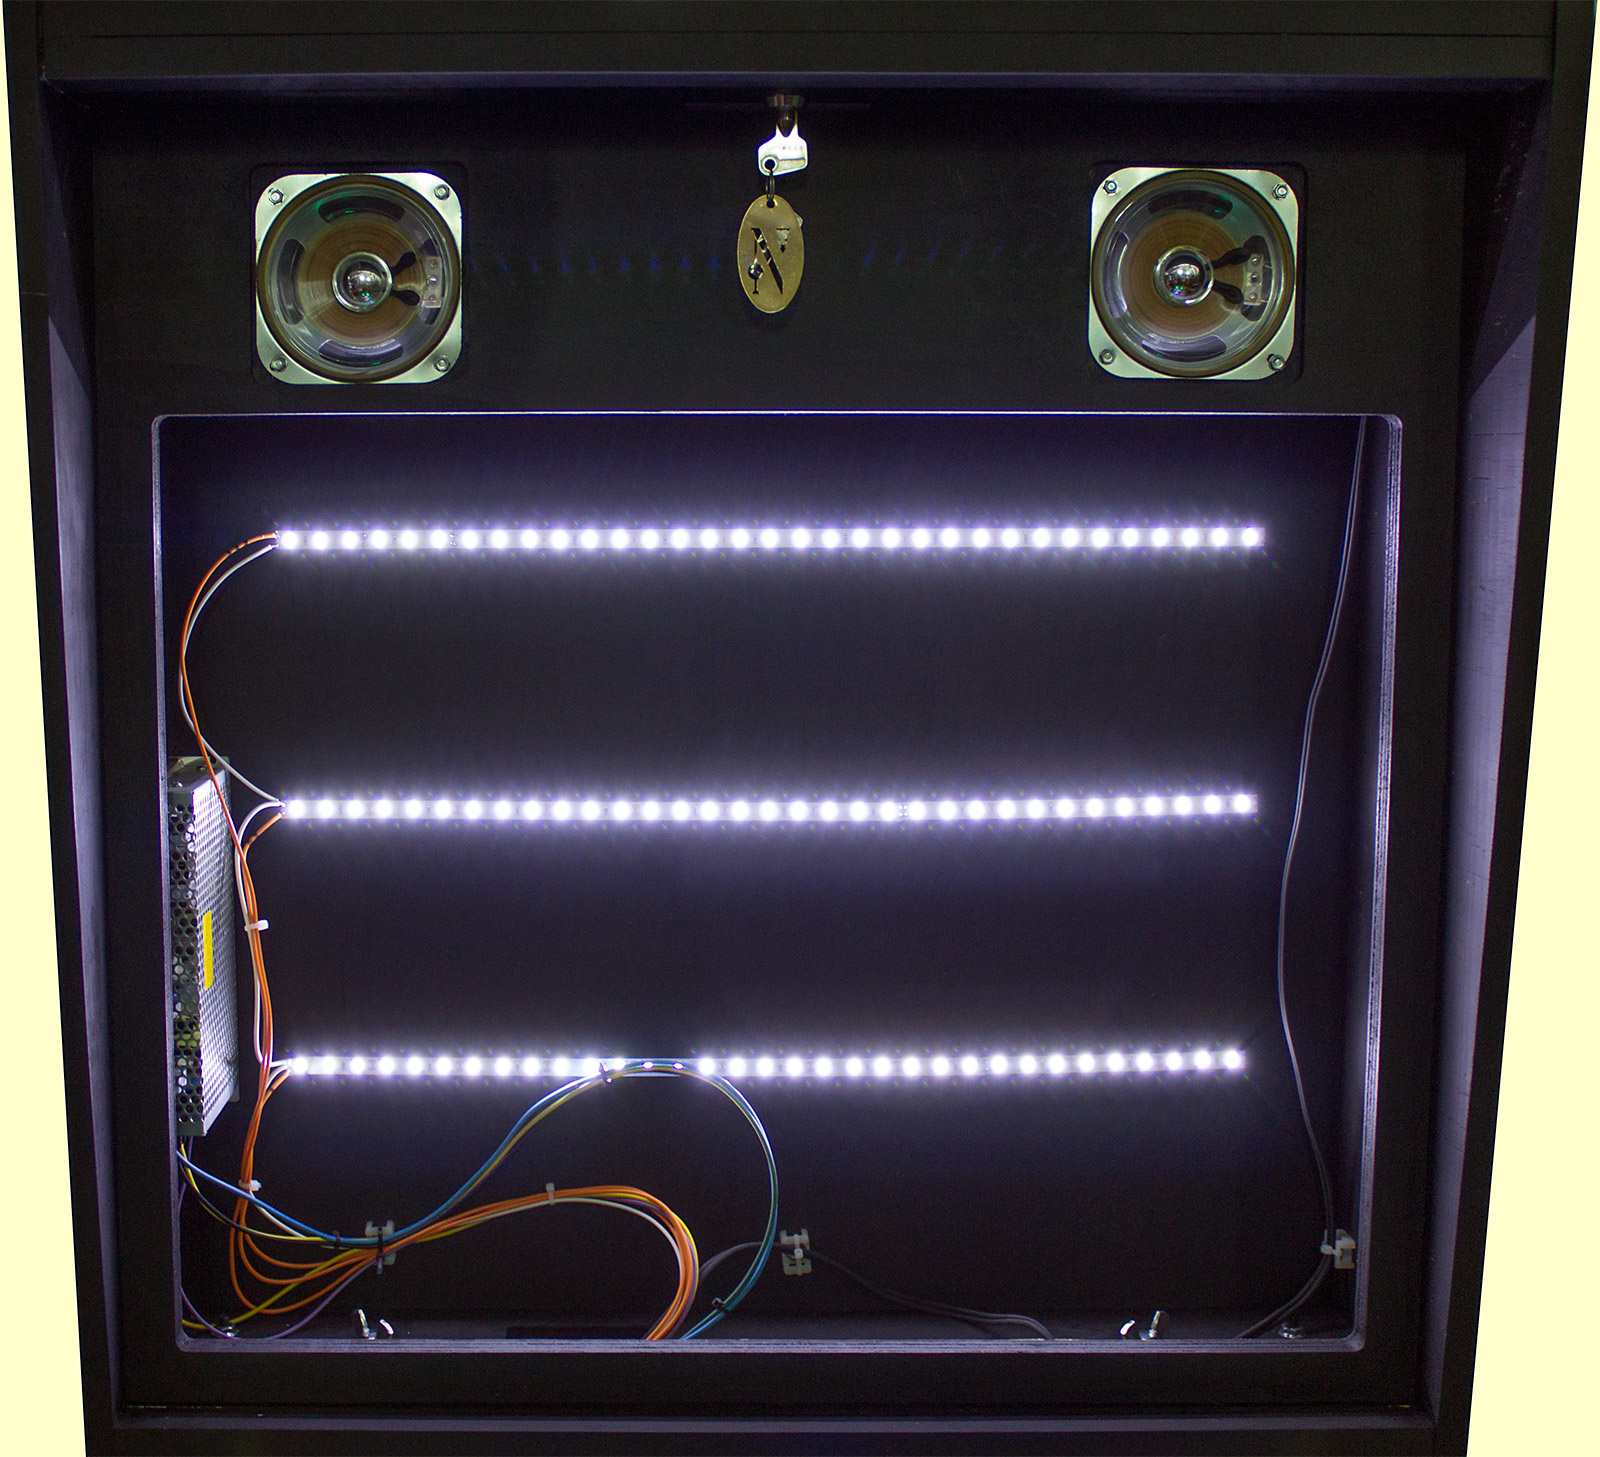
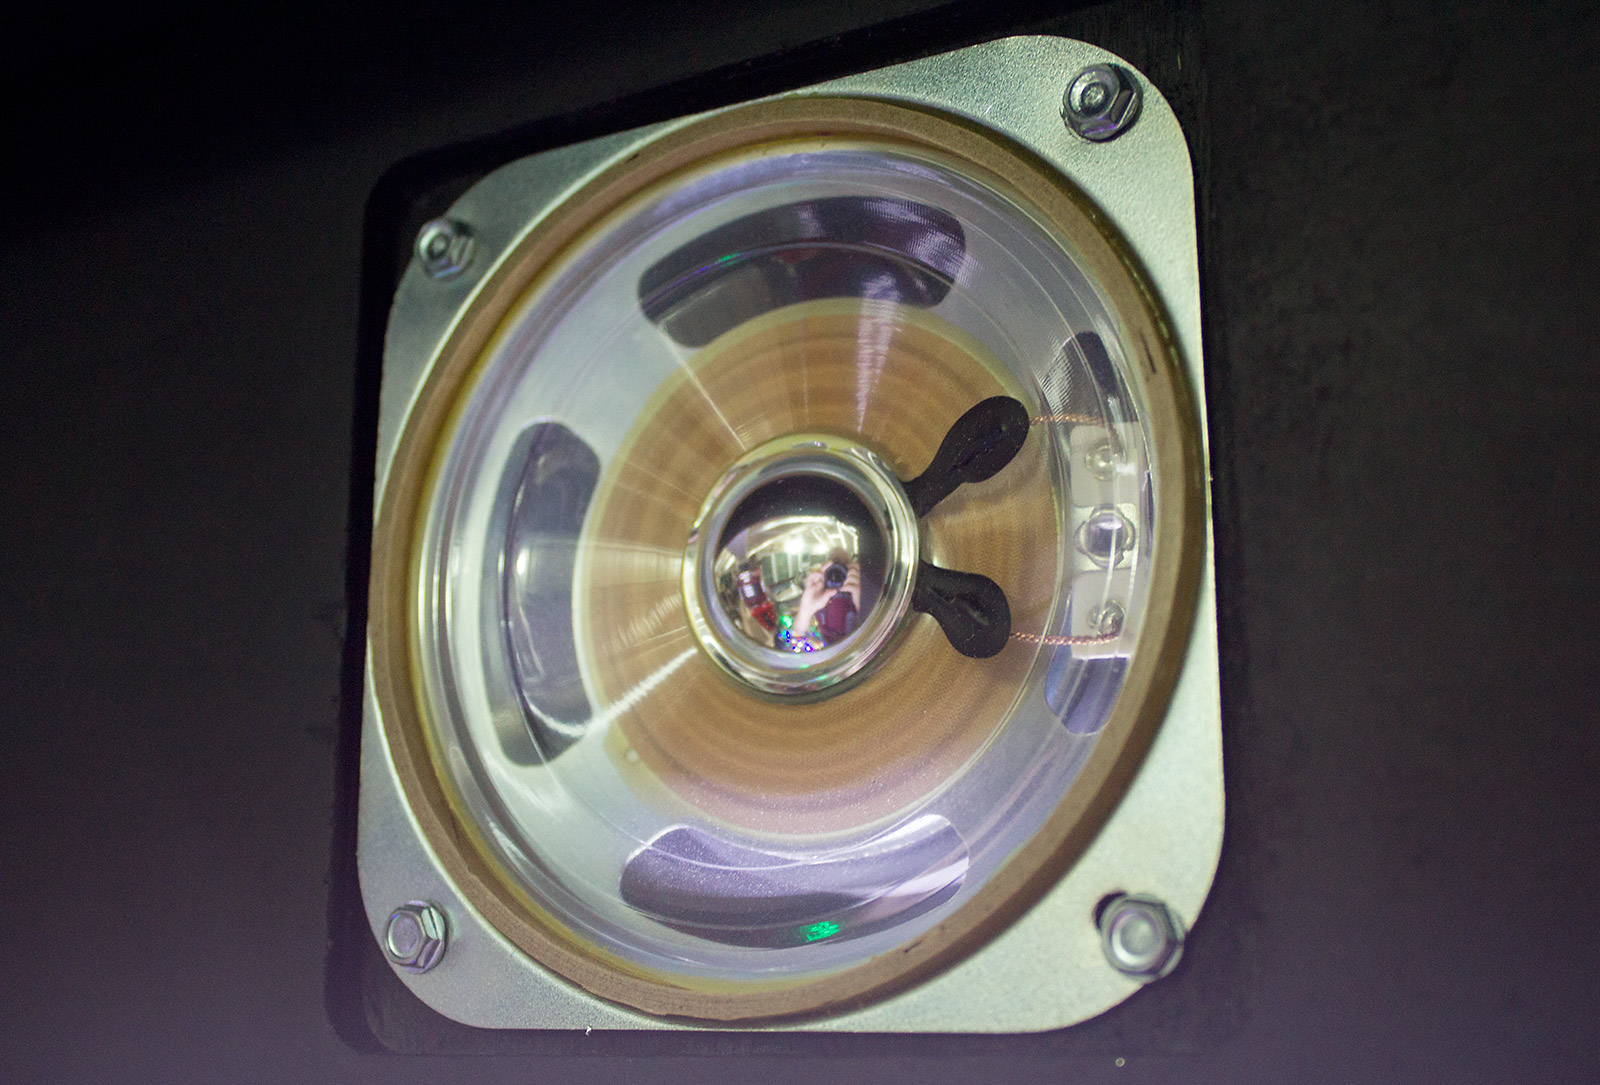
Nemo has two backbox speakers mounted at the top.
The sound from these speakers is projected through cut-outs in the translite panel.
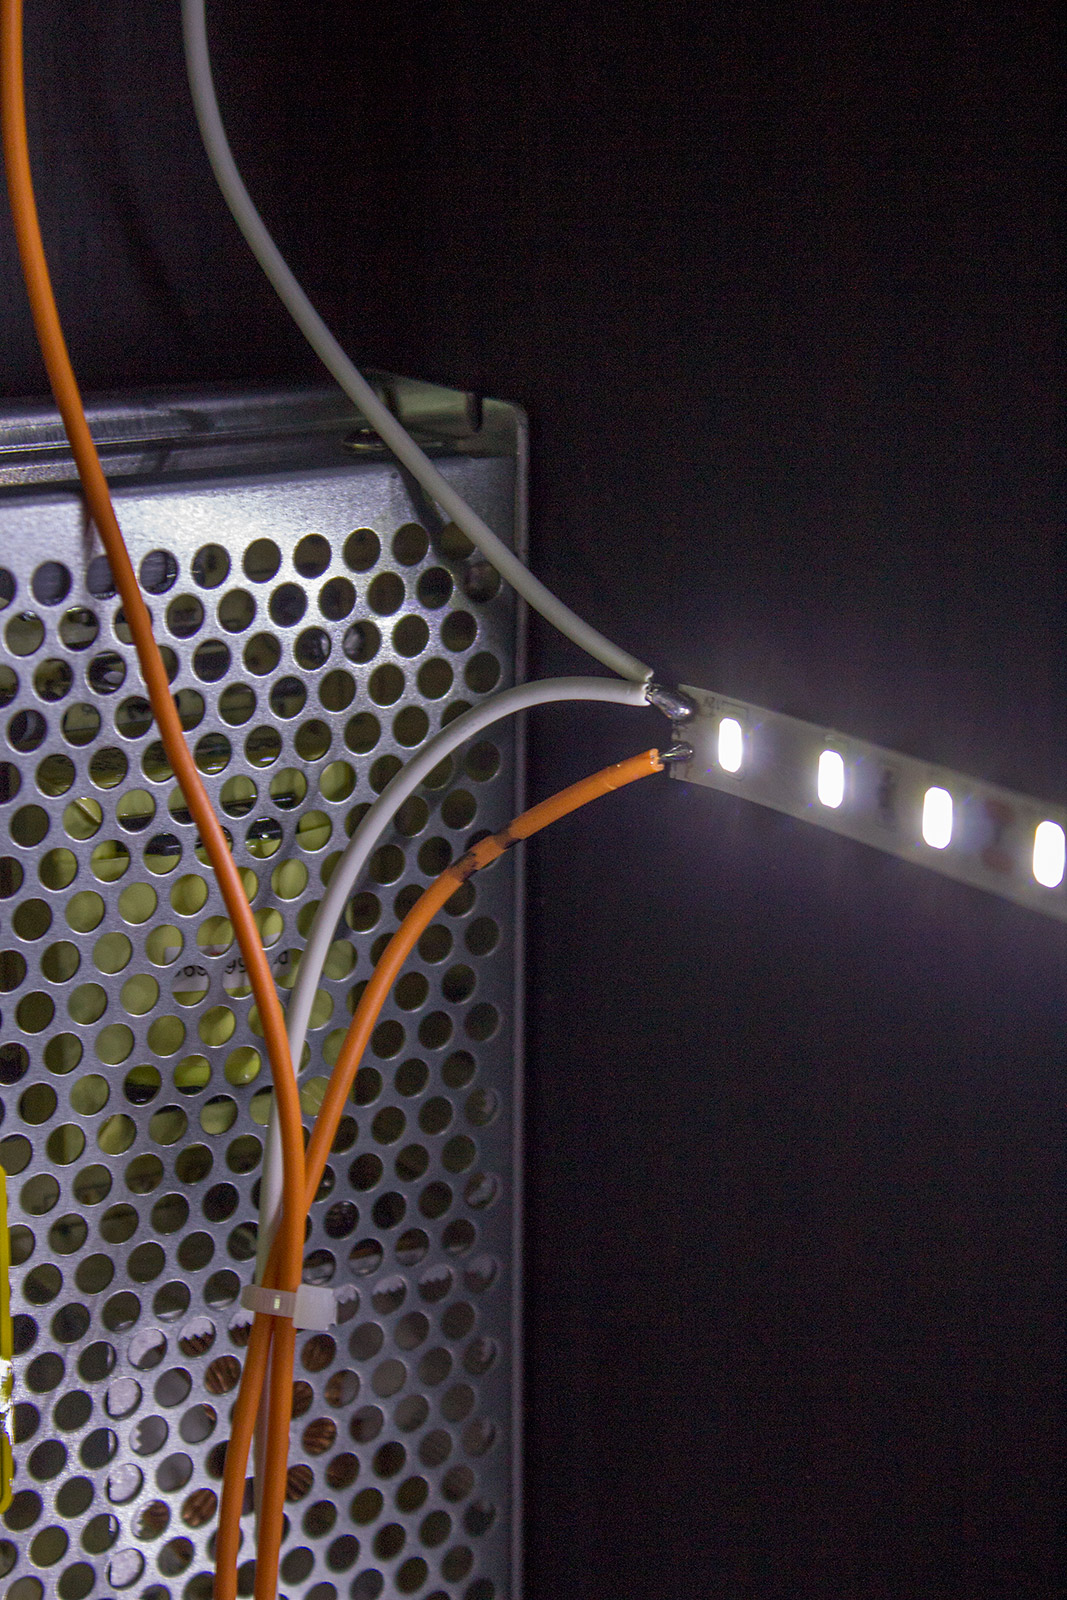
The speakers are each fed with their own audio channel from an amplifier in the base of the cabinet, where there is also a third speaker. Meanwhile, remaining in the backbox we find a switching power supply which drives the backbox's three white LED strips.
Some of the power supply's outputs also go into the cabinet, while mains power for the supply comes in from the cabinet.
The backbox hinges and folds down as normal. With no backbox latch, it is held upright by two wing bolts. These look flimsier than their Williams equivalents but are actually the same diameter bolts.
So there's not much in the backbox - just a power supply, two speakers and some LED strips. To find the really interesting stuff we need to open up the cabinet, starting with the coin door. Surprisingly there's a coin mech fitted.
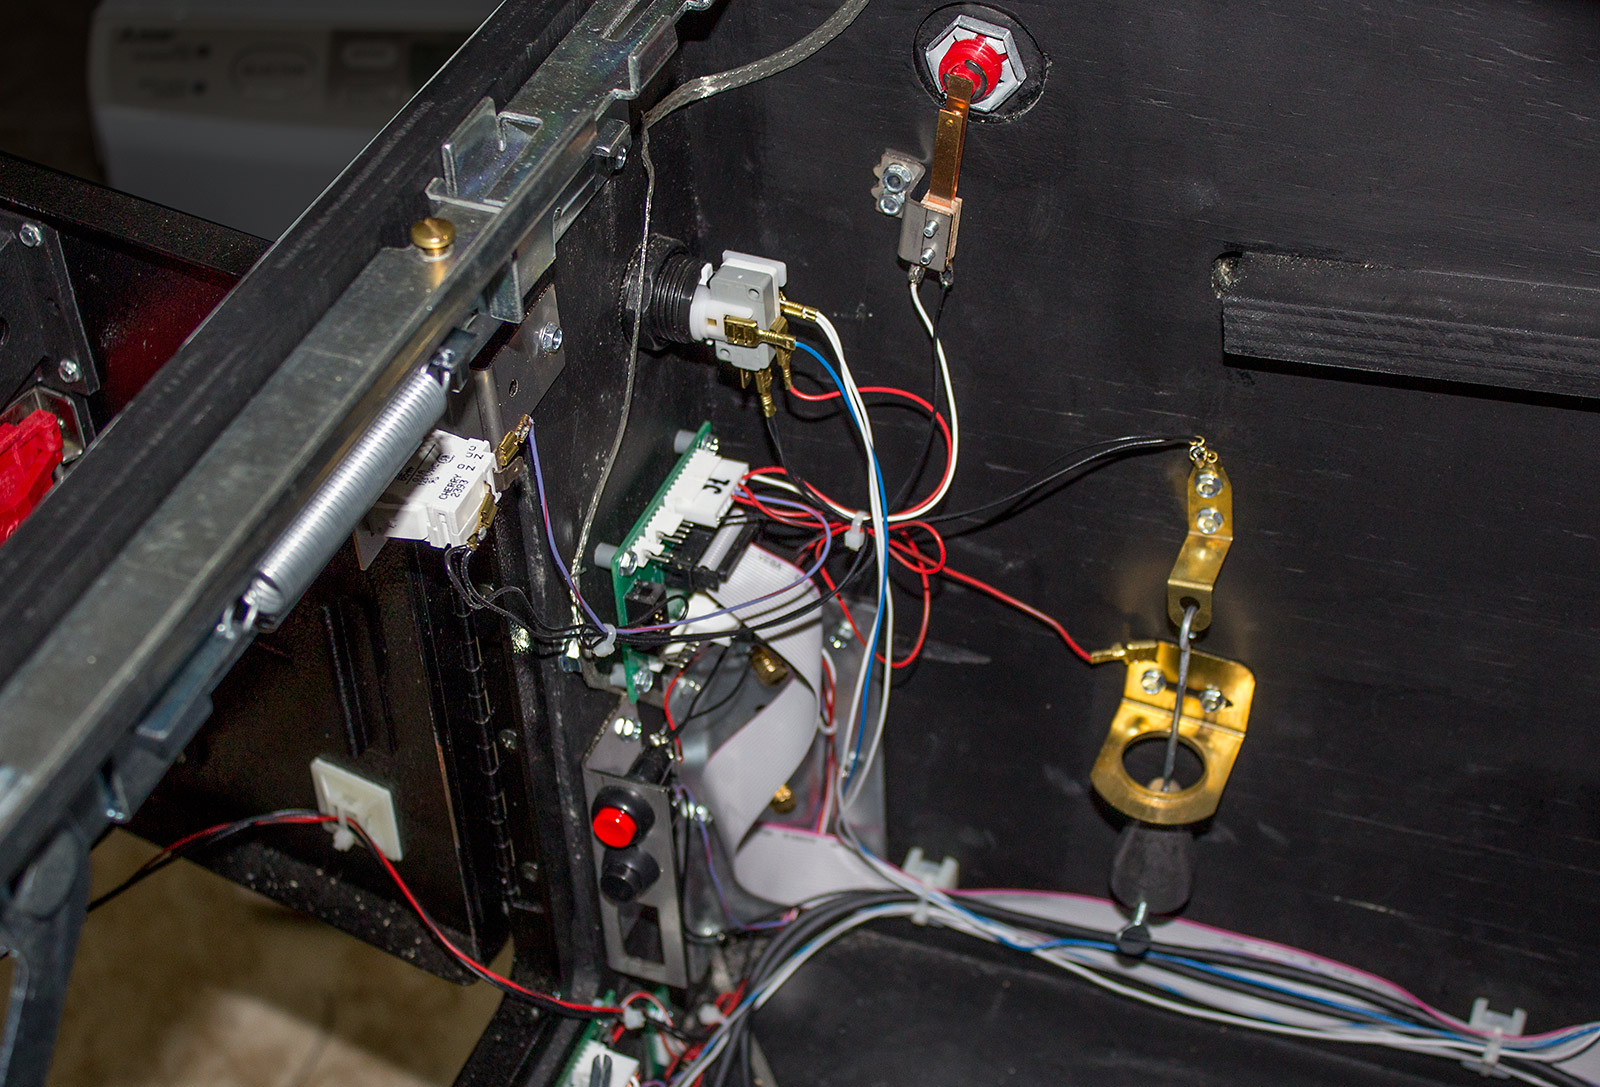
It's a single coin device and we're not sure which coin it takes - quarters, Euros, or something else. In any case, there were no controls to set the game pricing scheme in the menus in this version, so it's a moot point. Inside the coin door we have more interesting items to examine.
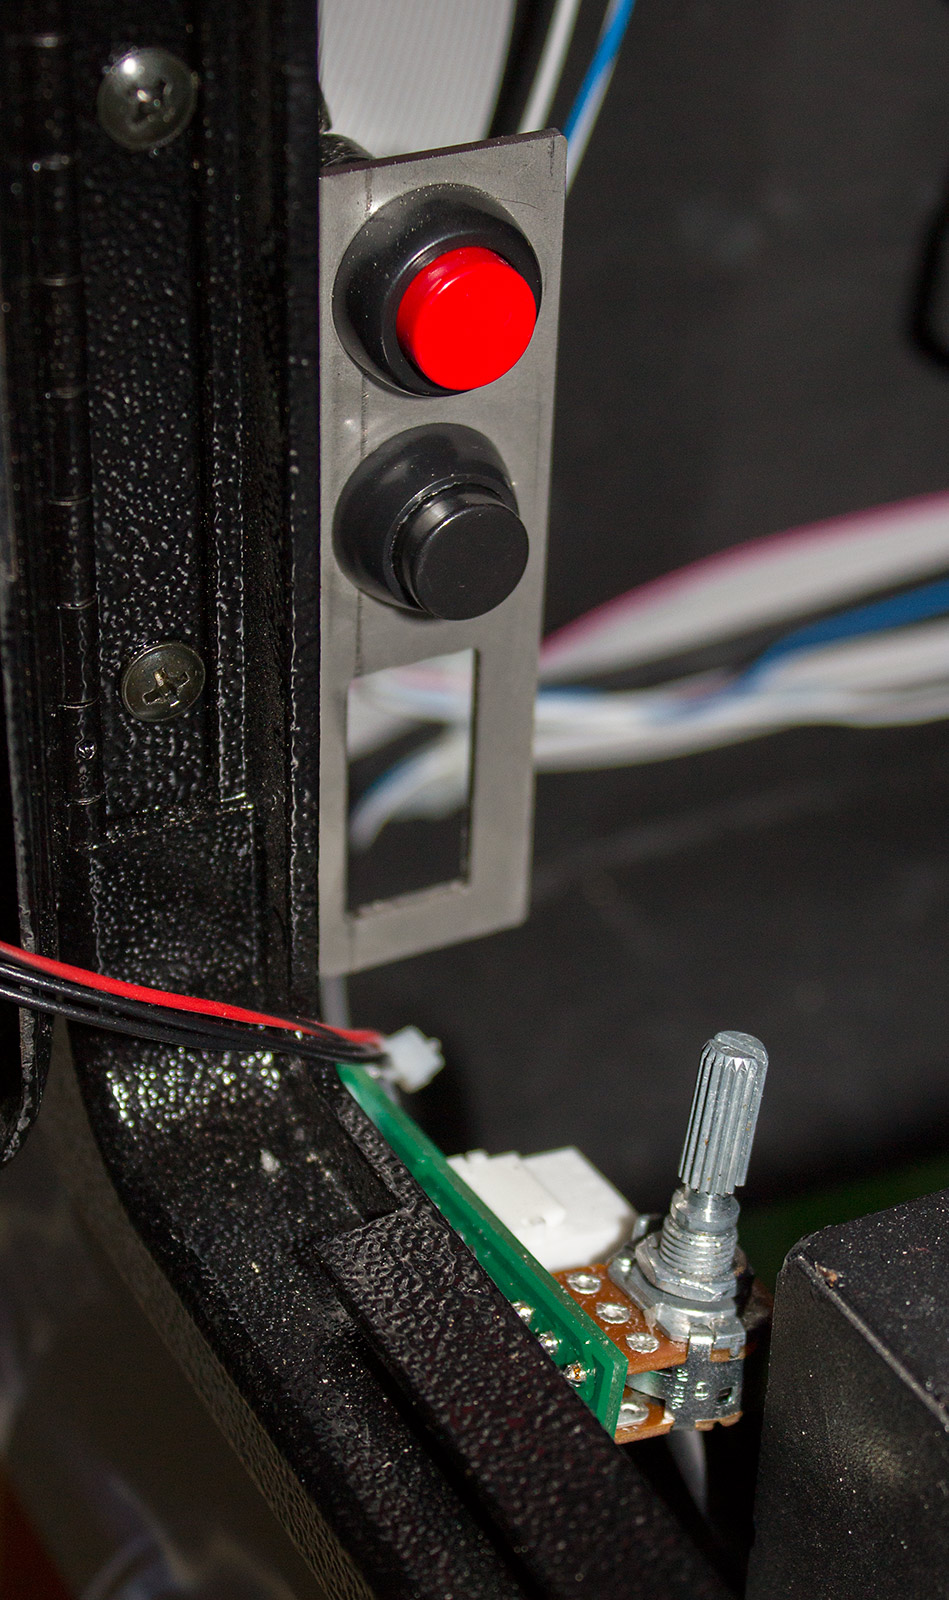
At the top, we have the yellow-sleeved lock bar lever and a coin door switch. We originally thought this switch would disable the solenoid power, but it didn't. In fact, we couldn't see that it made any discernible difference to anything. In the bottom, we find a cash box which can be bolted into the cabinet using a lock mechanism while at the bottom left corner of the coin door we have two diagnostic buttons and the game's volume control.
The volume control is a little basic and could really do with housing in a discrete box with a knob added to finish it off more neatly.
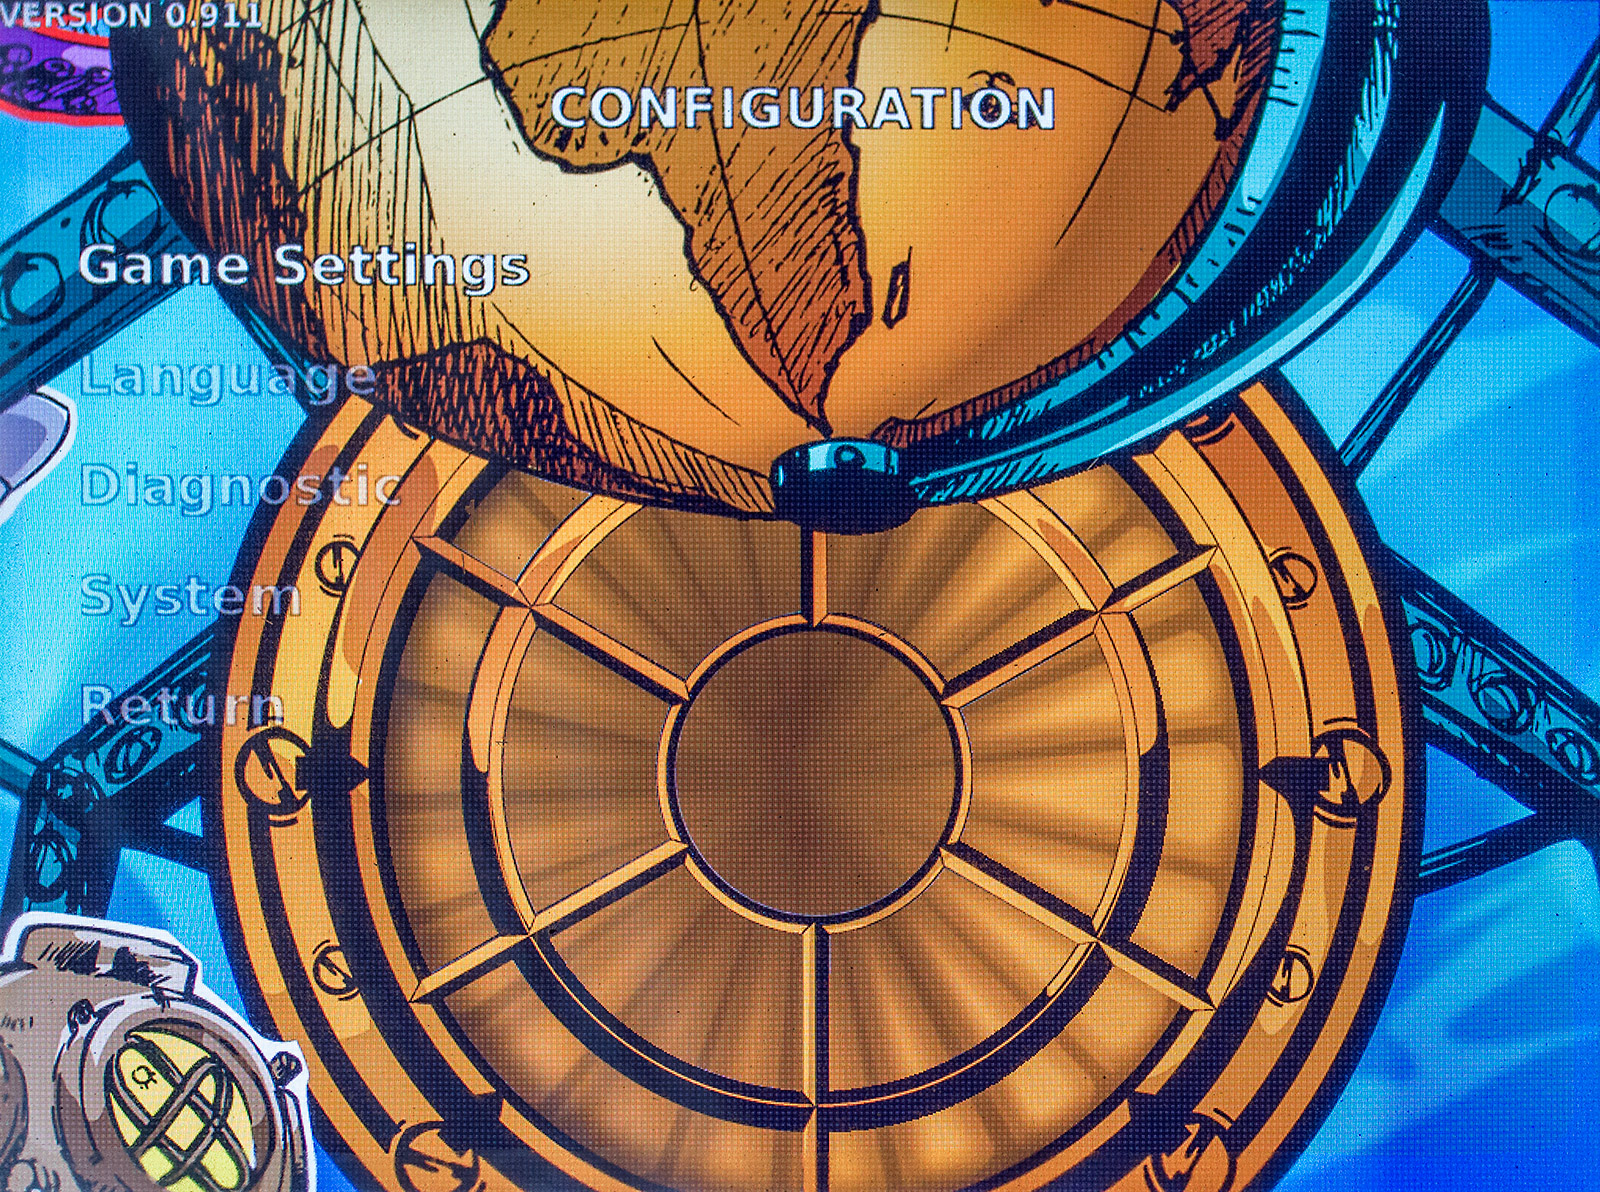
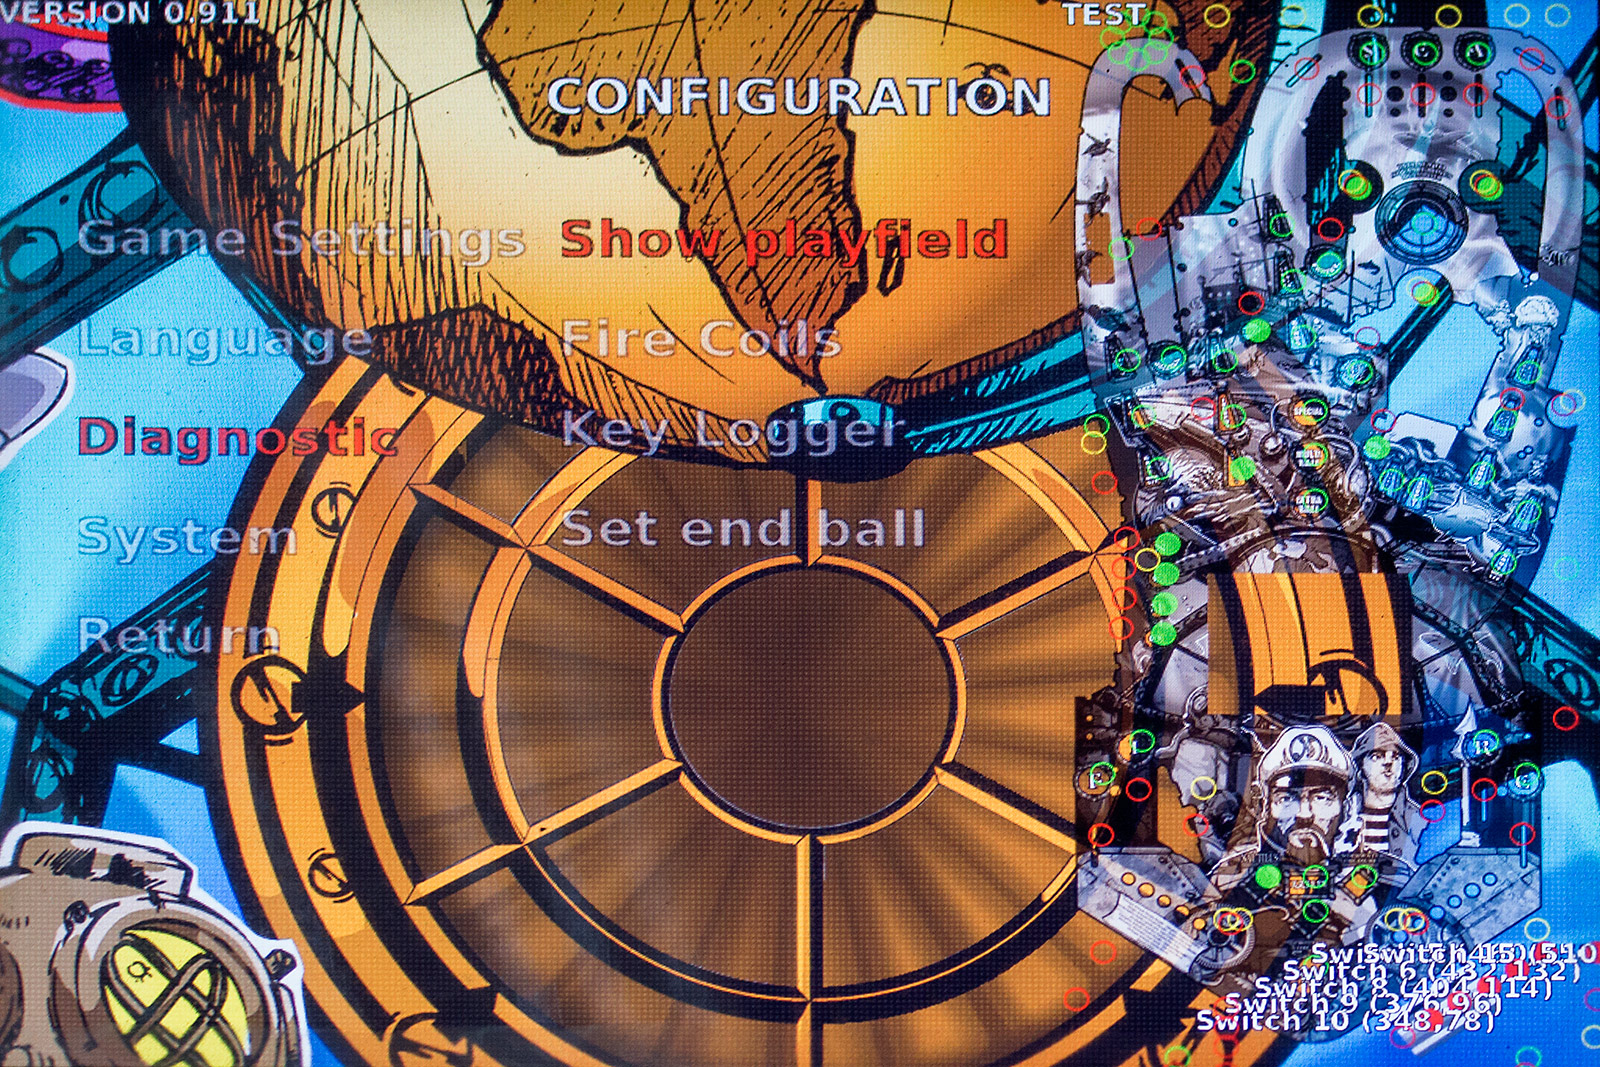
The two buttons on the left are used to diagnose problems, adjust the game settings or depower the game. Nemo runs on PC hardware using a Linux operating system. Pressing the red button shuts down the current session and allows a change of user just like pressing the power button on a PC.
Using any of these options requires a mouse and/or keyboard so this isn't a button you would generally want to press. You can, however, press and hold the button to depower the PC. This doesn't shut down the whole game as LEDs remain lit and the display continues to operate, however once the PC is shut down you can press the button again to start it up again. The black button is the more useful one as that takes us into the diagnostic and configuration menus. We are presented with five menus: Game Settings, Language, Diagnostics, System and Return. For all menu options, the left and right flipper buttons move through the menu options, the ball launch button is the 'enter' key and the game start button is the 'back' key.
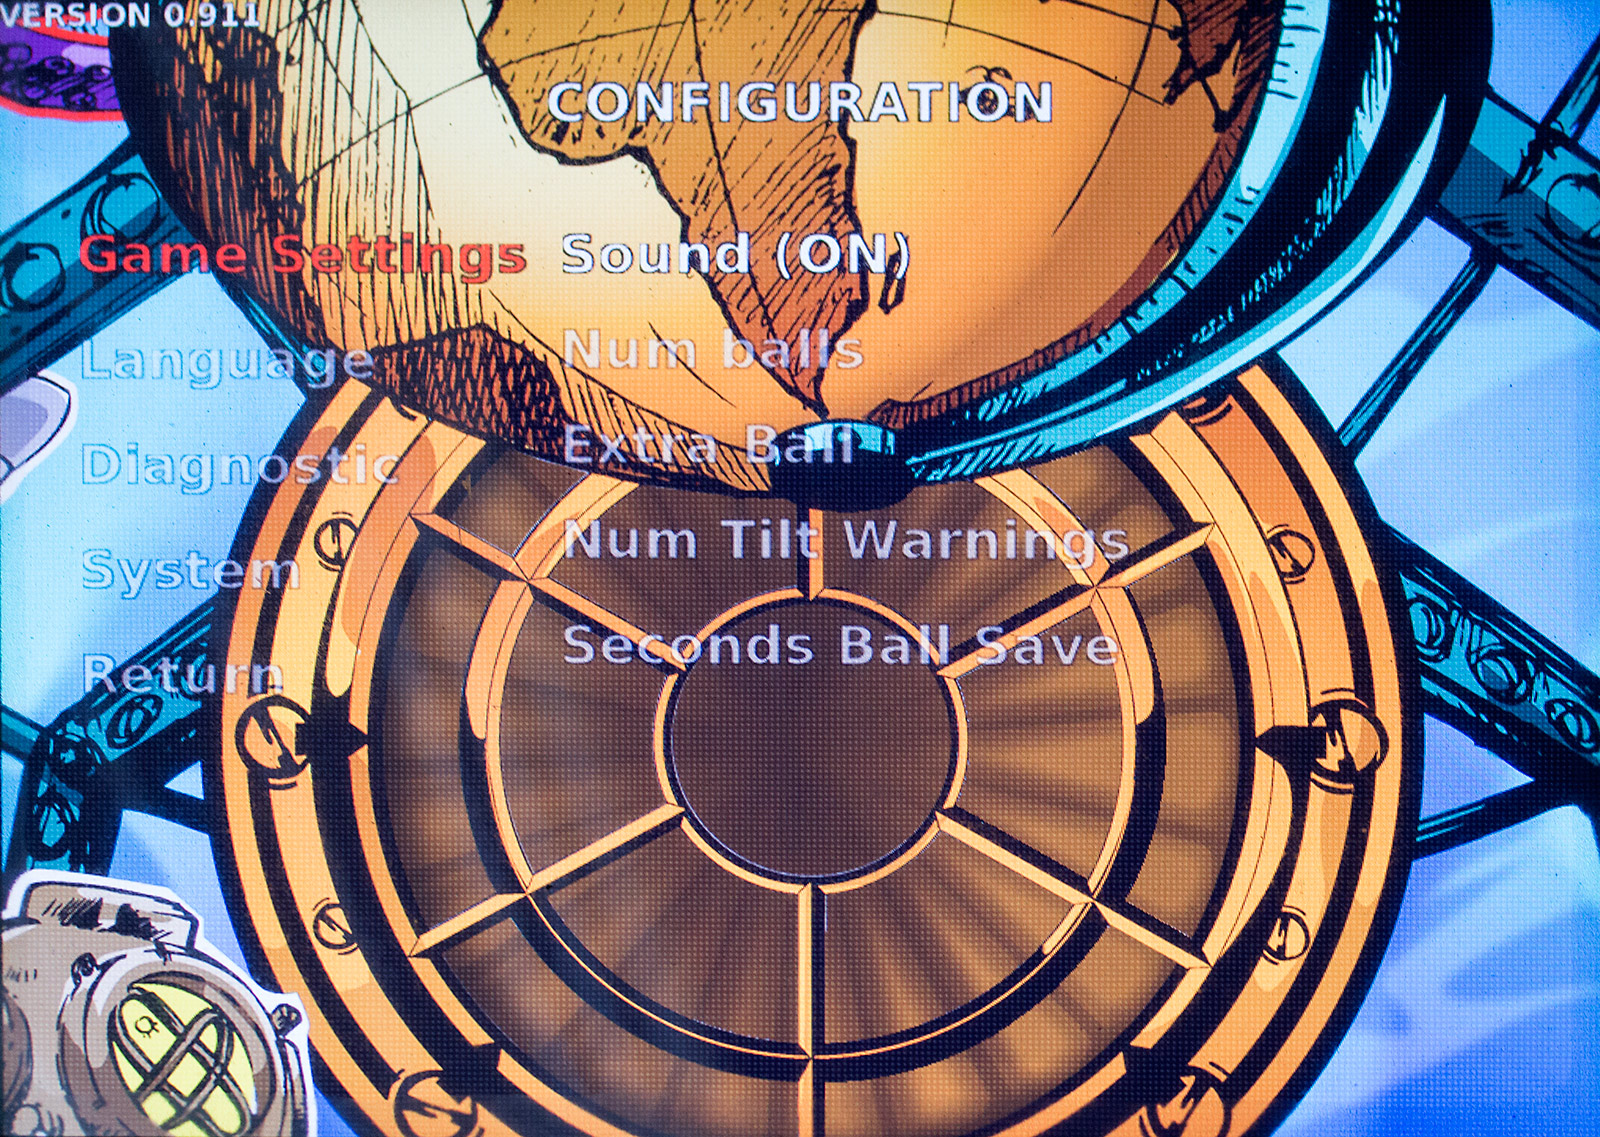
Game settings opens more options to enable or disable the sound, change the number of balls per game, adjust how many (if any) extra balls are allowed, the number of permitted tilt warnings and the duration of the ball saver.
In this version of the software (0.911) quite a few of these didn't work properly, but they have been corrected in the latest release (0.912) which came out around nine days after our review session. The game supports four different languages - English, Spanish, French and German.
The diagnostic tools are limited. The Show Playfield selection adds an overlay to the monitor showing which switches are closed and which are open. As a switch changes state, it is shown on the playfield map, although the map is overlaid over a busy background and the text all overlaps, making it hard to work out what's going on.
Fire coils allows you to energise individual solenoids; again, using the flipper buttons to choose the coil and the ball launch to activate it. The name of the coil is shown, but it is underneath the playfield map and so mostly illegible. Other menu options are to log actions or to end the ball in play. The System menu is where you update the game code, or shut down/reboot either the whole game or just the PC.
Return takes you out of the menus and back to the game. Time to lift up the playfield and take a proper look at Nemo's hardware. The lock bar is a standard Williams-type mechanism, with the familiar latch bolted to the front top of the cabinet above the coin door.
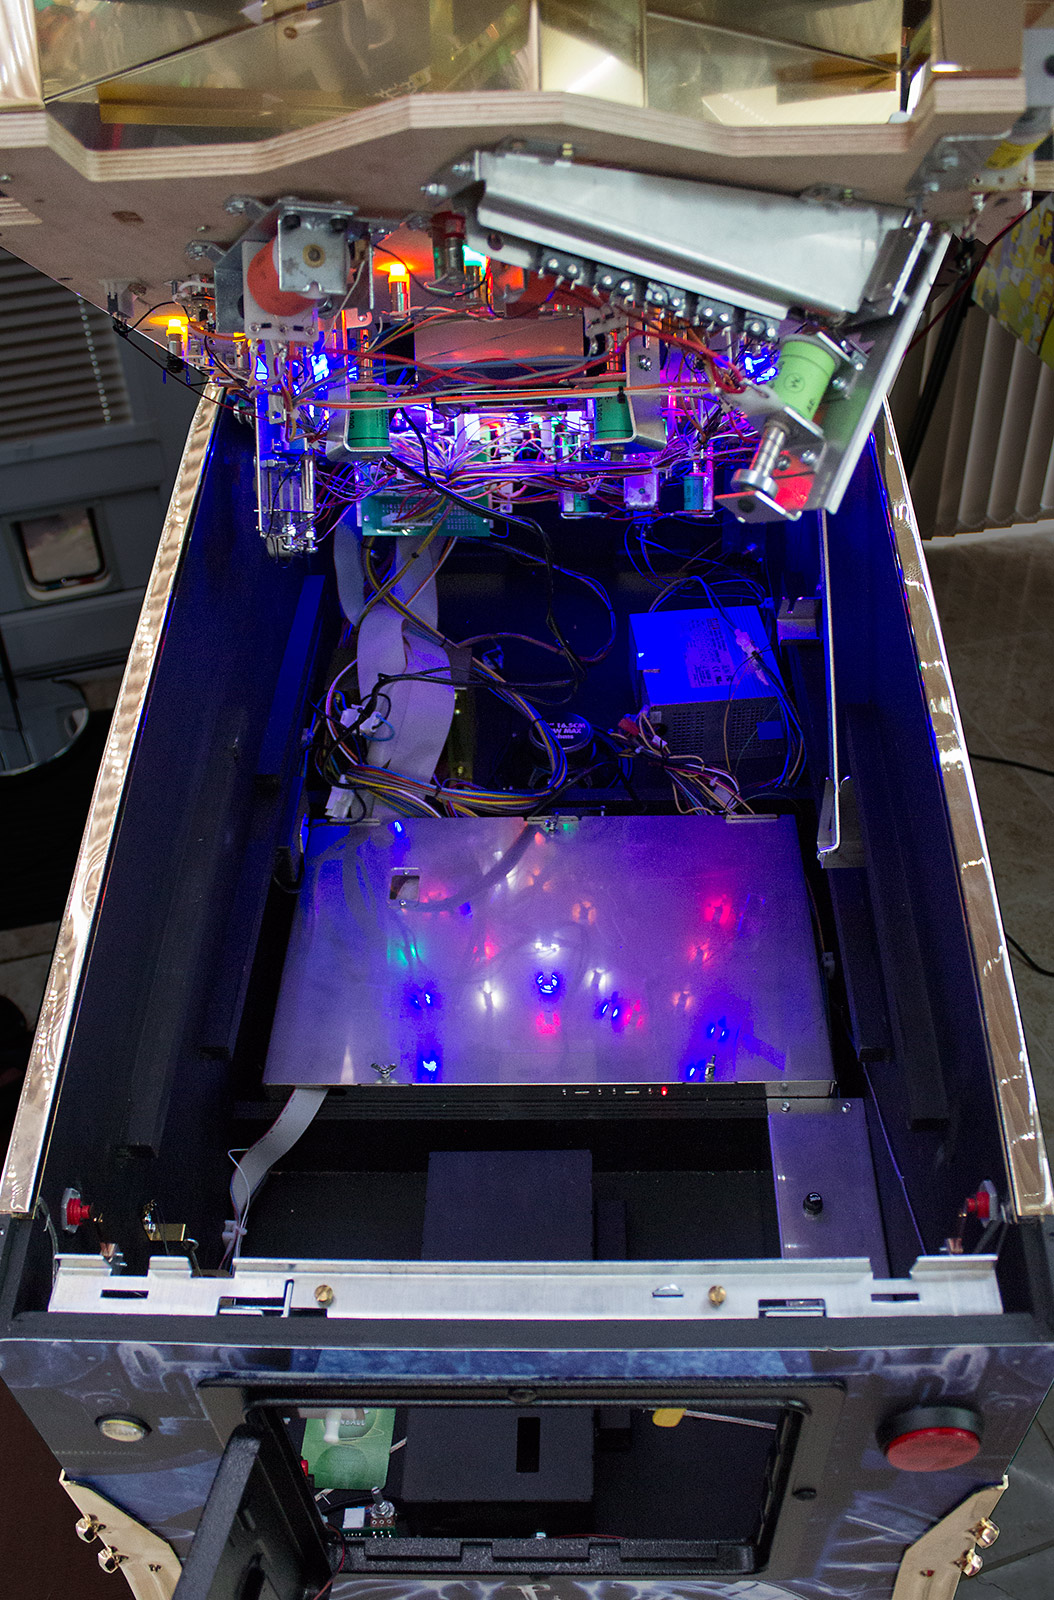
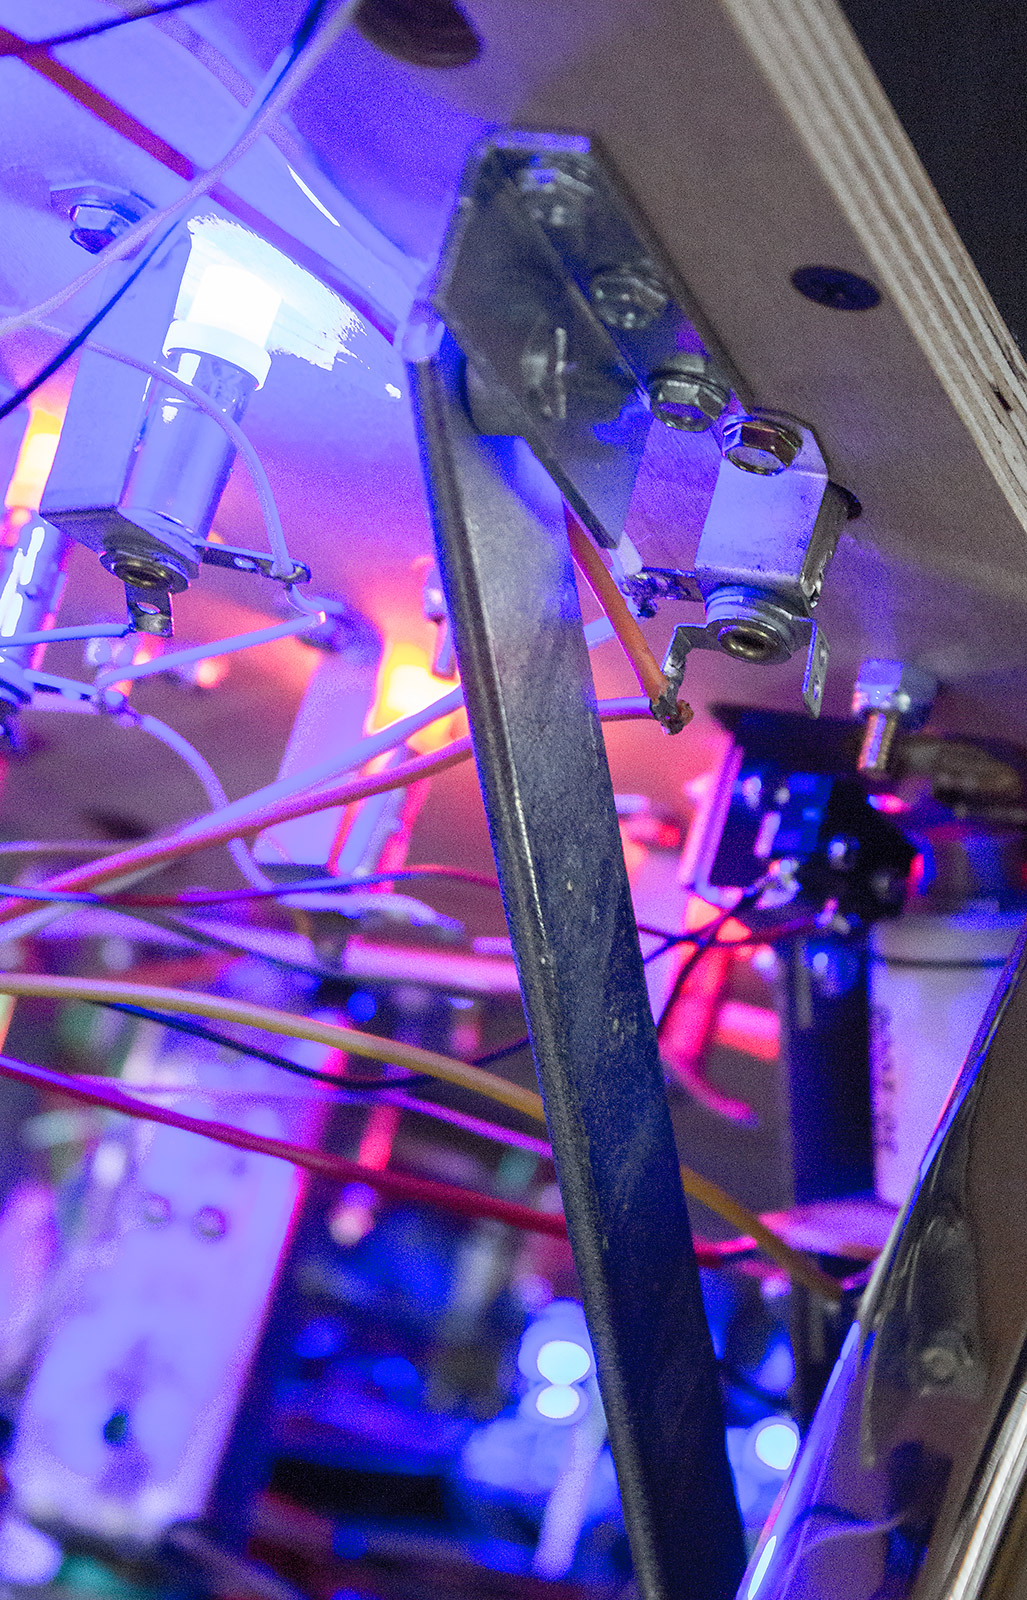
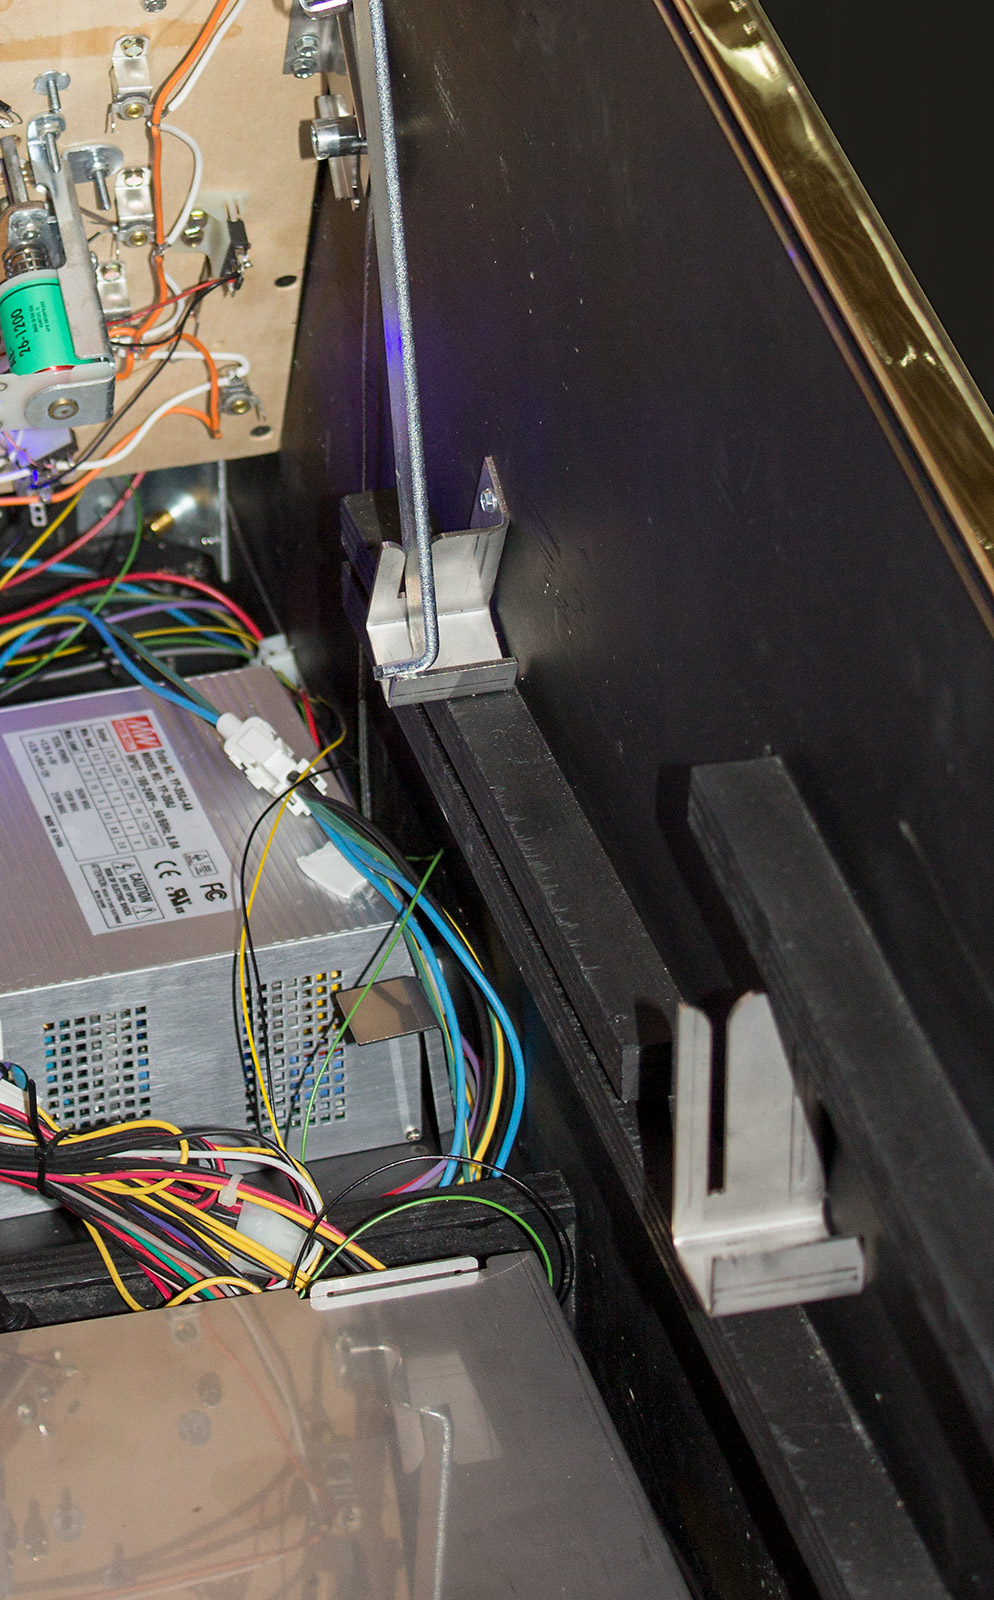
Lifting the playfield, we find that it rotates about a pivot point towards the back, but doesn't slide forward. The playfield can only be lifted so far due to objects in the base of the cabinet getting in the way.
Because the playfield doesn't slide forward, to work on the game you need to use the playfield prop arm. This is attached to the underside of the playfield and can slot into either of two prop brackets for different heights.
With the playfield raised we can see the underside of the playfield.
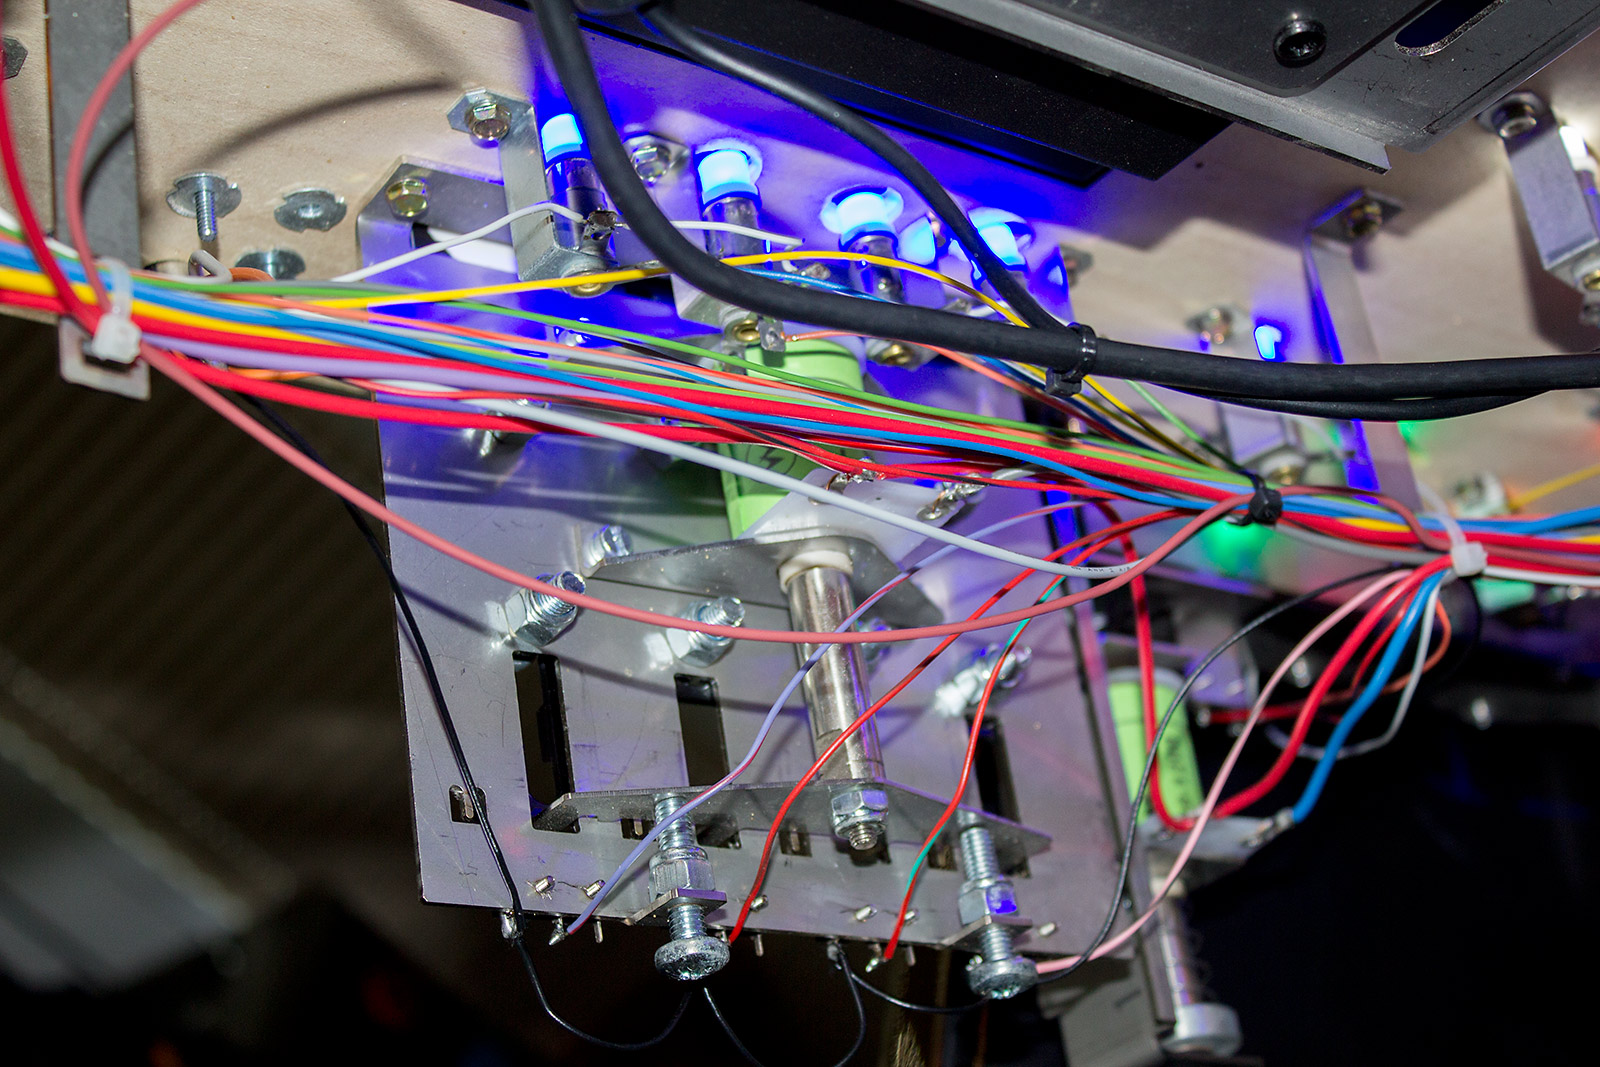
The wiring is relatively straightforward with microswitches used throughout and all the LEDs mounted in lamp-style bayonet sockets.
The coils are a mix of Williams-branded ones and others from APB Enterprises.
The only PCB mounted to the playfield is a bespoke interface board which brings together all the solenoid, LED and switch cables so they can be bundled into one playfield wiring loom.
The playfield isn't the only place we find switches. The cabinet has a few for the flipper buttons, the start and launch buttons, the power and menu buttons, and the tilt bob.
These switches are connected to another interface board which sends them back to the control system on a ribbon cable.
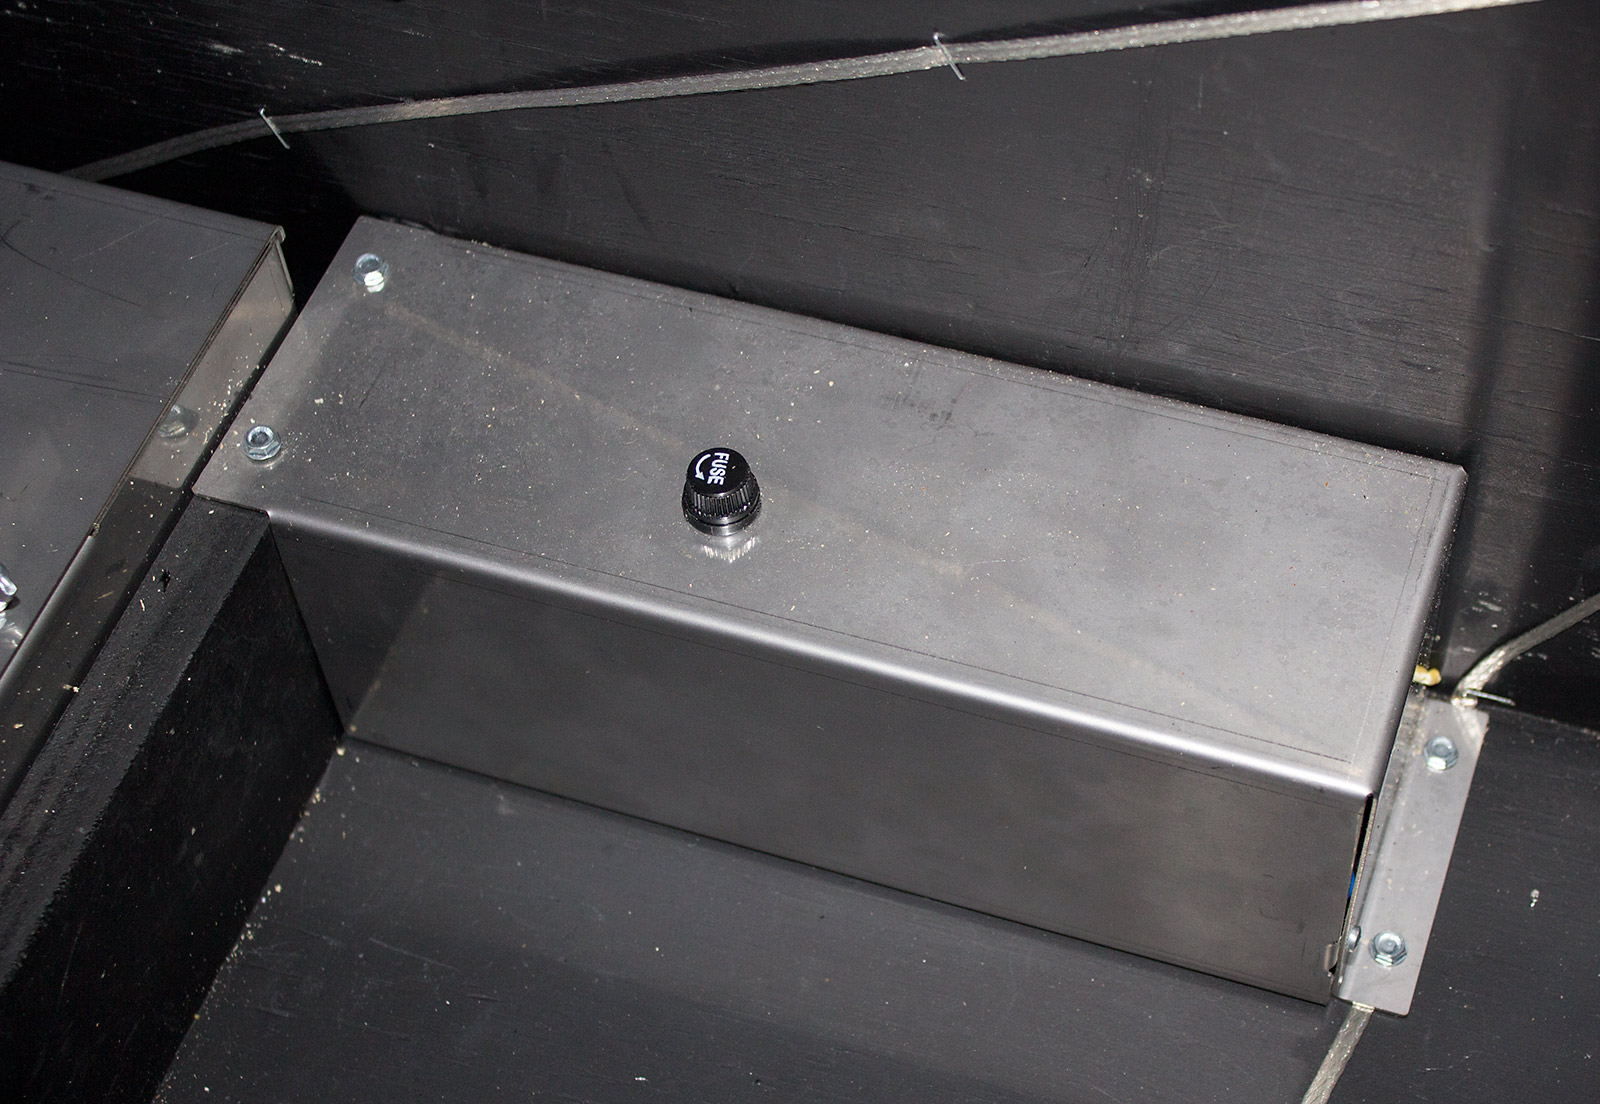
On the right side of the cabinet base is a metal power switch box. This contains the main game fuse and covers the rocker power switch which is accessed from under the cabinet in the traditional place at the front right corner.
Towards the back of the cabinet base we have three more parts of the pinball system. In the middle we find the cabinet base speaker.
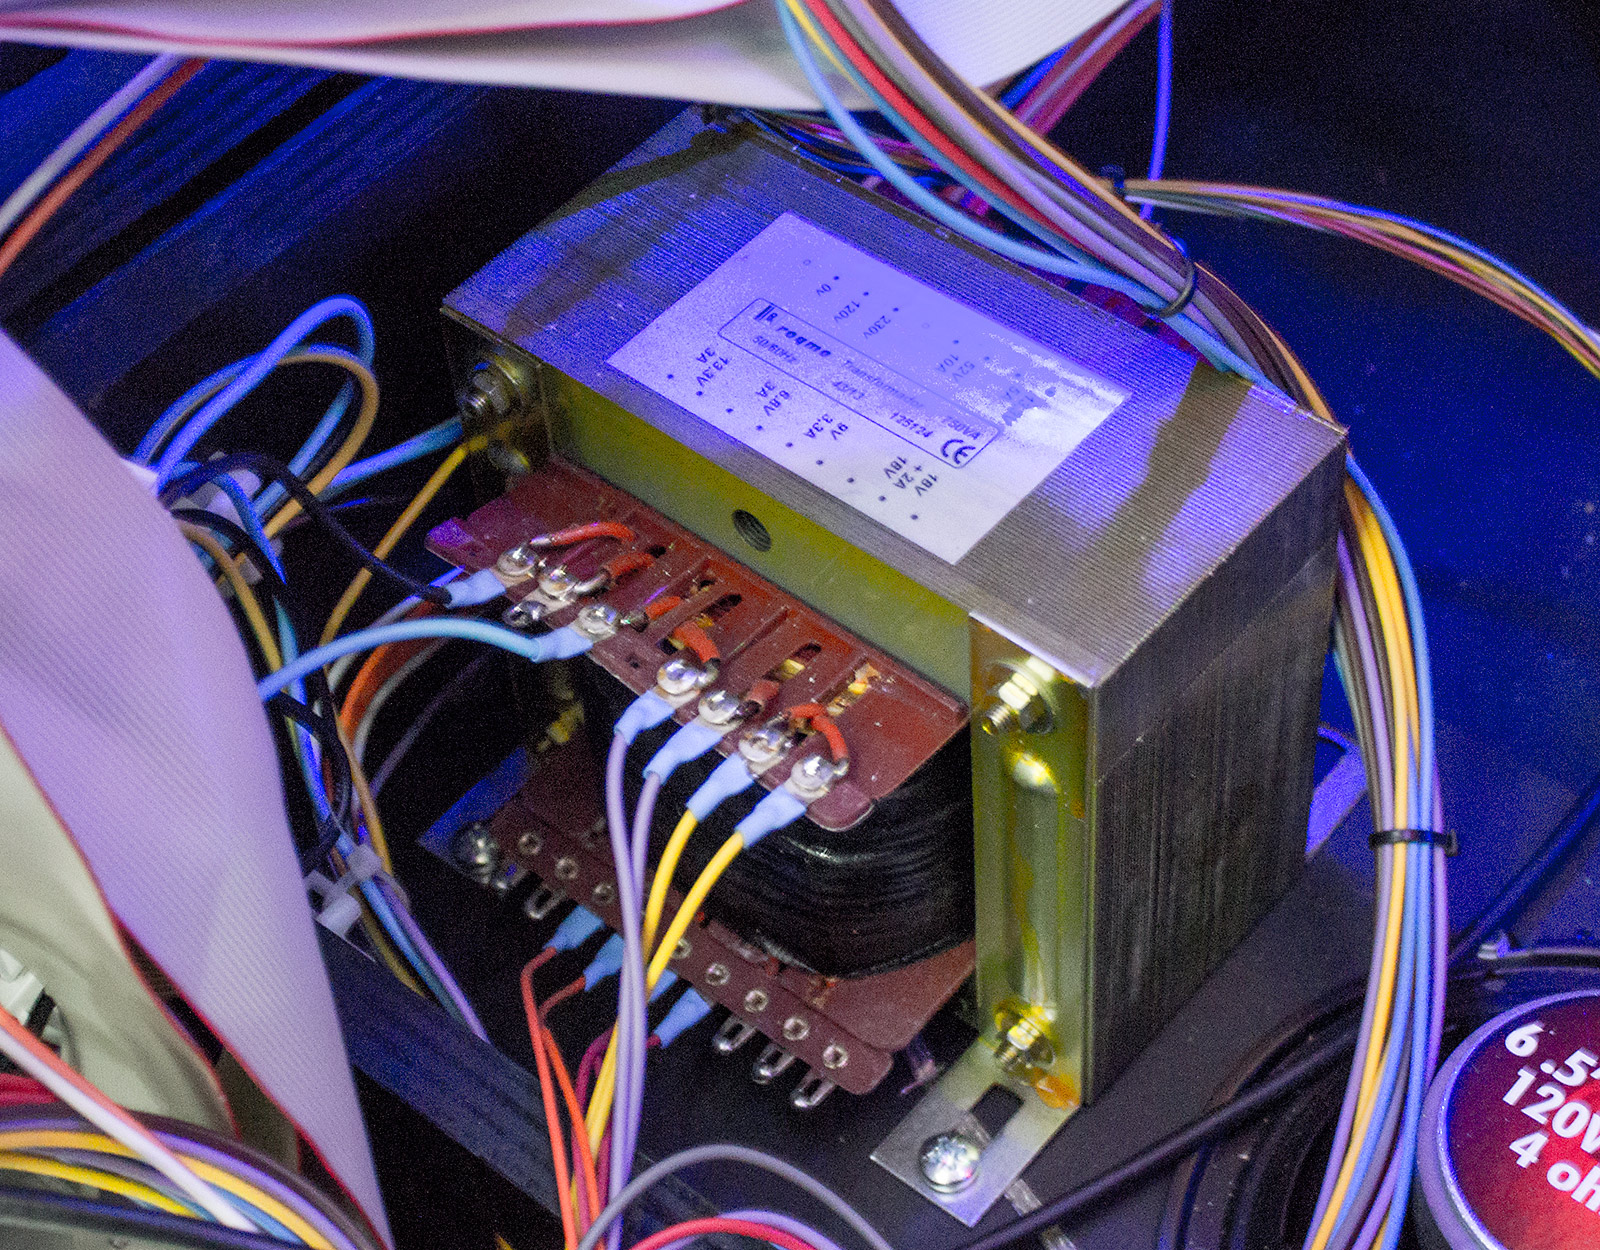
It's not a huge speaker but it's perfectly adequate for this application and more than capable of handline the power thrown at it. To the left of the speaker is a traditional transformer for solenoid power and various other voltages.
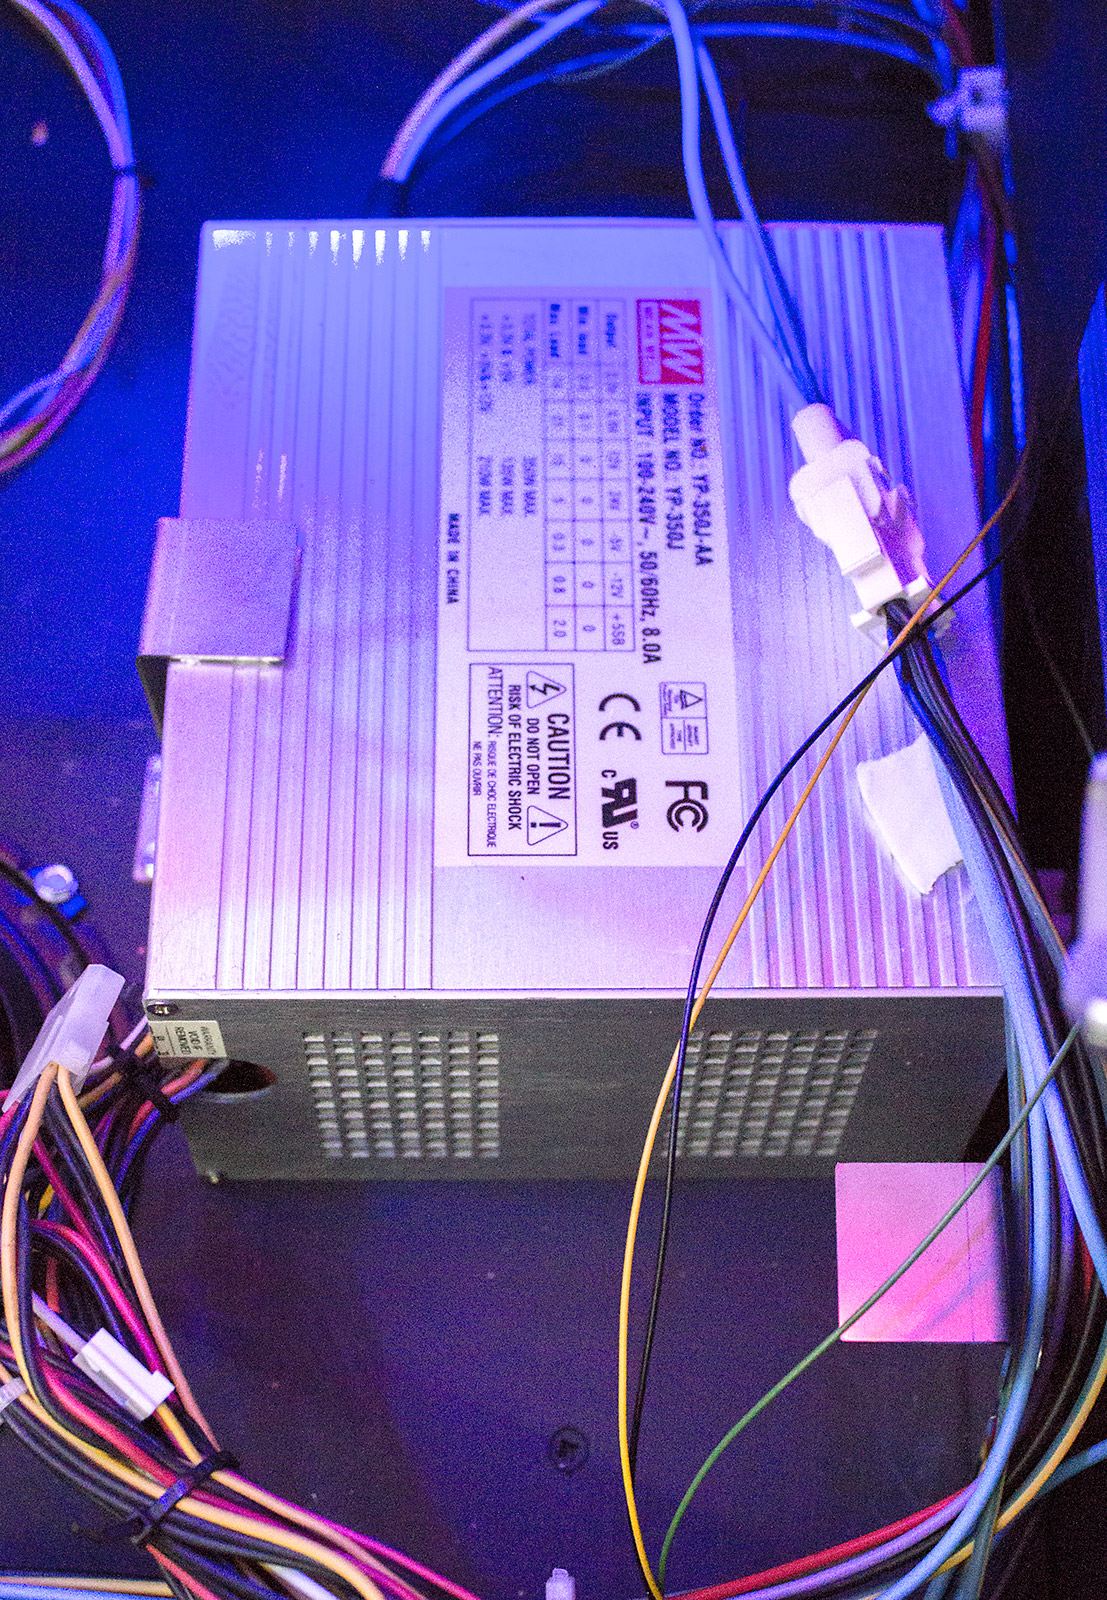
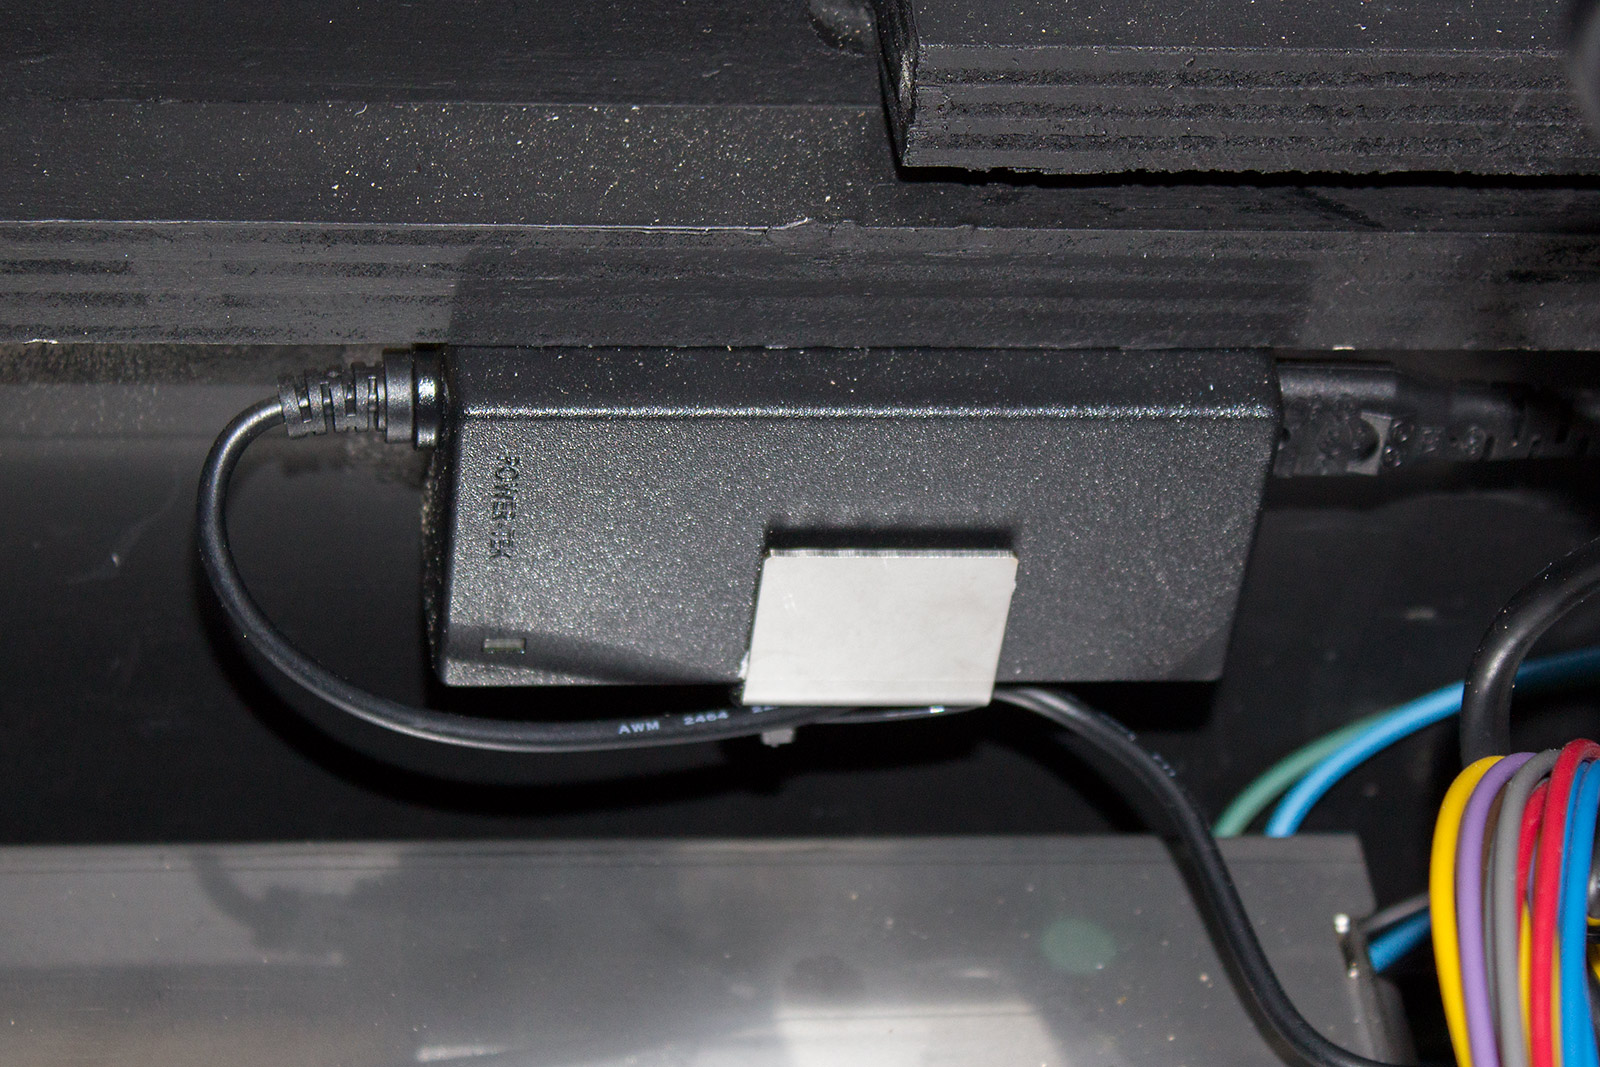
As we said before, Nemo is a PC-based game, so there is a switching power supply for the PC motherboard and this is found to the right of the cabinet speaker.
With the backbox power supply that's three different power supplies so far, but there's one more to go and that's a small switching supply on the left side of the cabinet base which is for the playfield display.
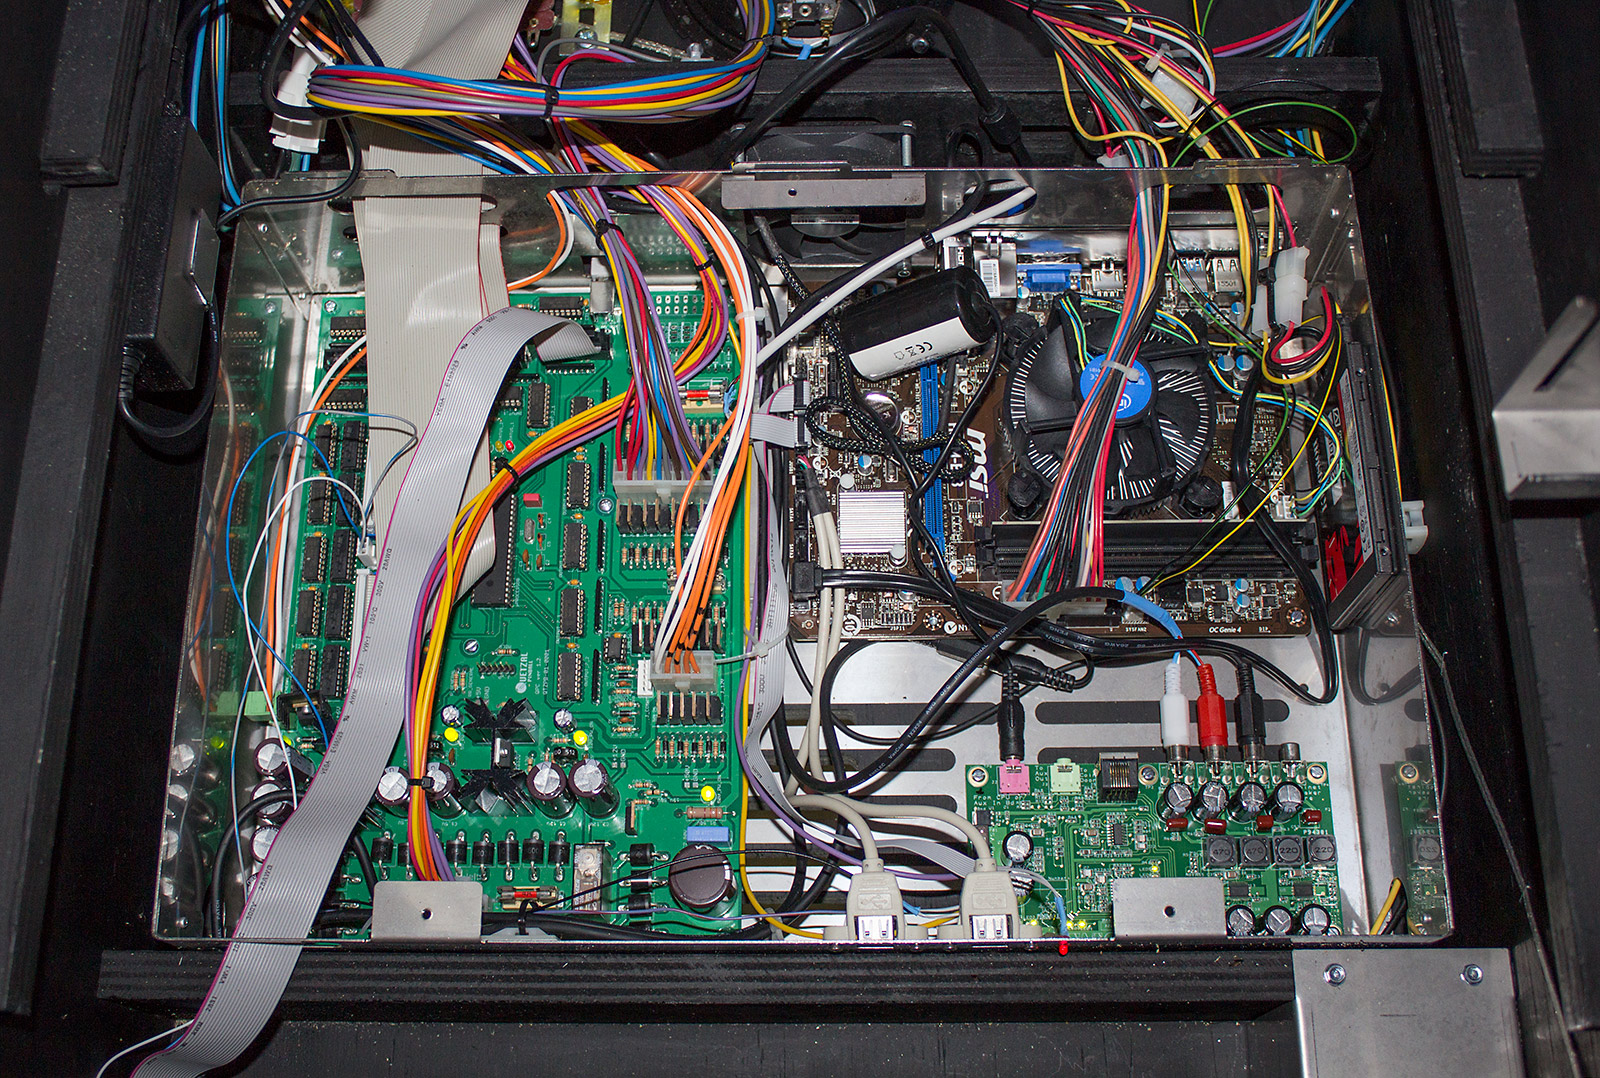
That just leaves the large metal box to examine. This arrangement is quite similar to the Jersey Jack Pinball system which uses a similar metal box to house its control system. As we shall see, the similarities don't end there.
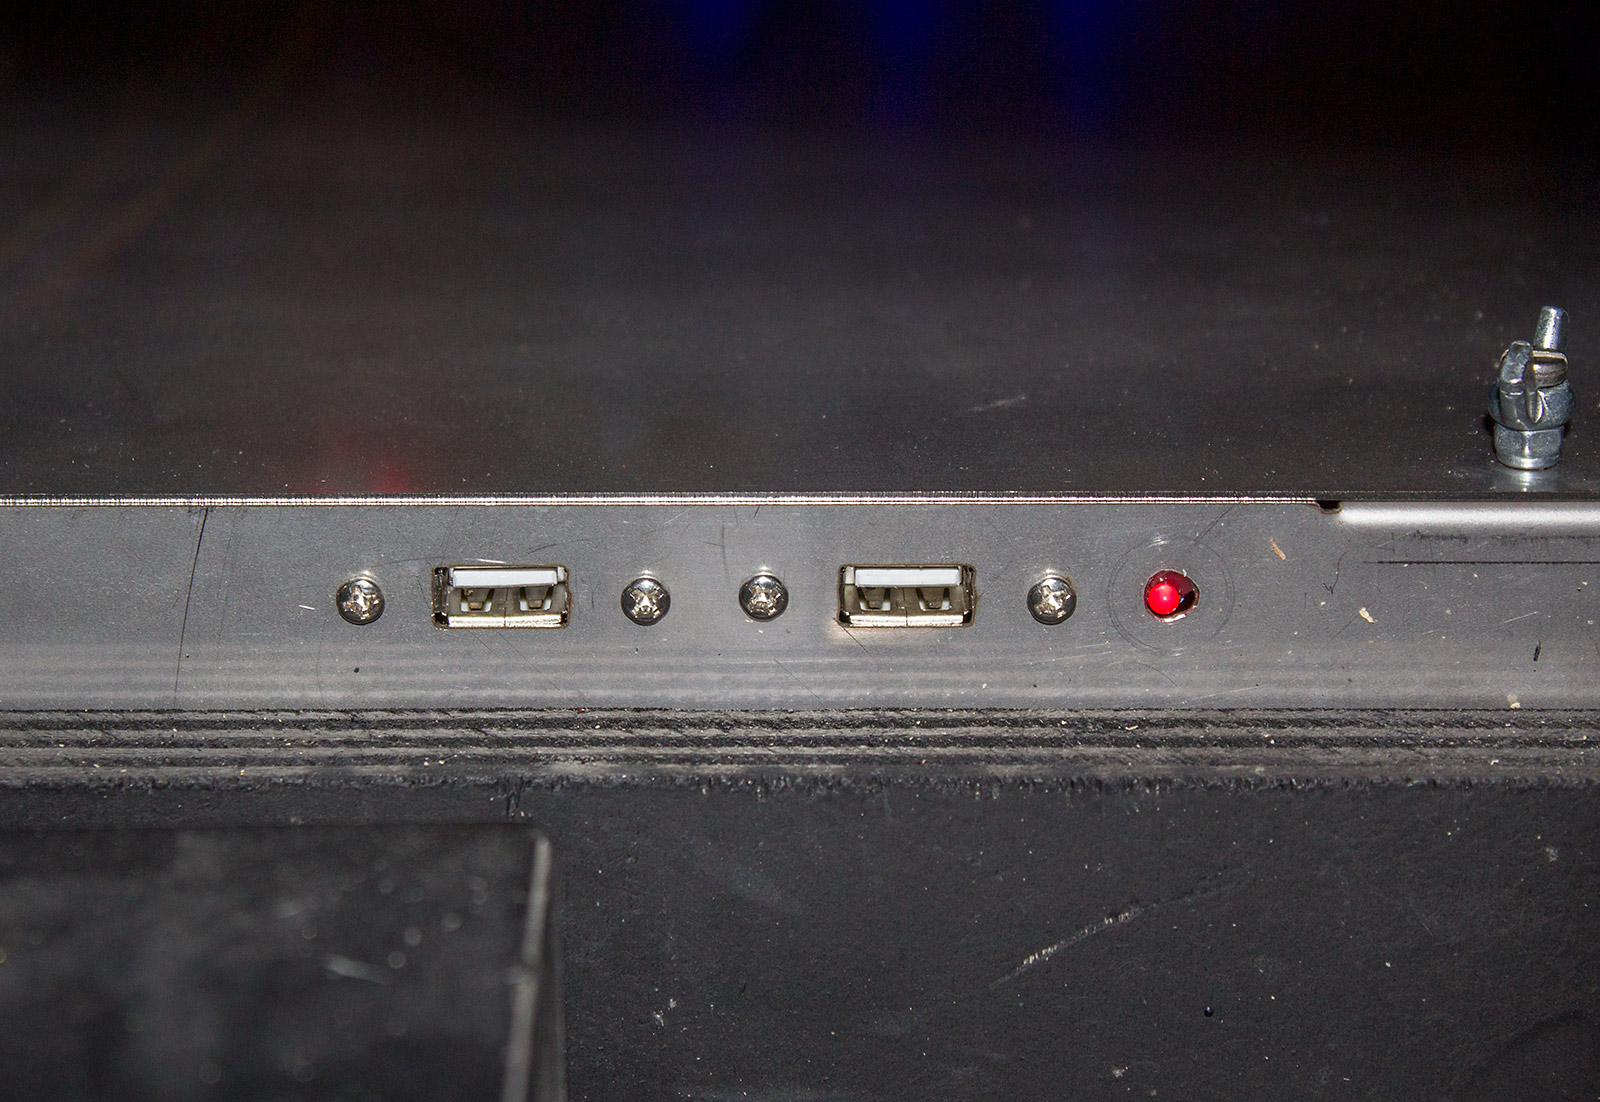
We saw in the menu system how you can update the system software. This is done by plugging a USB stick containing the new code into one of the two USB ports on the front of the box.
To find out what they connect to we need to remove the cover from the metal box.
Inside we find four main components. The first is a Micro-ATX PC motherboard made by MSI, model H81M-P33. This contains on-board graphics for the playfield display and supports any of the 4th generation Intel Core processors, although we didn't pull it to pieces to see which processor was installed.
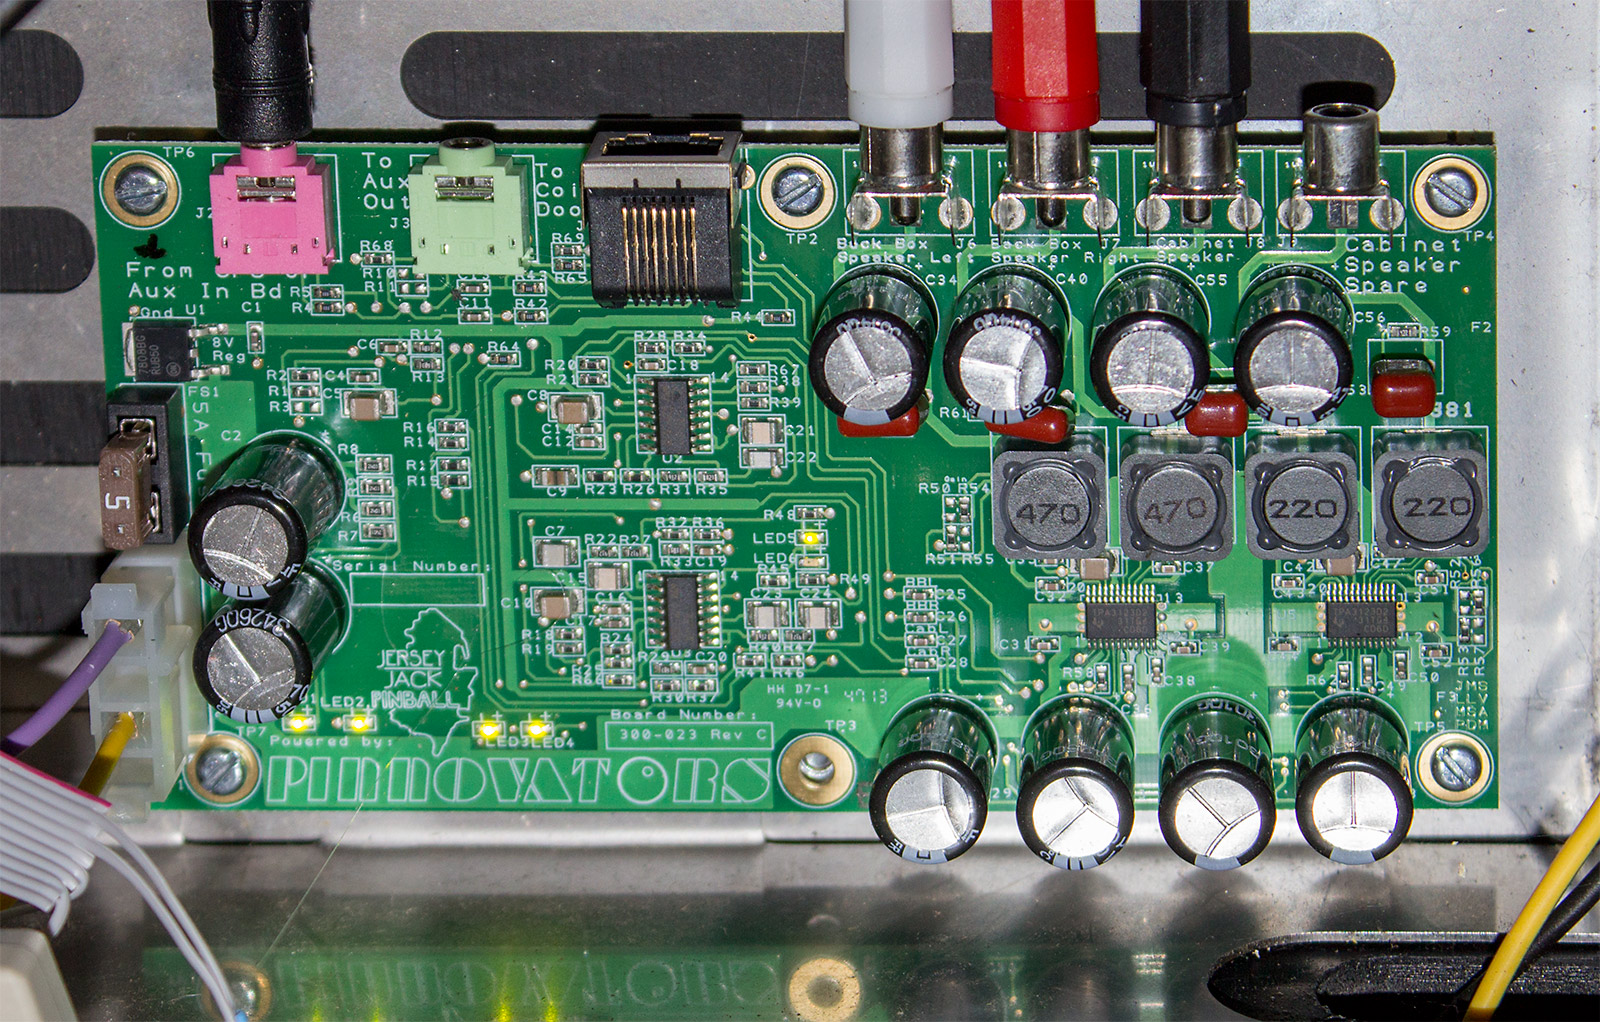
If the metal box and the elements within have more than a passing resemblance to the way Jersey Jack Pinball games are built, the sound board mounted next to the motherboard is the exact same Pinnovators board found in JJP games.
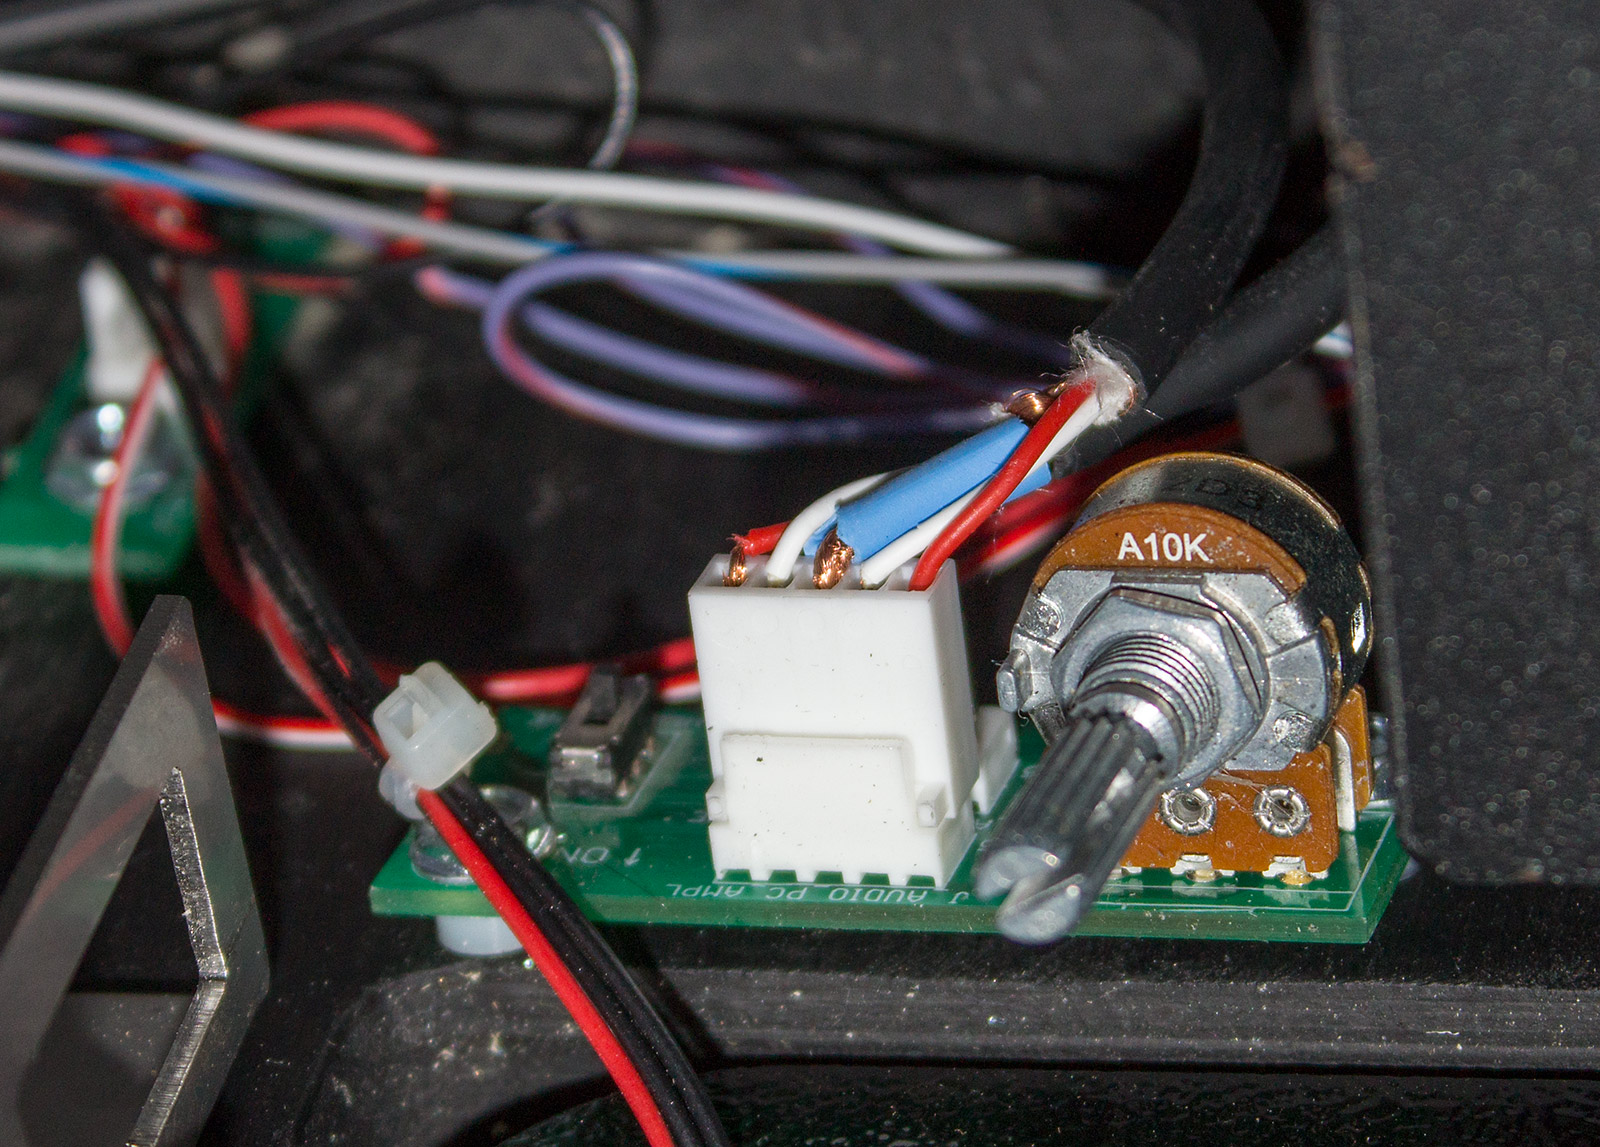
Although the Nemo implementation doesn't use the coin door digital volume control found on The Wizard of Oz and The Hobbit, the connector is on the board if someone wished to add it. The board contains four channels of amplification although only three are used in Nemo for the one cabinet and two backbox speakers. The third item in the metal box is a custom power driver board called the Quetzal Pinball Controller or QPC.
This is where the two interface boards connect and thus where the switch inputs are fed back to the PC, and the LED and solenoids are driven. There is also AC voltage rectification and smoothing to provide some DC voltages.
This is a custom Quetzal board which also provides fuse protection against short circuits.
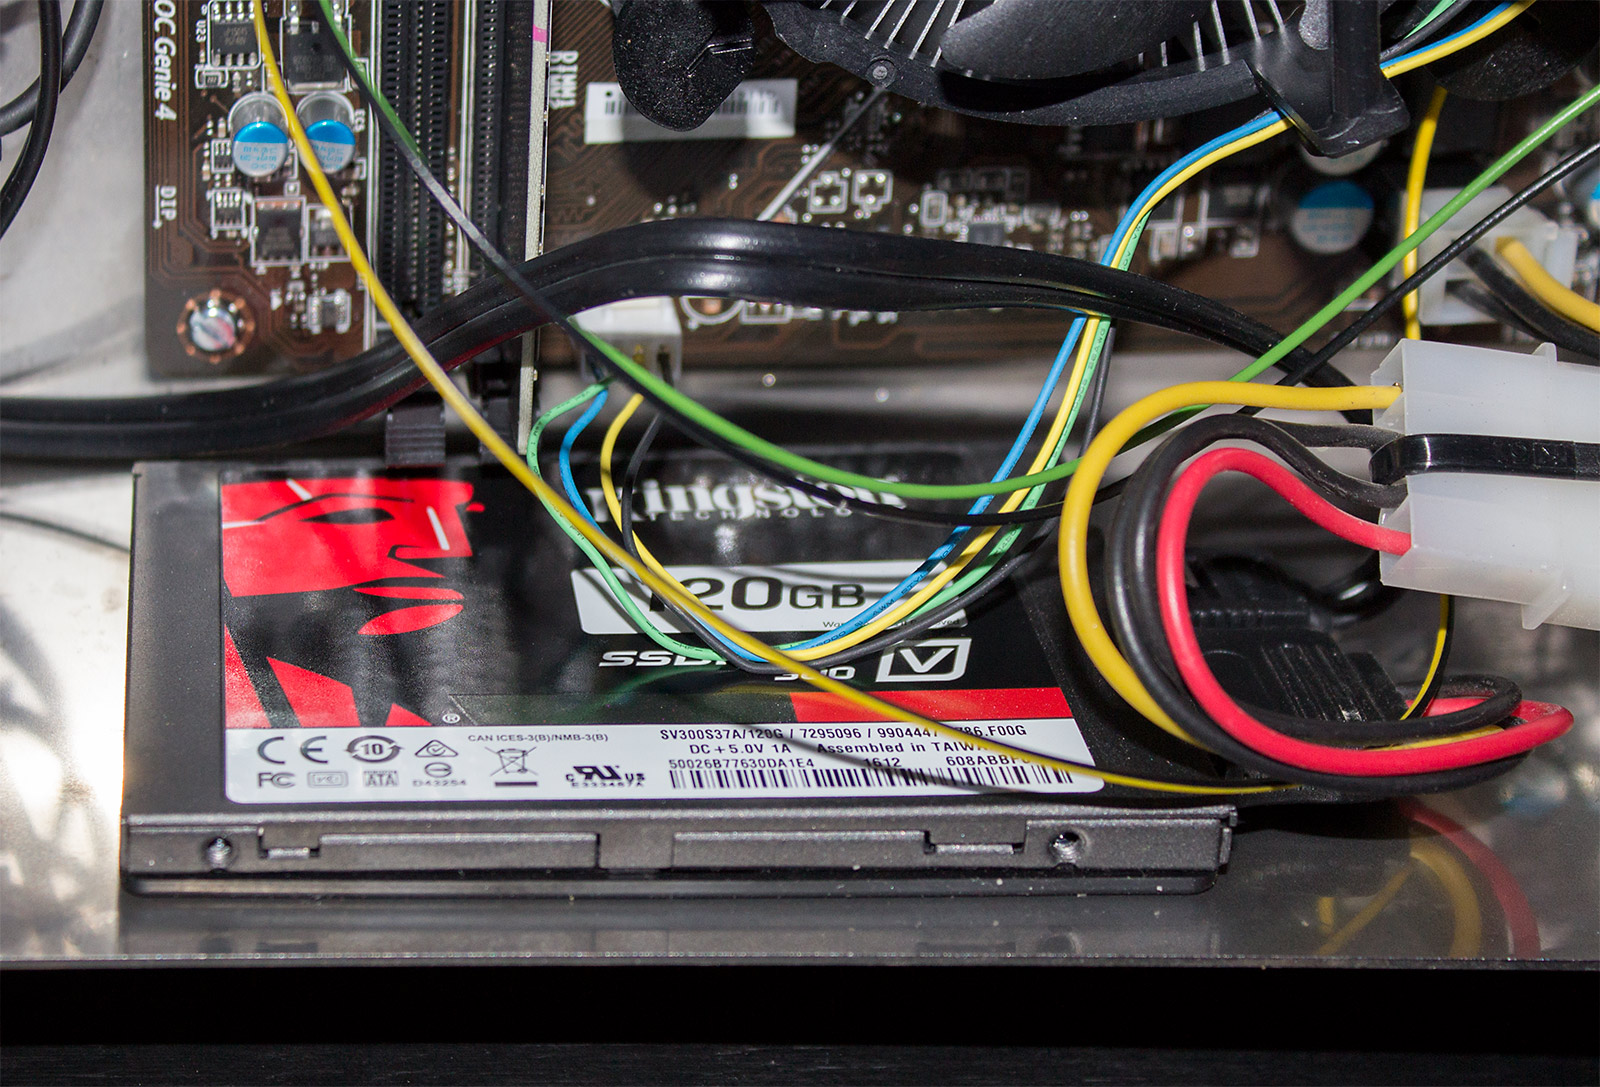
The fourth and final main hardware component inside the metal box is a 120GB Kingston SSD containing the game code and assets such as music and display animations.
The box also contains a small fan to assist with airflow and cooling in addition to the fan mounted on the processor. All of which brings us to the end of our look inside the Nemo game.
When the game is shipped it doesn't come with a manual, but it does have two copied of the game flyer from 2012 and a pair of spare slingshot plastics.
Quetzal's Captain Nemo Dives Again game looks excellent and for the original asking price of between €4,000 and €4,500 provides good value for money. The game is not perfect of course. The software is still quite incomplete and lacks the polish expected of modern games, while the playfield and backbox lighting are both pretty dark. But all these can be fixed. The hardware problems are overwhelmingly of the variety which call for tweaks rather than wholesale redesigns. When Antonio first announced Nemo it was stated it would be open source. Many things have changed with various aspects of the design and specification of Nemo in the intervening five years, but it could make an interesting project to either enhance the existing rules or even create an alternative ruleset which owners could download. Antonio is not finished yet, though. He is both building the remaining games and continuing to develop the software based on customer feedback. It's great to see that at least one of the boutique pinball manufacturers is delivering their contracted games without all the drama and heartache experienced elsewhere.
We'll be back with another Pinball News In-Depth Review very soon.
Thanks for reading our latest In-Depth Review. You've seen all the details of Captain Nemo Dives Again, so what do you think? Is it a game you'd like to play, or even own? Are you one of the fortunate thirty who bought the game? What do you think of it after five years of development? Share your thoughts with us here: Your comments:
© Pinball News 2017 |