 |
|
DMD EXTENDER |
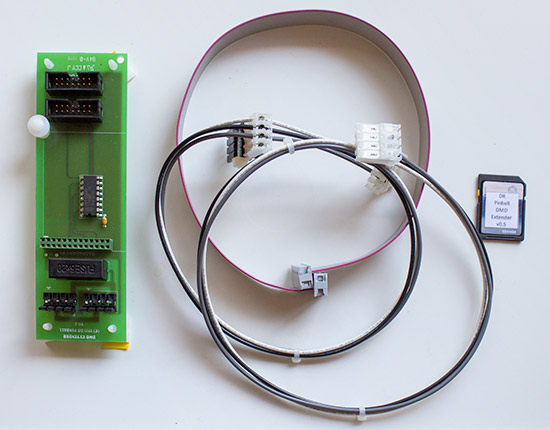
Date: 10 May, 2013 Video coverage of pinball play is becoming increasingly popular. Overhead HD cameras coupled with a large screen monitors or projectors give tournament audiences the opportunity to marvel at the skills of the top players. But while a bird's-eye view is an ideal way to present the flipper skills, ball bounces and shot angles, it's far from ideal for seeing the players' scores and the display animations for the start of, and progress though, the game's features. Unfortunately, the dot matrix display is not fed with a video-friendly signal, so if you want to get those dots outside the confines of the backbox, you're going to need to do some clever decoding and re-encoding to turn it into a regular TV signal. Which is just what the DMD extender does. The kit, as supplied from Dr. Pinball in the UK, contains four parts.
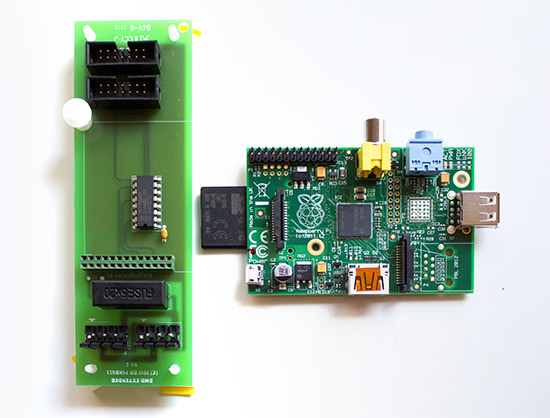
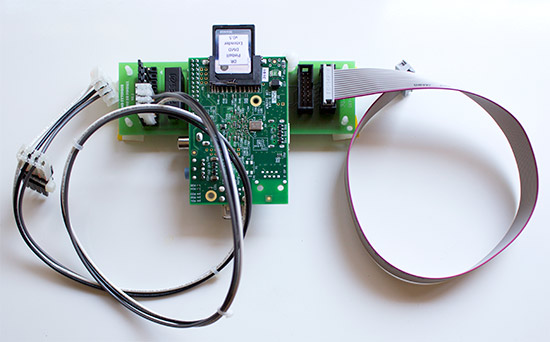
The first, and most important, is the DMD Extender circuit board.
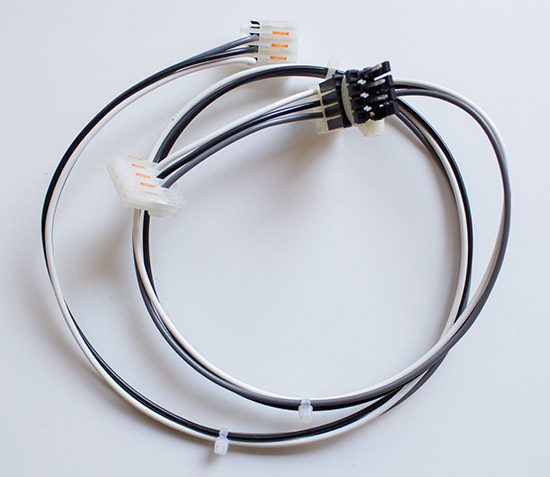
This plugs in between the DMD output of the AV board in the pinball and the display's input, so it comes with a DMD cable to connect it to the display. Power for the board comes from one of the connectors on the pinball's driver board and a cable is supplied for this. But because the driver board's connector may already be used by one of the game's features, the cable includes a removable pass-through connector.
The fourth item is a flash memory SD card containing the software and the configuration settings. As you might have noticed, the DMD Extender board isn't exactly packed with processing power, containing just a single six-way buffer IC. So to manage the decoding and re-encoding of the dot matrix data, the DMD Extender employs a separate micro-computer in the form of the Raspberry Pi.
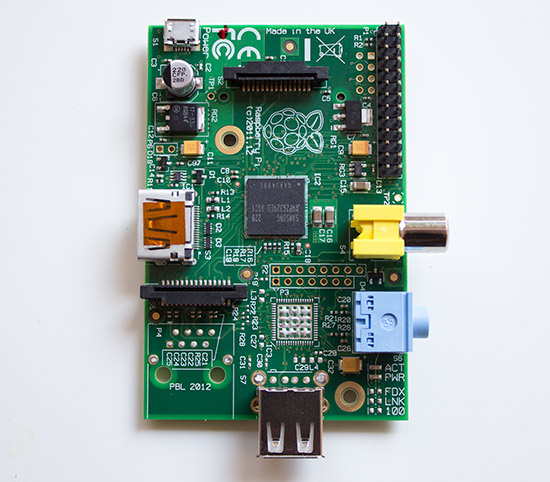
The Raspberry Pi is a small, cheap, multi-purpose computer which comes with an SD card slot, a micro USB connector, HDMI and composite video outputs, a 700MHz ARM processor and 256MB of RAM. All this costs just £19 ($29, €24) or $25 in the US, but since the Raspberry Pi isn't supplied as part of the DMD Extender kit, you'll need to buy this yourself. The SD card plugs into the Raspberry Pi and contains the application, the configuration file and optional image files.
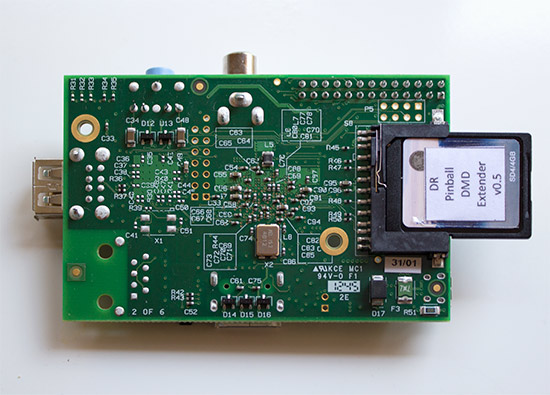
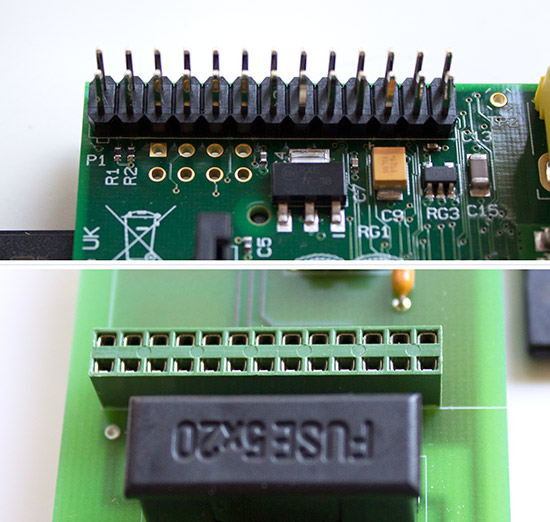
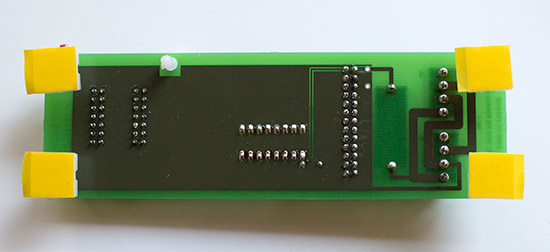
Then the Raspberry Pi has to connect to the DMD Extender board.
Connection is made using the 26 pin connector - male on the Raspberry Pi and female on the DMD Extender.
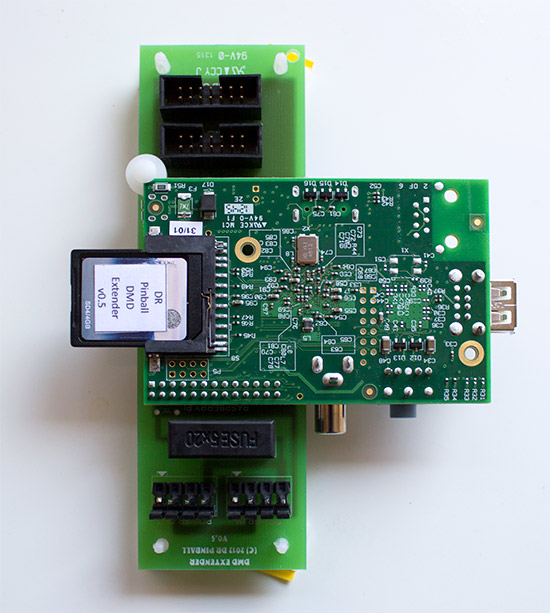
The Raspberry Pi flips over and plugs into the DMD Extender's socket.
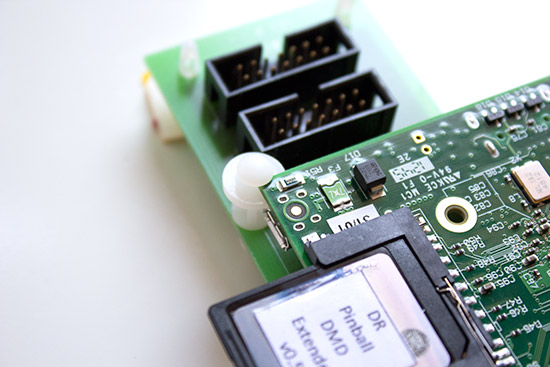
A white plastic post on the DMD Extender provides additional support to ensure the connectors aren't stressed by vibrations once installed inside a pinball machine.
Plugging in the cables completes the assembly stage.
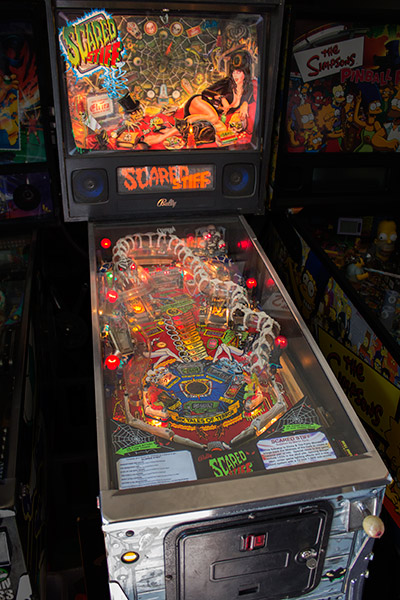
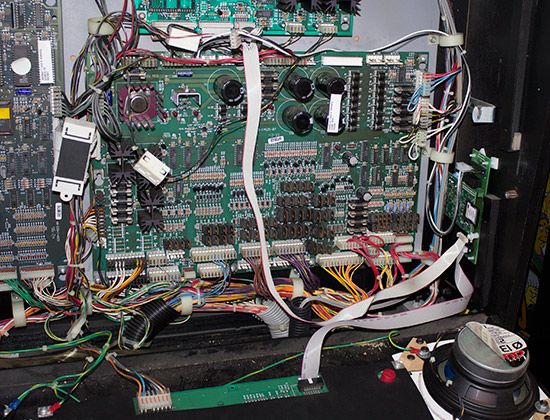
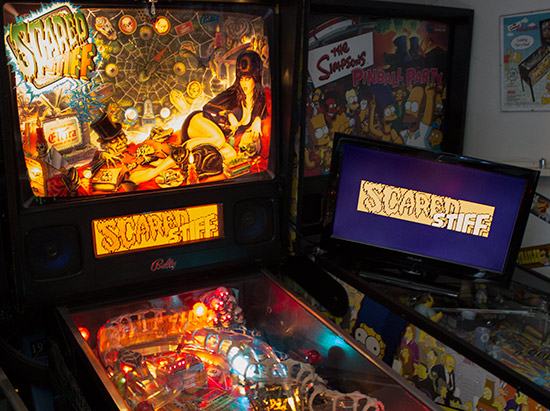
Now it's time to install it in a real machine, and for this review we eschewed our usual High Speed 2 test model and instead opted for our Scared Stiff on the basis it had more challenging dot matrix effects.
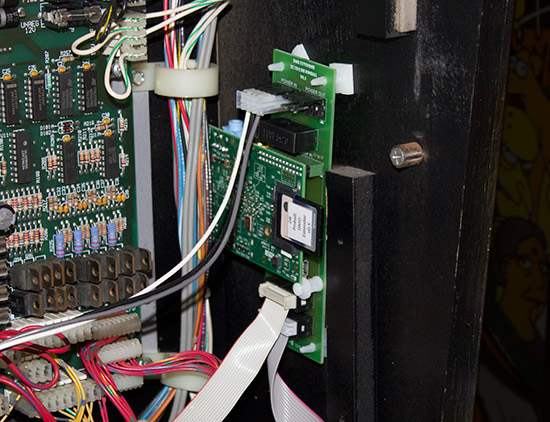
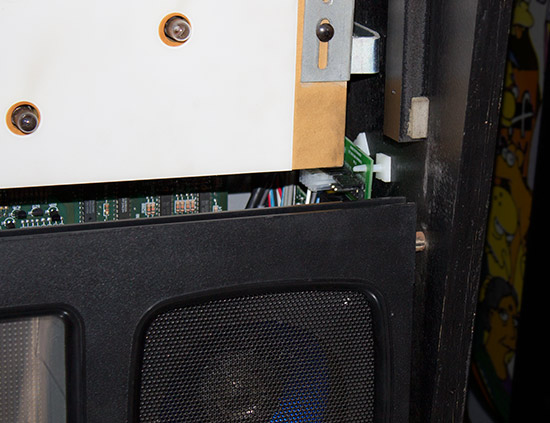
The recommended location for the DMD Extender is on the inner right side of the backbox, so we went with that suggestion. The DMD Extender board comes with four self-adhesive feet.
These appear to be enough to hold the two boards in place and make the system easily removable without causing any marks or mounting holes. We put the boards so that the SD card can be easily removed, while ensuring they didn't interfere with the speaker panel or backbox lamp board. The unused end of the new DMD cable was plugged into the display, while the old cable end plugged into the DMD Extender's 'DMD In' socket.
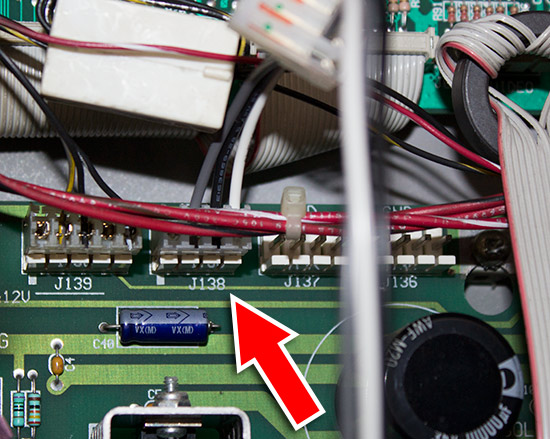
Power for this WPC-95 game came from connector J138 on the power driver board. This isn't used for Scared Stiff, so it was simply a matter of plugging in.
After a little cable tidying, everything was in place.
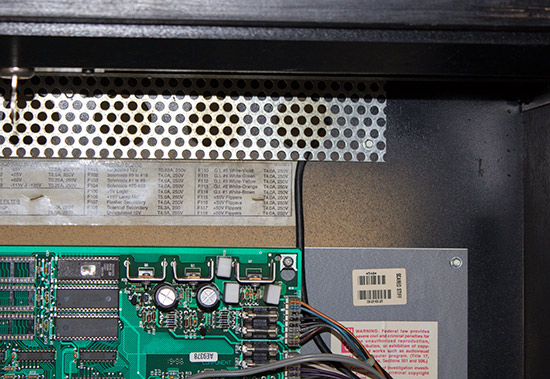
Well, almost everything, because there was still the matter of attaching a monitor using the HDMI connector on the Raspberry Pi. Naturally the connector was in the most awkward place possible and totally hidden from view, so if you're installing a DMD Extender, remember to plug in the HDMI cable before mounting the boards. Anyway, we managed to plug in a cable without too much difficulty and then thought about how we were going to run it out of the backbox. Yeah, not a lot of planning went into this. Despite that, it proved easy to unscrew the metal mesh covering the ventilation holes and run the cable through one of these.
The speaker panel was replaced carefully, to make sure it didn't snag the new boards.
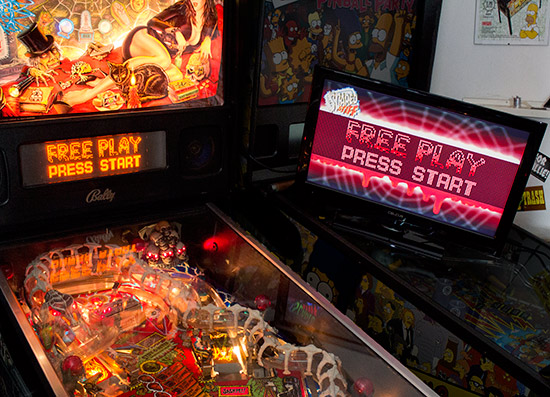
After replacing the translite, it was time to test the new addition. A 22-inch widescreen TV with an HDMI input was used. Although there are several configurable settings available, it was first tested with its default setup.
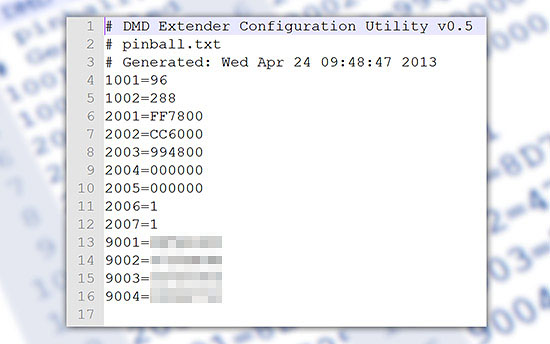
The monitor was giving a pretty good representation of the colours of the DMD but the image wasn't filling the screen width and it should be possible to make it more interesting, so it was time to explore the configuration settings. There are two methods for making adjustments to the DMD Extender's settings. The first is to use a text editor and just change a few values.
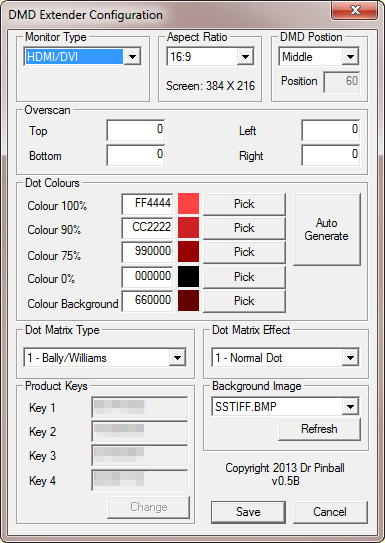
There aren't many setting to adjust. The first two define the type of monitor and the vertical position of the display on the screen. Then come colour settings for the four levels of brightness, followed by the background colour. The last two tell the software whether this is being used on a Bally/Williams game or a Stern/DE - since they write to the dot matrix display in different ways - and whether to use a horizontal or vertical scan-line effect or not. The last four settings (which have been obfuscated) contain the product key of the system. All these settings are documented in the PDFs on Dr. Pinball's website. But if you can't resist a pretty interface, there is a Windows app which provides a graphical representation.
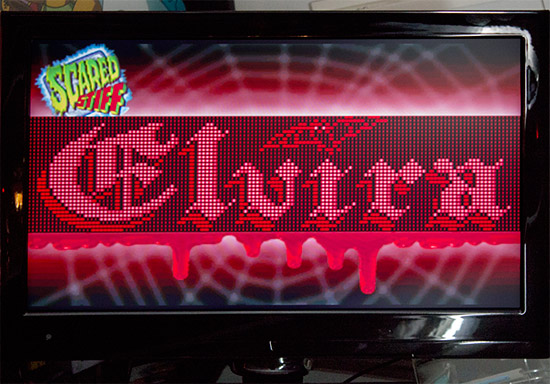
One of the sections you might have noticed in the configuration tool is the Background Image selector. This allows you to add a full screen picture around and behind the display image. The resolution of the DMD Extender display on a 16:9 monitor is 384 pixels wide x 216 pixels high, with the display section being 96 pixels high. Using that information, we made a test backing image for our Scared Stiff and made the background colour dark red to provide an overall dot pattern.
The native colour resolution of the Raspberry Pi is only 16 bits per pixel which makes gradients look a little stepped, but - as you can see above - it's not a problem at normal viewing distances.
Of course, showing the dot matrix display's image on an accompanying side monitor isn't necessarily all that useful, but you can do more with the DMD Extender's output once it is carried through an HDMI connector. That could include projecting on to a side or back wall, recording your new high score game, or even streaming the display on the web. The LCD monitor could even be used to replace the existing DMD entirely. Recent developments have seen the DMD Extender supporting the rare and expensive 192x64 displays used in selected Sega games, giving owners of games such as Baywatch, Batman Forever, Frankenstein and Maverick a cheaper and more readily-available alternative. The DMD Extender is available from Dr. Pinball in the UK for £55 including delivery in the UK, or £62 (€73.40, $94.70) delivered to the rest of Europe or the US. The Raspberry Pi is an additional £19 ($29, €24) or $25 in the US.
© Pinball News 2013 |