 |
| IN-DEPTH REVIEW PART ONE |
|
Hello and welcome to this first part of the Pinball New In-Depth Review of Stern's Transformers game. As usual, in this part we'll look at the game's artwork, hardware and playfield features. Then in the second part we'll examine the rules and give our thoughts, conclusions and ratings to the game. Transformers has been an unusual game for Stern. For a start, it's the first game from George Gomez where he has been VP of Game Development, which presumably gave him a little more control over the game's production and development, as well as the marketing and the different variants he could offer. Those variants have produced the greatest number of Limited Edition models so far seen from Stern. The three LE versions - Decepticons, Autobots and Mixed - combine with the regular Pro model to give four flavours of the game. We'll mainly examine the Pro model - the one you'll see on location - but we'll note some of the differences between the Pro and the LE models along the way. So, Transformers. Those who missed out on the comic books, the Hasbro toys and related cartoons on TV and at the movies in the mid-to-late '80s and early '90s, must surely be aware of the theme from the three more-recent destruction-fest movies (Transformers, Revenge of the Fallen and Dark of the Moon) directed by Michael Bay and released since 2007. There have also been more recent comic books and various spin-off animated TV series and computer games. If you somehow managed to dodge all that marketing and remain blissfully unaware of the premise, it's a simple one; two warring races of robots - the Autobots and the Decepticons - bring their battle to Earth. There have been many variations (some directly conflicting with others) of where they came from, why they end up on Earth, and what they do when they get here, but in summary, the Autobots are on the side of us Humans, while the Decepticons want to wipe us out. Autobots are led by Optimus Prime while Megatron is the leader of the Decepticons. Both sides can change their form and take on the shape of mechanical devices of the same approximate size, although even that limitation is removed later on in the comic books. One other thing is the colour-coding of the two races. There's some confusion about which colour should represent which, since the Autobots always have blue eyes but generally use red to brand themselves, while Decepticons have red eyes but use blue. In Transformers the pinball, Decepticons are violet and Autobots are crimson. Clear? Well, Decepticons are also on the left side of the game and Autobots are on the right, which is probably easier to remember. So with the back story explained, let's get on to looking at the game, starting with the cabinet and backbox artwork.
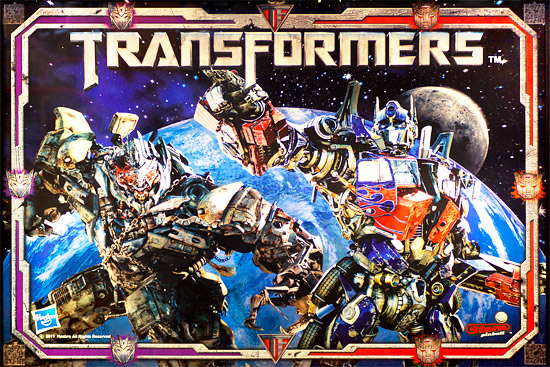
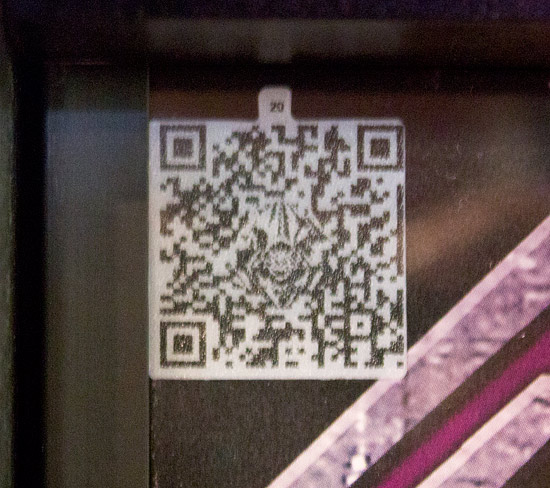
This is the translite image for the Pro version of the game which features Megatron and Optimus Prime, with the Earth in the background and the moon behind that. This gives a hint of the Transformers:Dark of the Moon movie, but the game is not based on that single film. Instead, it is an amalgam of the recent movies, the original cartoons and everything in-between, placing the two factions to their respective sides of the backglass, matching their positions on the playfield and using their colours and logos in the frame border. In each of the four corners we find the new QR codes which Transformers premieres.
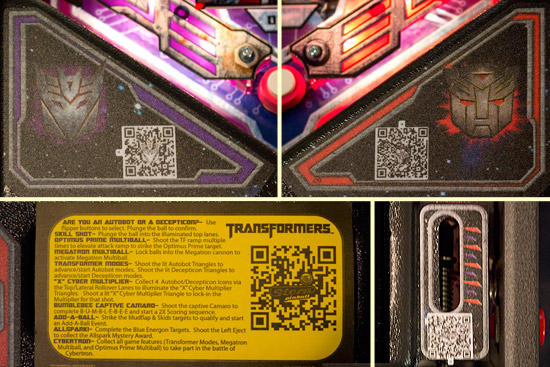
These QR (Quick Response) codes are placed all over the game, from the backbox to the coin door, from the shooter lane to the instruction card. You can take pictures of them using a smartphone and then use an app on the phone to decode them and be sent to a website with additional information and extra features. We'll list all the ones we know in the second part of this review, but the QR codes lead to videos about the game's development, pictures from George Gomez's sketchbook, audio clips and music from the game, and similar added-value links. The translite image is not the most attractive or clearest we've ever seen. The amount of detail in the Transformers makes them the obvious focus of our attention, but the Earth is also pretty vivid and equally in focus. This has the effect of reducing the definition between the Transformers and the planet, making what should be a massively three-dimensional image look strangely two-dimensional. That look continues onto the cabinet sides.
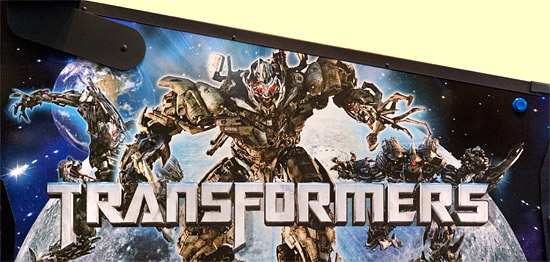
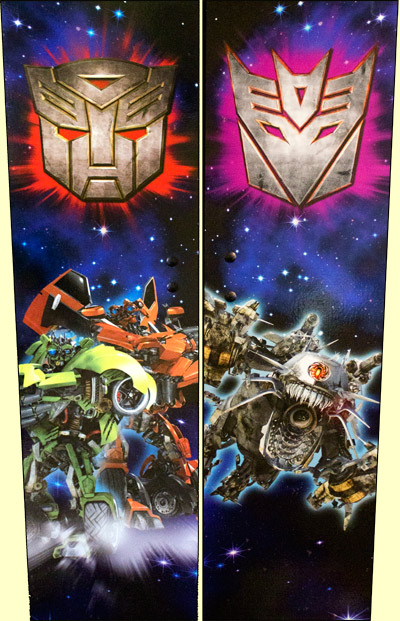
The left of the cabinet features the Decepticons led by Megatron, in space over the moon. The definition here is improved by a soft glow around and behind the robots. No prizes for guessing what's on the right side.
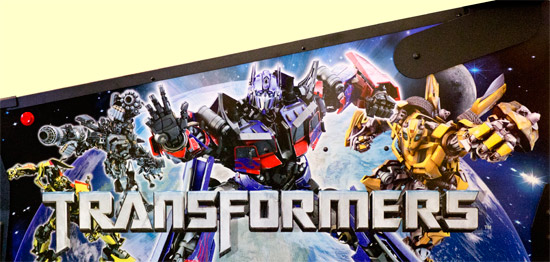
Yes, it's the Autobots out in front of the Earth, on their way to clash with the Decepticons heading in the opposite direction. The two tribes are similarly represented on the backbox sides along with their respective logos.
With limited space, there's only room for the two logos and the game's name on the cabinet front.
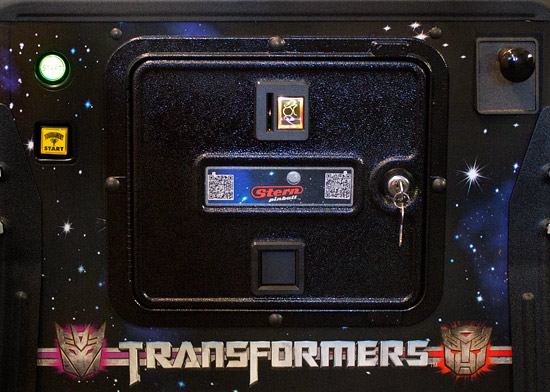
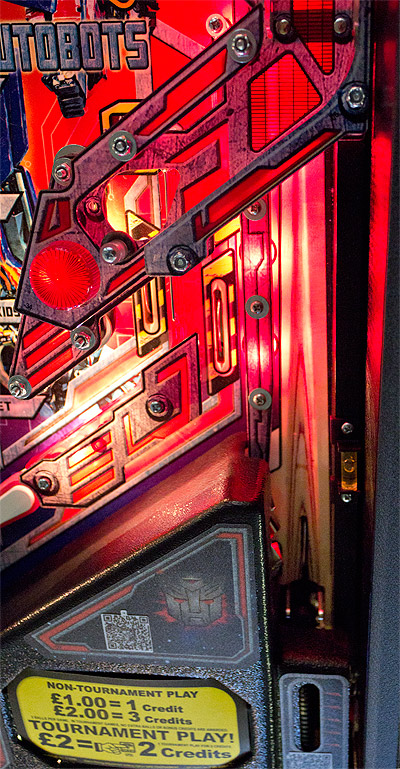
As you can see, the game has a manual plunger, the regular and tournament start buttons and, being a European model, a single multi-coin slot. Two more QR codes are printed on the coin door decal giving us a total of six so far, but there are another four on the game's apron, instruction card and ball shooter cover.
Before we finish with the cabinet artwork though, Transformers is the first mass-production game from Stern to use cabinet decals for the artwork rather than screen printing onto the wood. You can see this if you look at the back where the decals wrap around the rear corners of the cabinet.
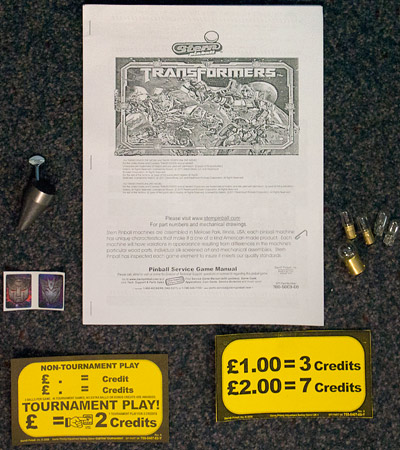
The use of decals allows for a greatly increased quality of printing, making the all-too-familiar nasty low-density dot patterns a thing of the past. However, decals being decals, they are not as robust as screen printing. They can be replaced though, if they become damaged. Supplied with the game is a rudimentary photocopied manual, some pricing cards, a smattering of spare lamps and some extra spinner decals.
So that completes the exterior look of the game.
Now let's head onto the playfield and see what the team at Stern have given us to play.
As usual, we'll begin our tour of the playfield down at the flippers and work clockwise around the various features and shots.
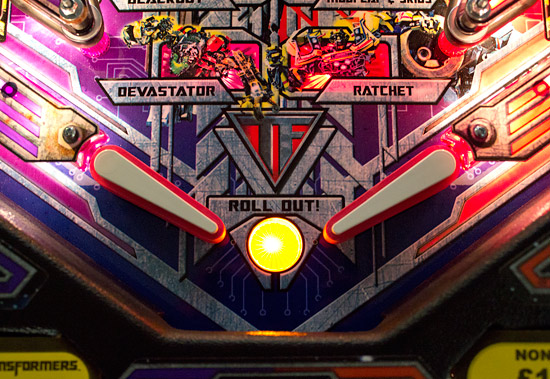
The white bats and red rubbers ensure the flippers are clearly defined against the darker background. Theoretically the left flipper should have a purple rubber to match the colour split on the rest of the playfield. The playfield artwork features lots of angular geometric designs pointing towards the centre drain, blended with a number of printed circuit track motifs. It does look somewhat reminiscent of the design from an earlier Stern game.
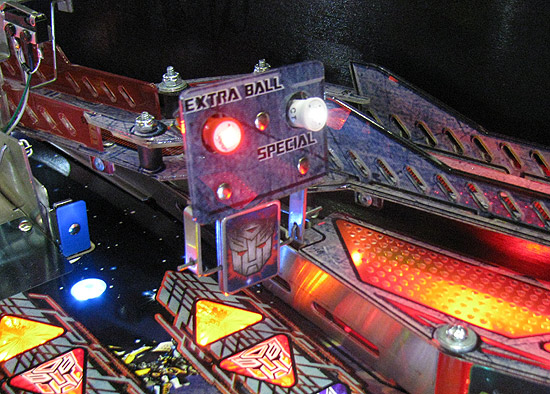
The 'shoot again' insert on Transformers doesn't actually say 'shoot again', preferring to use the rather less obvious 'roll out' wording printed on the playfield and leaving the insert blank. The Transformers design is flatter and less fussy than Iron Man though, with much darker and richer colours. It's lack of faux three-dimensionality is understandable because much of the rest of the game uses multi-layer effects to give real depth to the plastics and ramps as we can see, starting with the lane guides.
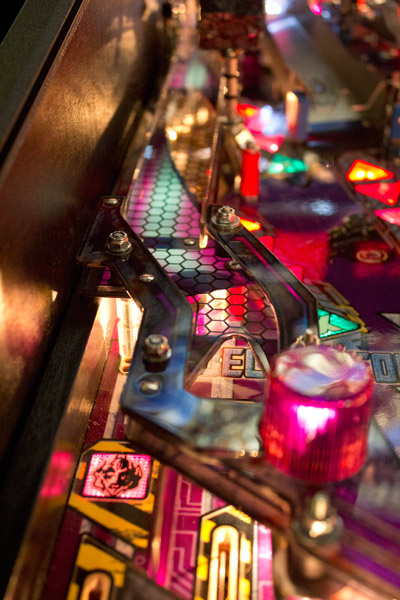
There are no metal guides here. Everything is plastic and themed to cast oodles of violet-tinted light across the whole area. The top layer plastics on the lane guide have transparent violet sections which are typical of the attention to detail which probably costs very little to achieve but give the game a much more considered and bespoke feel. Probably the only exception is the central support post in the lane guide which doesn't have a screw and leaves an odd-looking black ring where it meets the top layer plastic. You'd almost think it would look better with a screw fitted just to hide that ring.
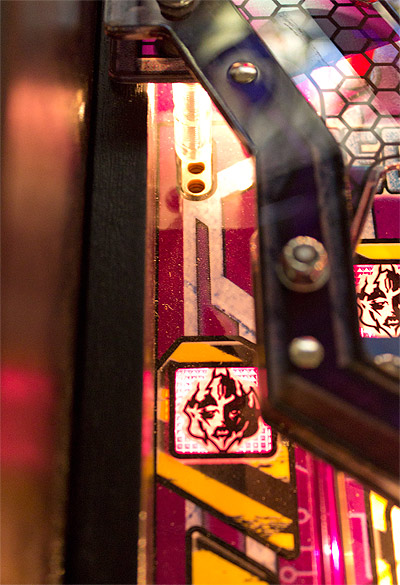
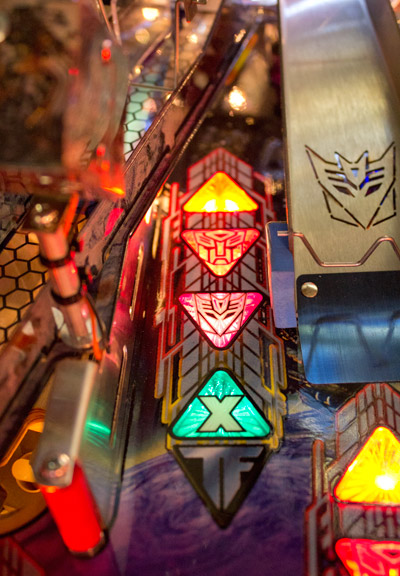
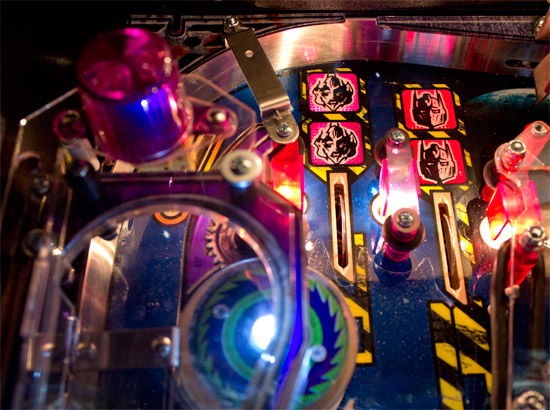
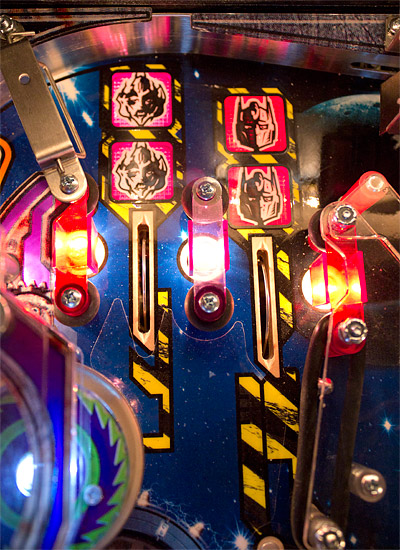
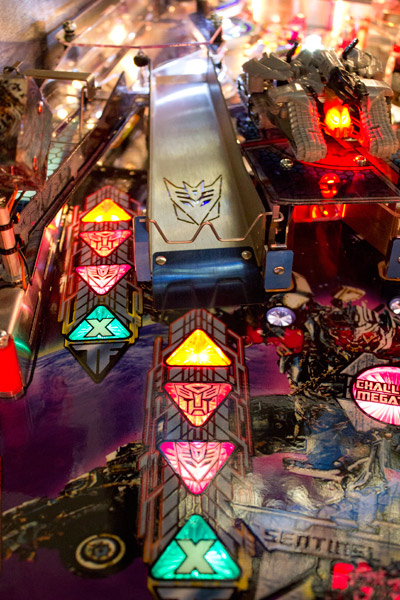
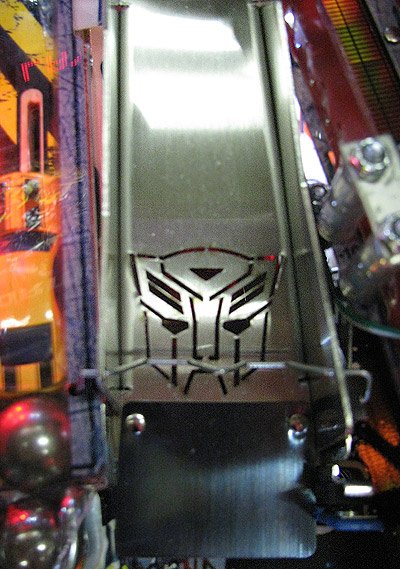
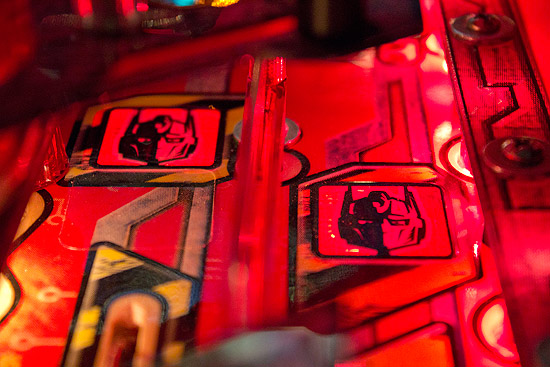
So there is just one inlane and one outlane on the left side of the playfield, each fitted with a single rollover switch. Above each switch is a Decepticon logo insert which lights when the switch is rolled-over.
The inlane and outlane inserts are a little unusual. Rather than the left and right inlanes and outlanes forming a set of four inserts which you need to light, the left lanes and the top left rollovers form one set of four, while the right lanes and the top right rollovers form a second set of four. It sounds confusing at first, but soon makes sense once you start playing. There's no kickback or ball-saving feature in the outlane, so once the ball's gone it's gone. The left slingshot, like the lane guide, also has a multi-layered construction.
Once again, pretty much everything is violet - the star posts, the flasher dome and the insert panels on the two layers. Both layers actually form part of the left ramp which terminates at the left inlane with a teardrop-shaped hole into which the ball drops and through which the inlane's Decepticon logo can be seen.
A blue rubber pad bolted onto the lower plastic helps stop the ball as it reaches the end of the ramp, and protects the plastic parts from damage by the ball.
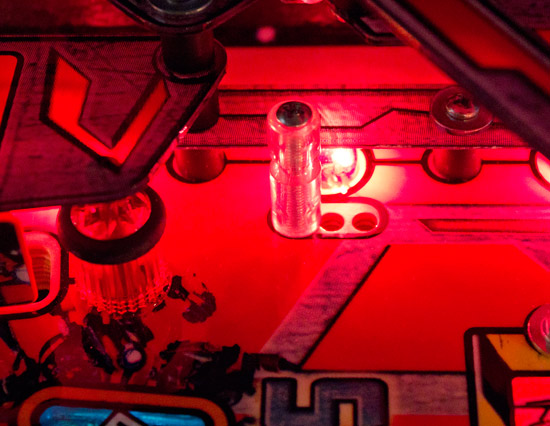
Just for a change, there are no spotlights mounted on the slingshots to provide extra lighting in the central playfield. The game doesn't particularly appear to need them, but the Limited Edition models do have them fitted. At the top of the outlane is a clear adjuster post which can be used to vary the outlane's width and make the game harder or easier.
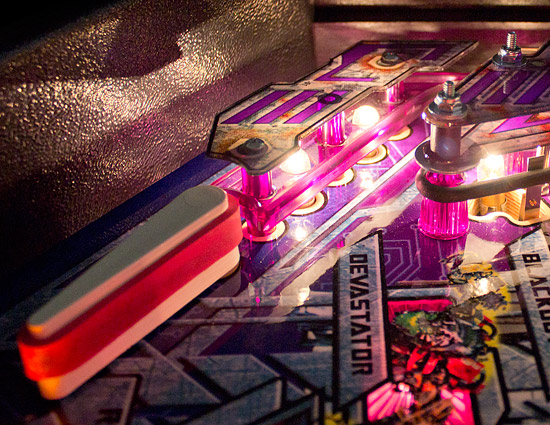
The game is shipped with the post in the highest (hardest) position. Changing its position (or removing it completely) requires the removal of several plastics, so expect to find it there on 99% of the games on location. Moving a little up the left side of the playfield we come to the game's first major shot - the All Spark Cube saucer.
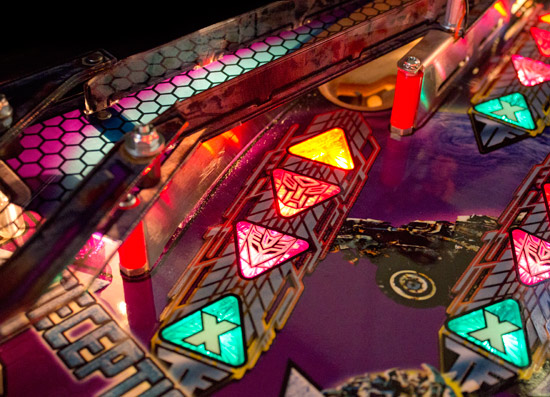
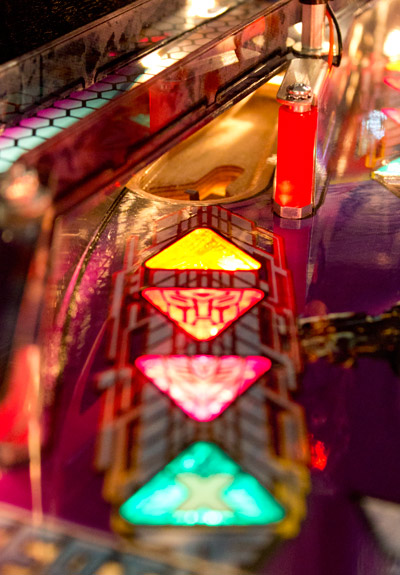
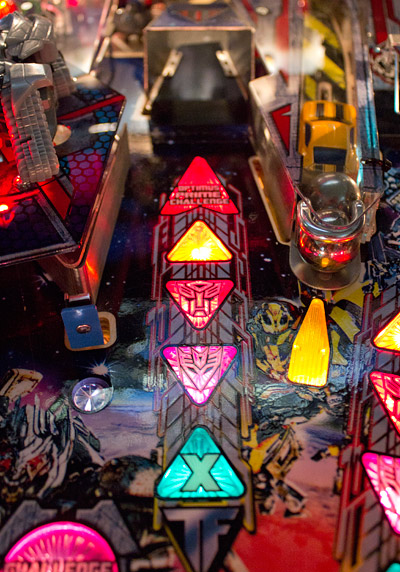
Like all the major shots in the game, it features an amber triangular insert, Autobot and a Decepticon inserts, and a teal shot multiplier insert.
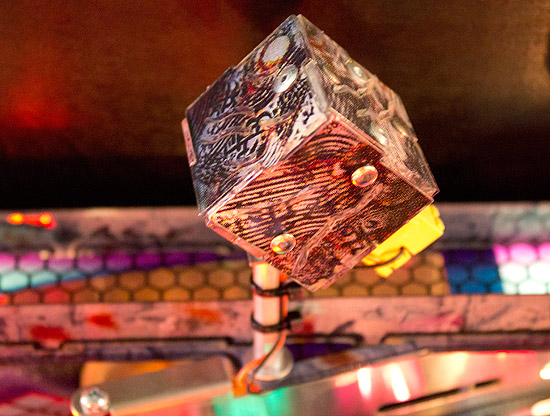
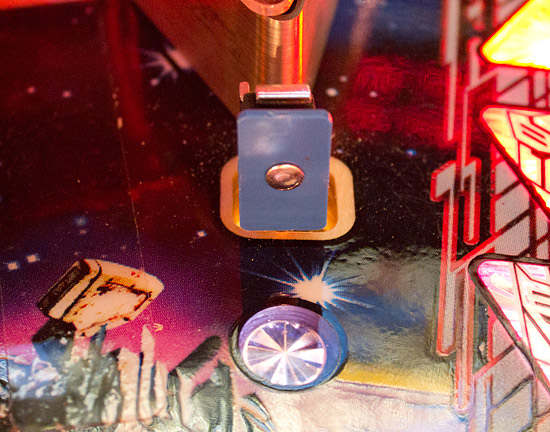
The saucer itself has a fairly lengthy run-off area at the back which absorbs a fast ball's energy and helps to prevent bounce-outs. In the saucer is a switch to sense the ball, and a plunger to kick it back out. The actual kick-out action is quite weak which seems disappointing, but is presumably designed not to damage the plastic base of the left ramp which sits above it. There's a reasonably long metal ball guide on the left entrance to the All Spark Saucer which makes the shot fairly easy to make. Mounted above the All Spark Cube saucer is the mystical object itself, or at least a slightly cheesy representation of it.
Yes, this riveted plastic patterned box is the All Spark Cube The All Spark Cube is a device believed to have the power to create worlds and populate them with life-forms, including the planet of Cybertron and all the Transformers. So, not such a cheap-looking plastic box now, is it? While not looking too exciting, the model of the All Spark Cube used in the game does have one trick up its sleeve.
As you can probably tell by the tie-wrapped cables and the yellow holder, the All Spark Cube contains a flasher lamp which illuminates the cube when the saucer shot beneath is ready to award some nice points or advance you through a feature. The base of the post on which the Cube sits, is mounted between the saucer lane and our next playfield feature, the left orbit.
The usual quartet of triangular inserts sits at the entrance to the left orbit, indicating it can build towards starting modes, score jackpot awards and its value can be multiplied. Cutouts in the orbit lane's wall let the general illumination behind spill out and brighten the lane's entrance.
The left orbit runs up the left side of the playfield under the left ramp and past the pop bumpers...
...curving right to head across the top of the pop bumpers and the rollover lanes.
As the ball rolls round the top of the orbit, comes to a rather stark-looking controlled gate.
If the gate's solenoid is activated then the flap lifts and the ball can roll round to the right orbit entrance. Otherwise the flap will stop the ball and send it into the top rollover lanes. The decision whether to stop the ball or not depends on the mode running and which shots are currently lit. So while we're up here, let's have a look at those top rollover lanes and the three pop bumpers.
You may notice an immediate difference to other recent rollover lanes - the two sets of inserts above each lane. With most games, any lit lanes can be toggled or cycled with the flipper buttons - one button rotating lit lanes to the right, the other rotating them to the left. Transformers shakes things up a bit by changing this familiar rule. In keeping with the 'Decepticons vs Autobots' theme, the two Decepticon inserts on the left rollover lane team up with the left inlane and outlane inserts to form a set of four. Rolling over any of these three switches lights its insert - if it's the top rollover then it lights whichever of the two inserts is unlit - and once all four are lit, an award is given and they become unlit, ready to be lit all over again. The right Autobot rollover lane works in the same way, but in conjunction with the right inlane and outlane to form its own group of four inserts. Pressing the left flipper button cycles the lit Decepticon lane inserts. The right flipper botton cycles the lit Autobot ones. Once the ball rolls through the rollover lanes it comes to the three pop bumpers.
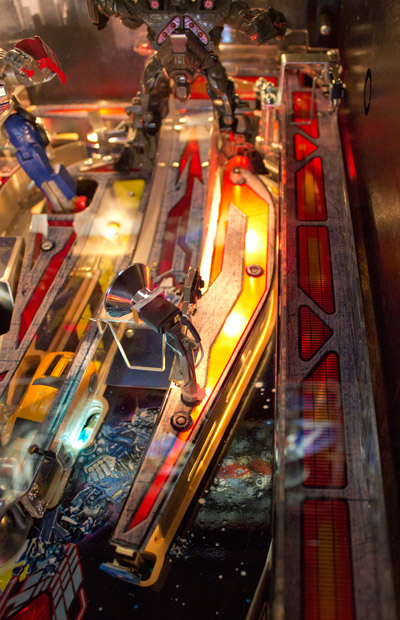
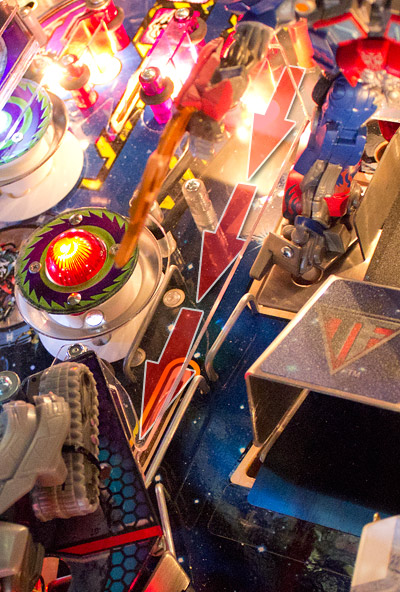
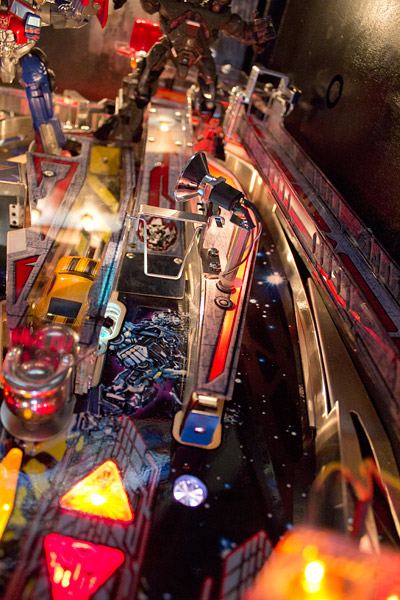
There's not a huge amount going on in the pop bumpers. There are no standup targets in there, just the usual opportunity to get the ball back into the rollover lanes to light an additional insert or two and a circular insert with a sole flash lamp beneath which fires whenever a pop hit is registered. When it's finished with the bumpers, the ball exits below the bottom pop bumper and into the left orbit lane. Our next major shot takes the ball off the regular playfield surface and sends it up a mixture of steel and plastic we call the left ramp.
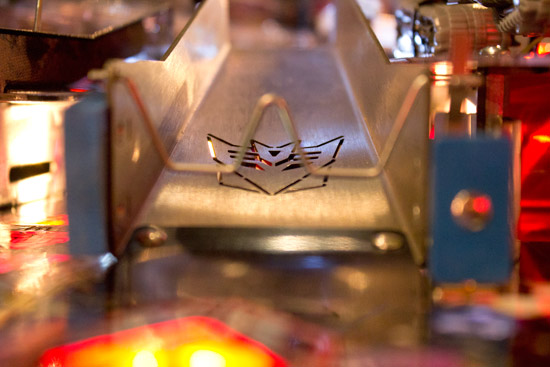
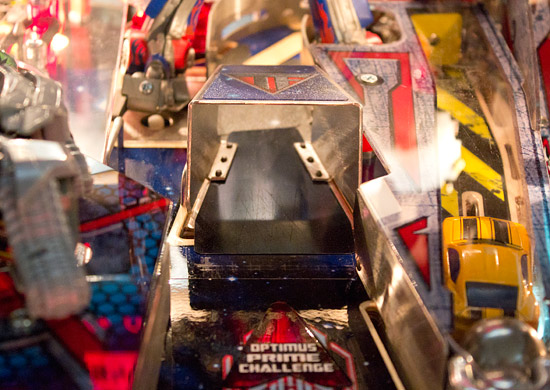
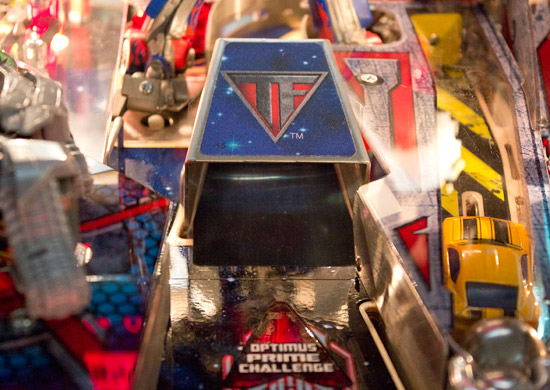
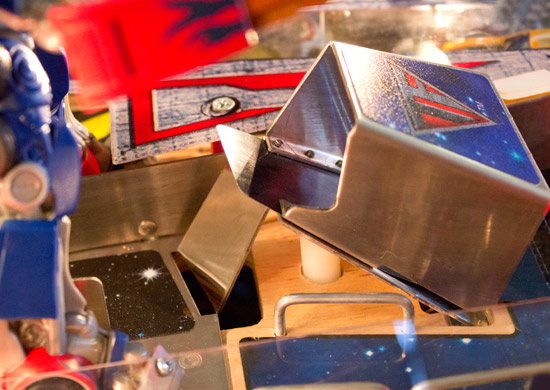
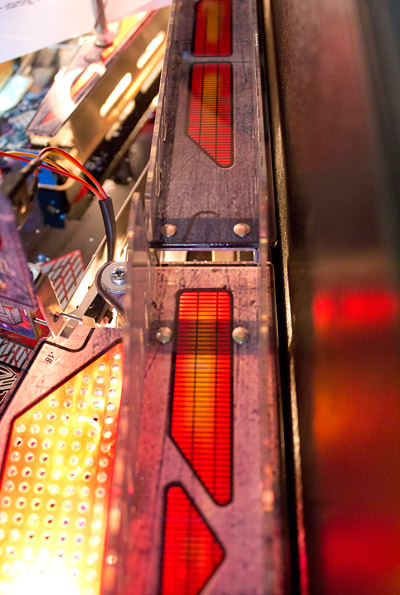
The same four triangular inserts denote the left ramp as another of the game's major shots. It starts off with a brushed steel incline with a laser-cut Decepticons logo which looks like it should just drop out and leave a hole.
But if we're playing the Pro model, it's not long before everything turns to plastic - albeit nicely crafted plastic.
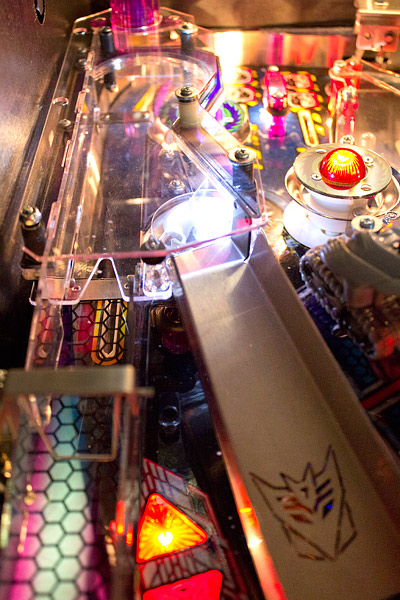
The non-metal part of the ramp consists of clear plastic sides interlocking into a clear top - to stop fast shots flying off the ramp but also making it difficult to clean - and a part-textured, part-clear base.
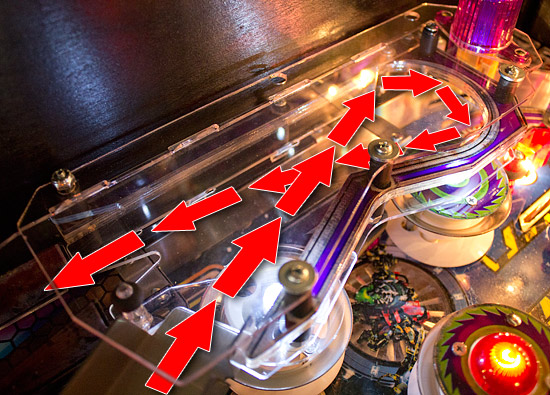
The ramp uses a novel but effective way to turn the ball around using the plastic walls to send the ball around a loop and guide it on its way down to the left inlane. Here's the path it takes when shot up the ramp:
As the ball leaves this section it rolls under a switch, and while there is also a switch at the entrance to the ramp, it is this one which registers a successful ramp shot.
From here, the ramp continues down the left side of the game, above the All Spark Cube saucer, and comes to an end as part of the left slingshot, dumping the ball into the left inlane.
The upper part of left ramp changes quite a bit in the Limited Edition models by adding a Starscream model on a rotating platform with a target behind him and a spotlight in front to illuminate him.
The platform can sit in the position above which allows shots to the red standup target between Starscream's legs, or it can rotate so he blocks the shot.
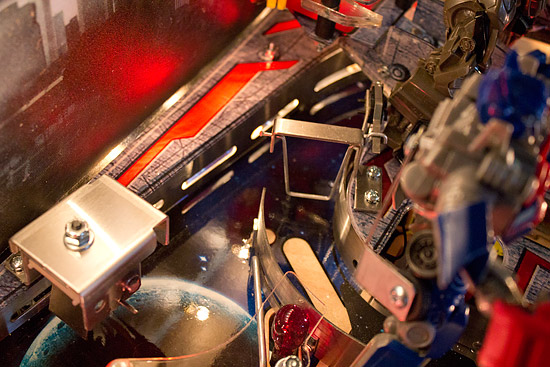
This replaces the Pro's simple turn-around section, and adds additional rules to control when Starscream turns to allow or block shots to the target, and what the target awards. Before we get to the game's next feature, let's just pop back to the left ramp entrance because there's one more thing to note about that.
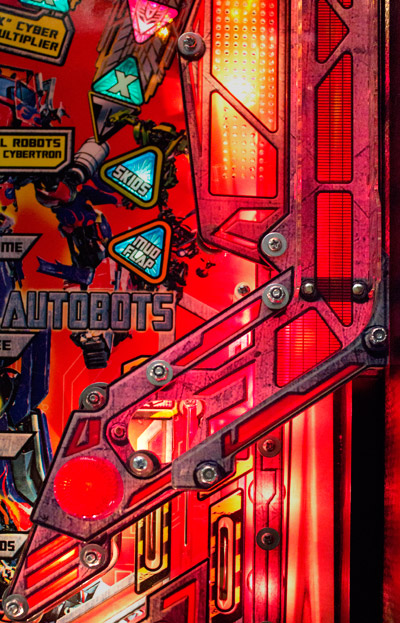
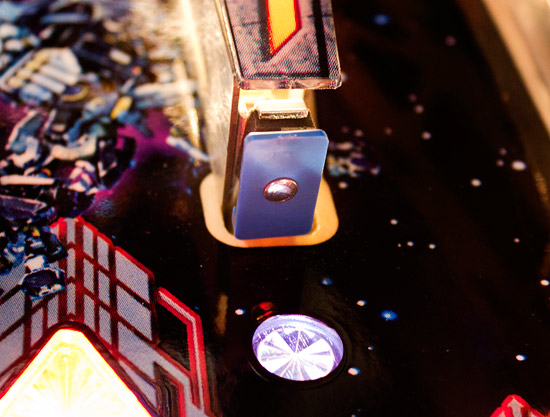
While a blue rubber pad protects the left side of the ramp entrance, on the right side is the first of three blue Energon standup targets in the game, with their associated blue circular inserts in front.
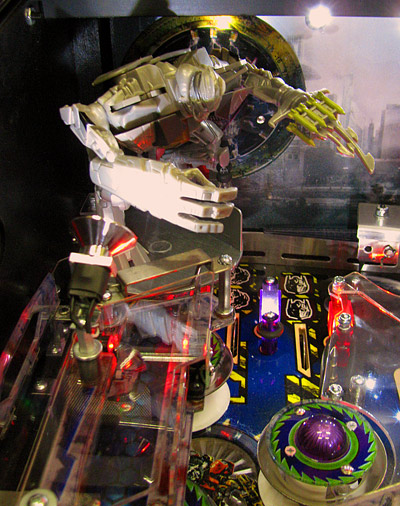
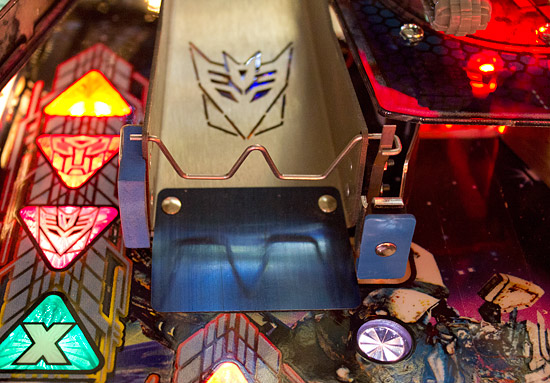
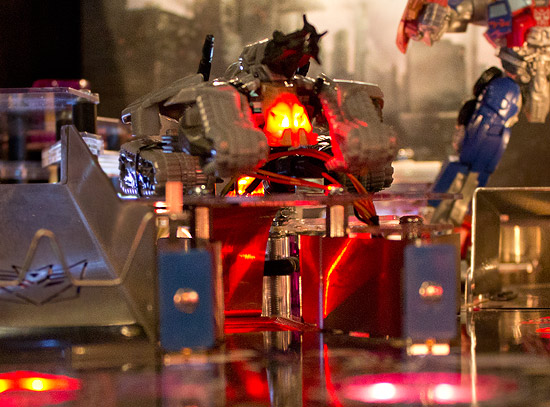
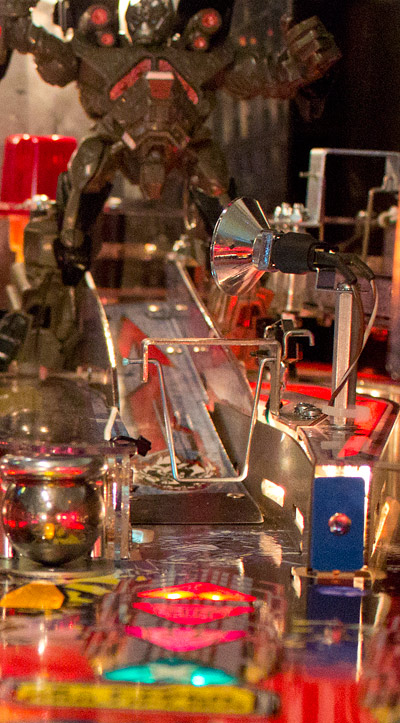
These light the All Spark Cube for awards when completed, but more on what doing that can give you in the rules section of part two. Right, back to our next Transformer and this one is the leader of the Decepticons - Megatron. His feature consists of a scoop hidden beneath an illuminated model of the big guy.
This is not officially one of the game's major shots, since it has none of the triangular inserts in front and is mainly used to start and play Megatron Multiball, however in terms of points available and starting one of the game's major modes, it remains an important shot. It looks like an ordinary scoop, with a wider opening and metal ball guides to make the shot achievable from both flippers.
But if we take a look under the playfield, we find there's actually a mini-trough which can stack up to four balls.
Most troughs have an entrance at one end and a kickout at the other, but this one only has a single entry/exit point causing us to wonder exactly how it stacks the balls up while also managing to feed them to the kicker. However it does it, the trough's other job is to fire the balls out one-at-a-time and as quickly as possible. Most trough software gives plenty of time for the ball to fully settle on the plunger before attempting to eject it, but time is of the essence here, so as soon as the ball rolls into position it is fired out towards the flippers.
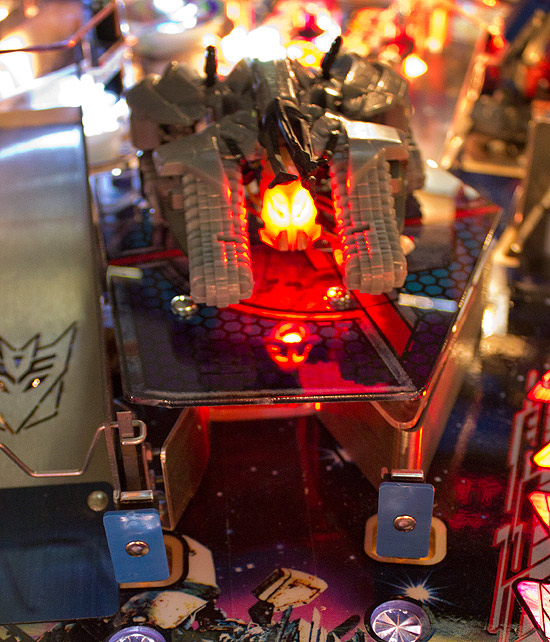
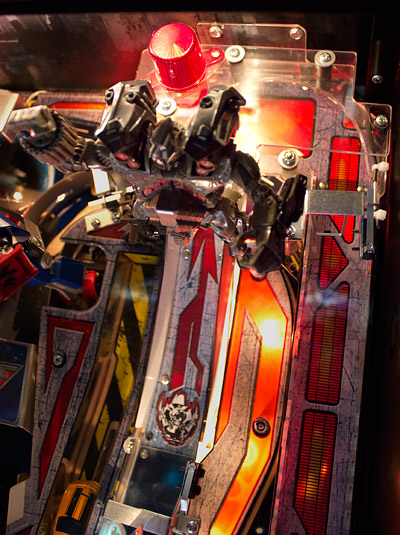
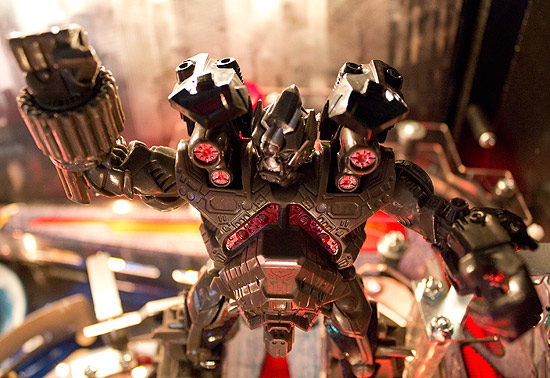
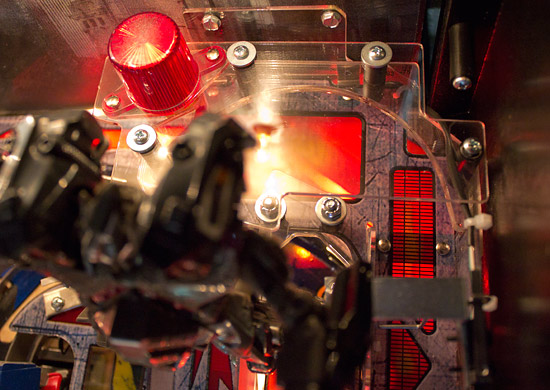
The upkicker's curved top metal ball guide extends further than usual to protect the plastic on top of the scoop. It is this upon which the internally-lit Megatron model sits. The cables aren't too subtly hidden and could benefit from some black heat-shrink tubing to help disguise them. The Megatron shot is also different in the Limited Edition versions of the game. For starters, there's a drop target in front of the scoop to add difficulty to the shot.
The flat white block-like design doesn't blend in too well with the rest of the game, but with it being so close to the flippers, strength is perhaps more important than design. Other changes take place above the Megatron scoop too where the character's model has been completely redesigned.
Yes, Megatron has been, err... transformed into a much larger model with additional lighting, and although he doesn't actually morph, he does have just a little movement. The part which looks like a vacuum cleaner attachment is a cannon which fires as the balls are kicked out of the scoop. It was originally hoped to get the balls to shoot out of the cannon like they do in Terminator 3, but this didn't prove to be possible, so instead the cannon is attached to a solenoid to give a kickback effect as the ball is ejected from the scoop. The ball is moving pretty fast at that point, so it may not be entirely obvious where it actually comes from if you're not giving it your full attention. Just to the right of the Megatron scoop is the second of the Energon standup targets.
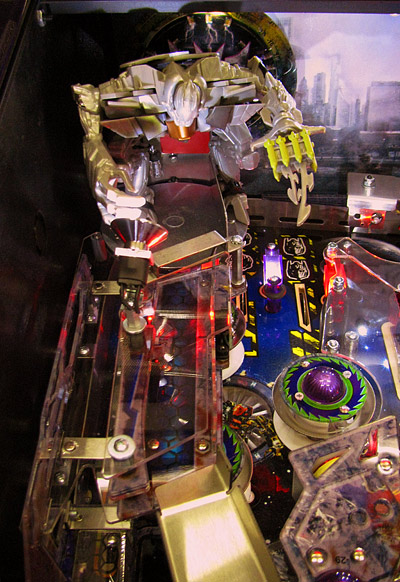
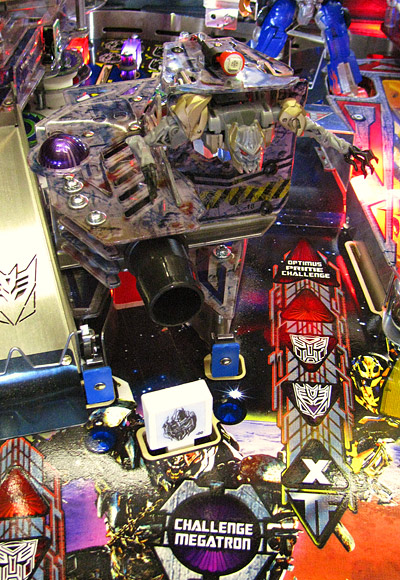
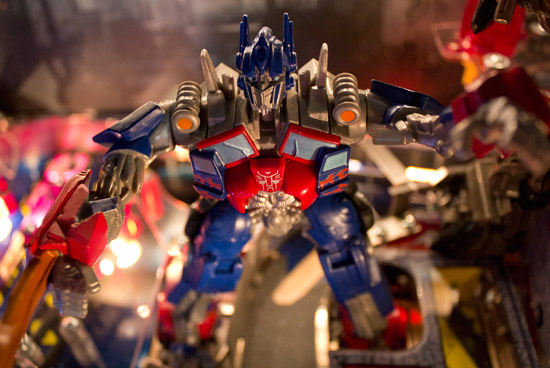
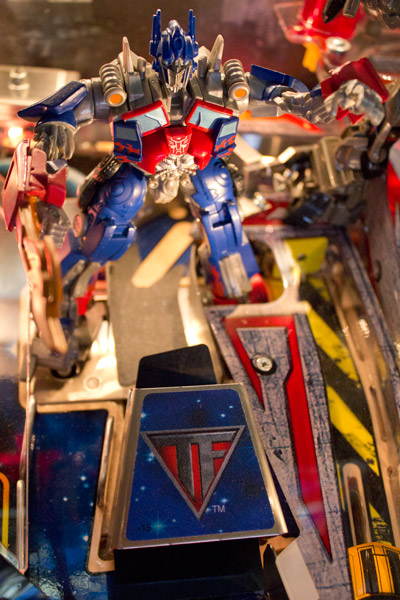
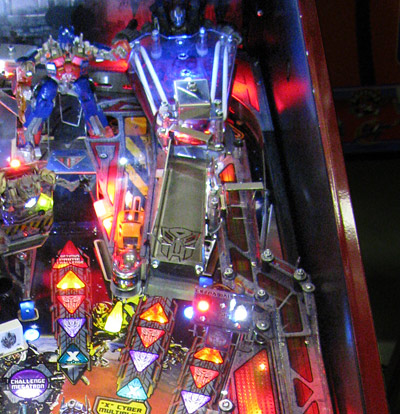
Collecting all three of these lights the All Spark Cube shot for a mystery semi-random award. OK, onto our next major feature and this is one which stays the same in both the Pro and the LE versions. It's Megatron's nemesis and leader of the Autobots, Optimus Prime.
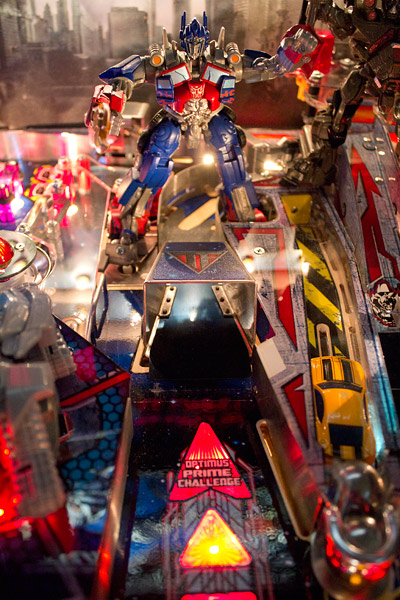
This is the closest thing Transformers has to a centre shot and it consists of four parts.
The first part is the lead-in which contains the familiar quartet of inserts, but this time they are joined by that old favourite, the big red arrowhead insert.
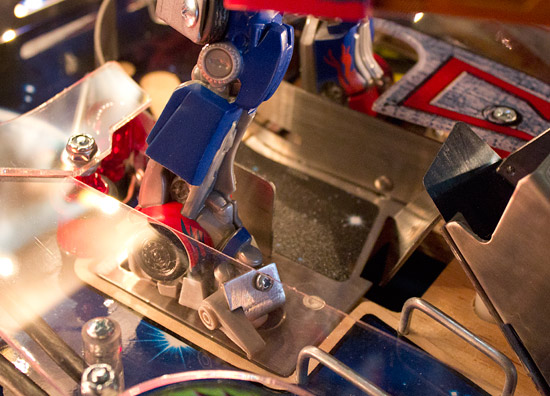
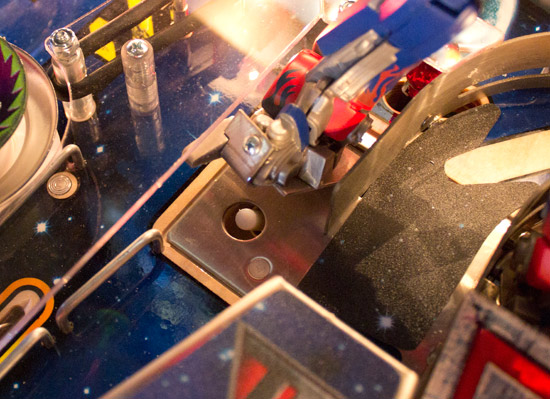
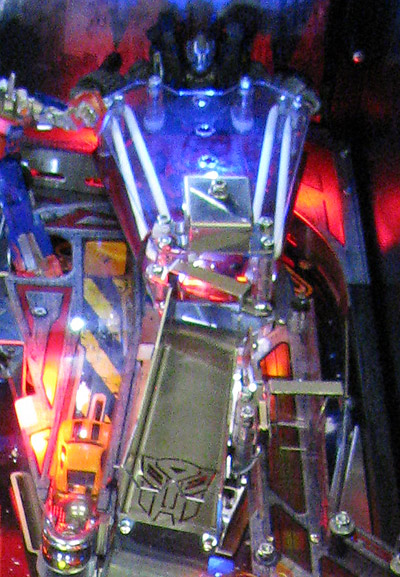
As you can see, the entrance to the Optimus Prime shot is pretty wide with ball guides to direct wayward balls into the lane. Once they enter, they come to the second part of the feature. This has been termed "more than meets the eye" because apart from acting as a tunnel, it can be raised at the back to turn into a ramp with which you can shoot Optimus.
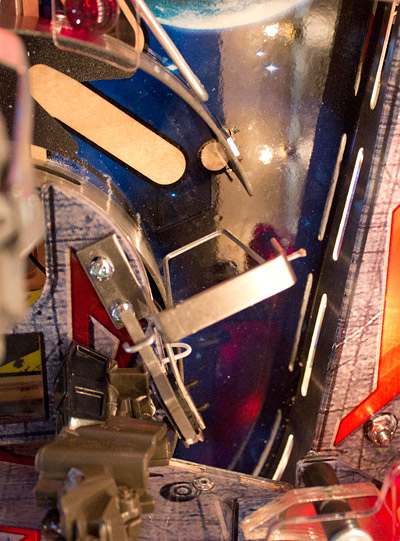
The ramp is usually in the down position which allows the ball to pass through and enter the third part of the feature, the curved lane which leads to the top of the right orbit.
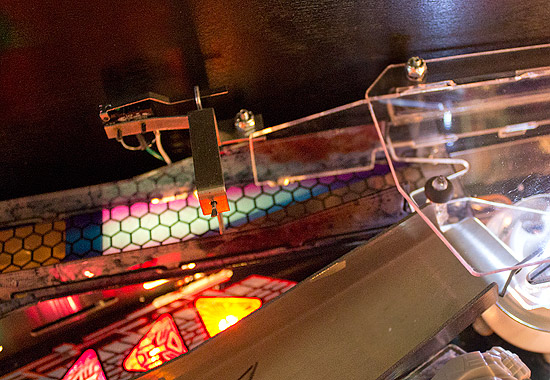
The switch which senses a completed Optimus Prime shot is right at the end of the curve, just as it joins the right orbit lane. It looks like there was originally going to be a rollover switch there, but it is now a rollunder switch instead.
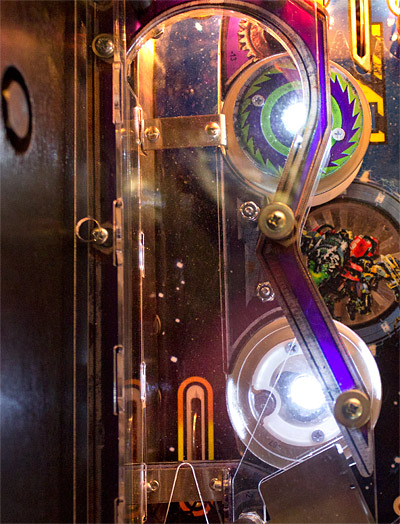
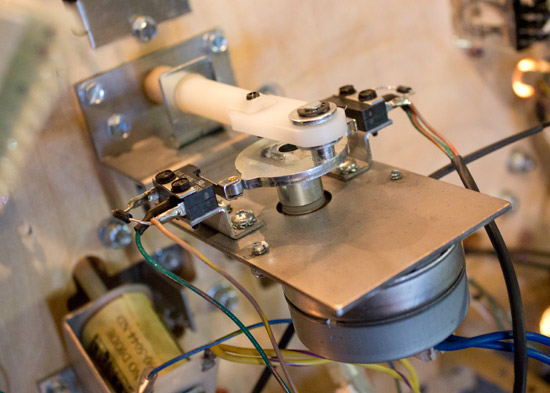
After enough shots through the lane, the ramp rises at the back.
The back of the ramp is raised by a white post connected to a motor through a cam below the playfield.
Let's have a look under the playfield and see how it works.
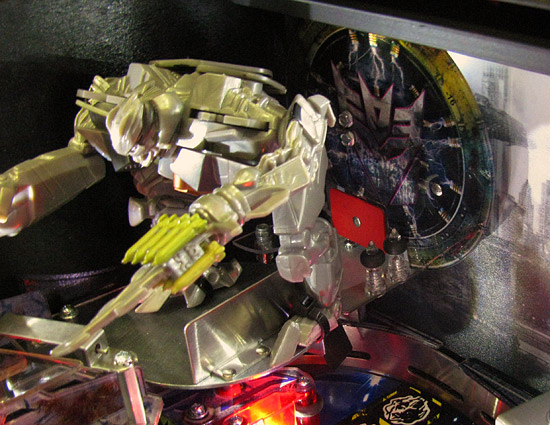
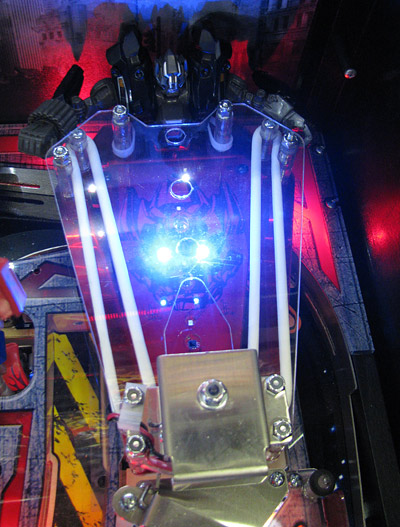
A motor drives the cam through a gearbox . Two microswitches on either side of the cam sense when the white post is full extended (ramp up) or fully retracted (ramp down). With the ramp up, shots to the lane are directed through the air so they hit the fourth and final part of this feature - Optimus Prime - squarely in what passes for his crotch.
Hits on Optimus are registered by a switch built into his left leg, while under his right leg is a solenoid which rocks Optimus backwards to accentuate the effect of the hits. His right leg has a metal piece screwed into the foot for the solenoid to push against.
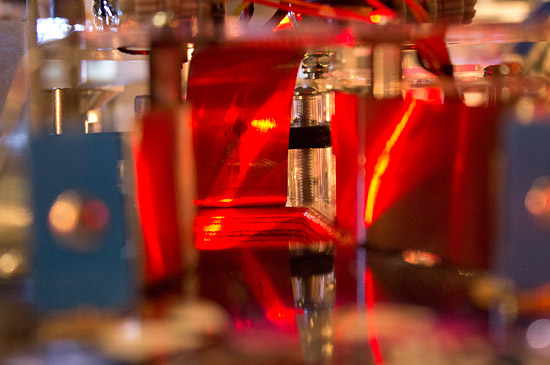
If we rock Optimus back a little we can see the solenoid's plunger.
The effect isn't especially pronounced but any additional animation has to be welcomed. The next feature in the game sits to the right of Optimus Prime and is the Bumblebee captive ball.
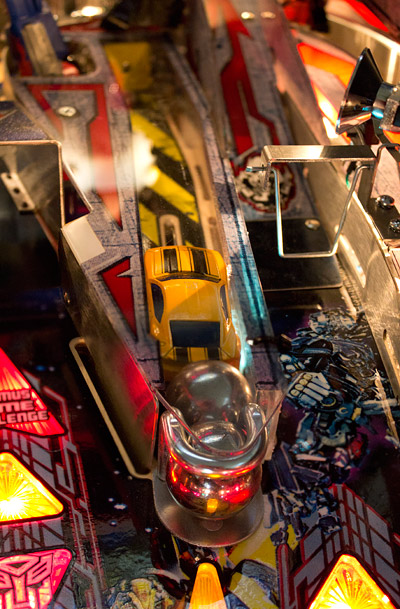
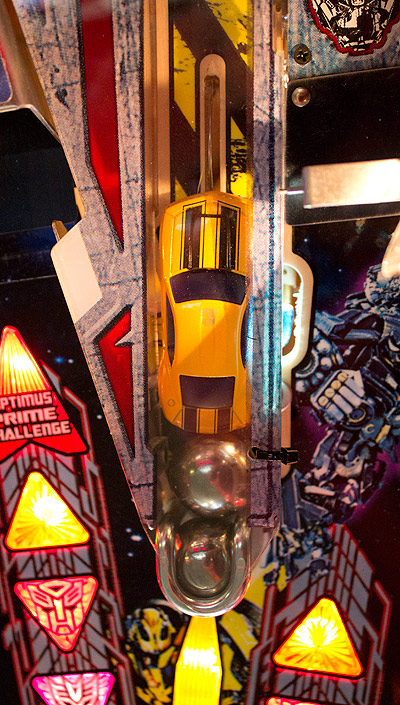
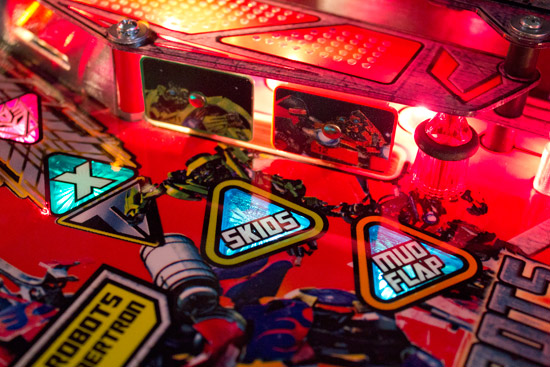
The Bumblebee shot consists of a regular captive ball with a loose ball behind, but instead of the loose ball being used to hit a target at the end of the lane, there is a yellow toy Camaro (the usual form of Bumblebee) which instead rolls up the lane.
There is a rollover switch which produces a sound effect when the Camaro moves forward, but to successfully register a shot the car has to move all the way up the lane and hit a yellow standup target at the end.
The Camaro then rolls back down to the captive ball, but because there is a loose ball as well, the car can be pushed into the standup target before it returns to the captive ball if the loose ball hits it while it is returning. Shots on the Bumblebee standup spell out B-U-M-B-L-E-B-E-E to start an associated mode. Positioned right next to the captive ball is the game's second ramp and this one belongs to Ironhide.
Unlike the Starscream ramp on the left, the Ironhide ramp has a plastic base in the Pro version. If you want a polished metal ramp complete with an Autobot laser-cut logo, then you have to splash out for one of the Limited Edition models.
There are other major changes to the right ramp in the Limited Edition games too. In the Pro version, the ramp rises and passes between Ironhide's legs before reaching a 180° turn and heading back towards the flippers.
The turn is all plastic, just like the equivalent on the opposite side.
It sends the ball down the right side of the playfield on a straight section of the right ramp, with a small jump in the middle where the ramp changes height.
The right ramp comes to an end at the right slingshot, where it drops the ball into the right inlane.
Now, as we said, things are somewhat different if you've got hold of one of the LEs. For these games, the right ramp includes a mini-playfield and a controlled gate which allows or blocks access.
The controlled gate is rather ugly and blocks some of your view of the mini-playfield, which is a pity as it's quite and attractive looking device with some interesting technology.
Comparisons with the LT-5 engine in Corvette are inevitable because the player can tilt the mini-playfield let and right once the ball has entered by using the flipper buttons. However, rather than just shaking the ball to keep it on the mini-playfield, the playing surface here includes a number of optical sensors which detect when the ball rolls over them and then light up. So this is more like a cross between the LT-5 and the Path of Adventure from Indiana Jones - The Pinball Adventure. The Ironhide model has been moved to the back of the mini-playfield, so it looks like he is the one tilting it. When the ball exits from the LE's mini-playfield, it has to take a slightly circuitous route to join up with the original right ramp as it runs down the right side of the game to the right inlane.
On the right-handed side of the right ramp is the third and final blue Energon standup target used to light the All Spark Cube.
Not much more to say about that, so let's move on to the final major shot of the game - the right orbit.
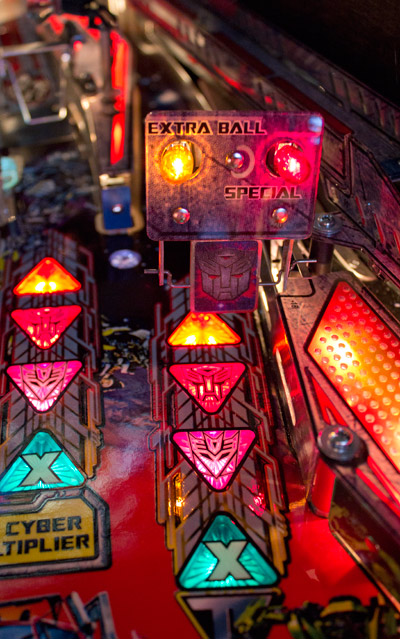
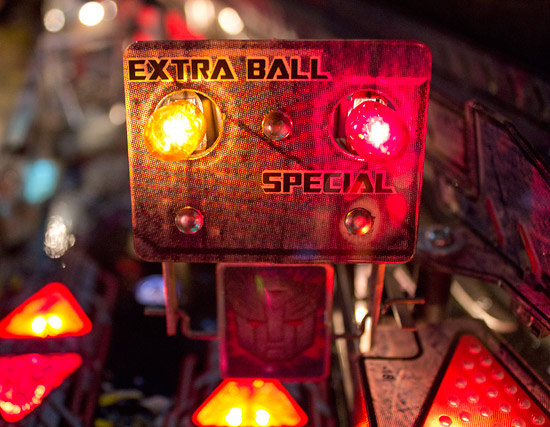
The usual array of inserts show this can be lit for jackpots, to advance towards Autobot or Decepticon modes and the shot value can have a multiplier applied. The game's sole spinner sits above those inserts and below a lamp board which indicates when the right orbit is lit to collect extra balls and specials.
The Limited Edition version of the game replaces many of the incandescent lamps in the game with LEDs and the lamp board also gets the LED treatment, although they don't look as nice as the coloured lamps.
After passing through the spinner, the ball disappears as it heads up the right orbit. That's because much of the lane is covered by the right ramp which, despite containing translucent panels, doesn't afford us much of a view of the ball.
One it reaches the end of the orbit, the lane curves left towards the top rollover lanes.
This is also the point where the Optimus Prime shot ends and directs a successful shot back down the right orbit. If a ball shot up the right orbit has enough momentum it will pass under the controlled gate to the top of the rollover lanes, where it meets a one-way gate which prevents it completing a full orbit and sends it into the lanes.
In the Limited Edition model, there is an additional controlled gate on the left of the rollover lanes instead of the one-way gate, so the game can allow compete orbits to be made from the right as well as the left. There is an additional option which allows a weaker ball to travel up the right orbit but not quite make the controlled gate. In this instance, it will roll into another lane between the pop bumpers and the Optimus Prime model, and end up dropping into the Megatron scoop.
This doesn't count as a Megatron shot because the rollover switch the ball triggers just before it enters the scoop tells the game Megatron wasn't shot from the front in the usual way. However, it can award a super skill shot if the lane is made at the start of the ball. The final Transformers characters in the game sit on the right between the orbit lane and the outlane. They are Mudflap and Skids and they are represented by two standup targets with their likenesses on.
Although not one of the major shots, these two get hit fairly regularly and start a scoring boosting feature, as we shall see in part two. They are wired as separate targets, so each one does something different during their associated mode. Directly below Mudflap and Skids we come to the right slingshot and the inlane/outlane combination. Like its left-sided counterpart, the right slingshot is made with a multi-level construction with transparent panels, and forms the end of a ramp.
There is a difference though. Where the left ramp ends with a blue rubber pad to kill the ball's momentum, the right ramp terminates with a rubber ring mounted on a post to stop the ball and drop it into the inlane.
The right inlane and outlane are very similar to their equivalents on the other side, except for the fact they form part of the Autobot group of inserts (the other two are on the top right rollover lane) rather than the Decepticons on the left.
The outlane adjuster on this side is also set to the maximum width when the game comes from the factory, although this one is rather easier to adjust with the right ramp not getting in your way.
There's nothing special about the right inlane or outlane as they direct the ball to either the flipper or the drain. This being the Autobot side, everything is bathed in red (or crimson) light rather than the violet wash given to everything on the Decepticon side.
A short distance from the right outlane is the place where each ball begins its travels. We know it as the shooter lane.
Transformers features the familiar combined manual and automatic plunger, so there's no problem in multi-player games with one player stealing another's locked balls, as any additional balls which are required can be auto-plunged by the game.
Pretty soon after leaving the plunger, the ball disappears under the right ramp until it emerges briefly as it joins the right orbit before heading up to the top of the game.
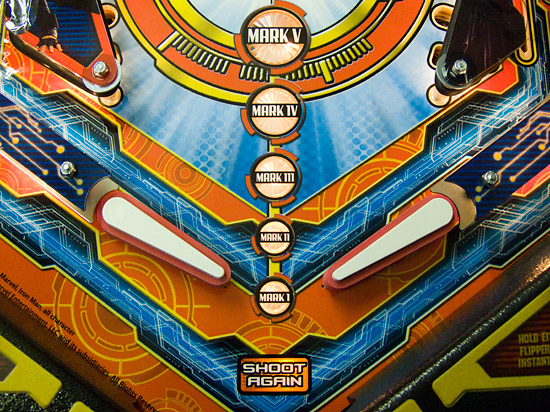
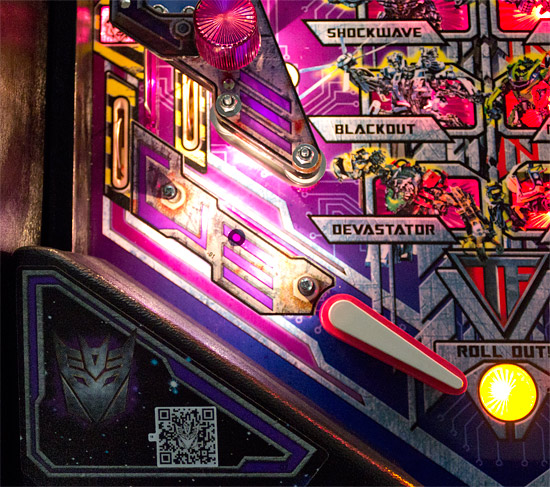
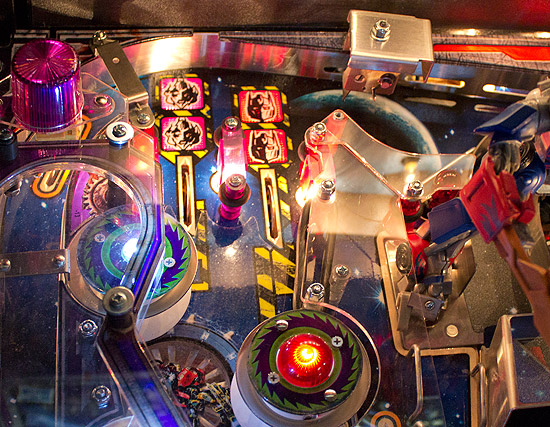
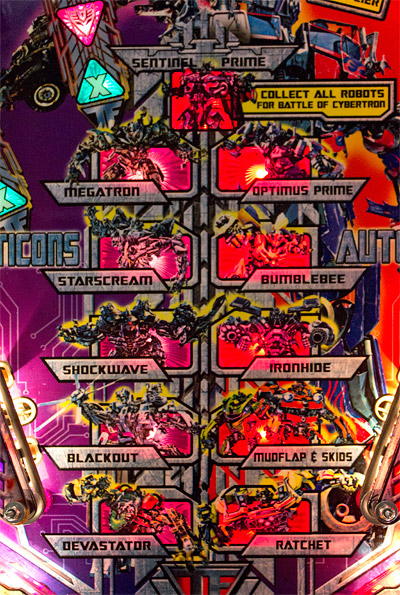
The final area of the playfield at which to look is the central space above the flippers which contains the progress grid.
There are five modes for each side and a wizard mode for completing all the Transformers' modes on one side. There's also a separate wizard mode for completing all the modes on both sides. The lamps or LEDs below the inserts can be lit solidly for fully completed modes, flash slowly for incomplete modes or flash rapidly to indicate the next mode. So that concludes our look at the playfield. We've shown you a few pictures taken under the playfield, but now it's time to have a proper look inside the game, starting with the backbox.
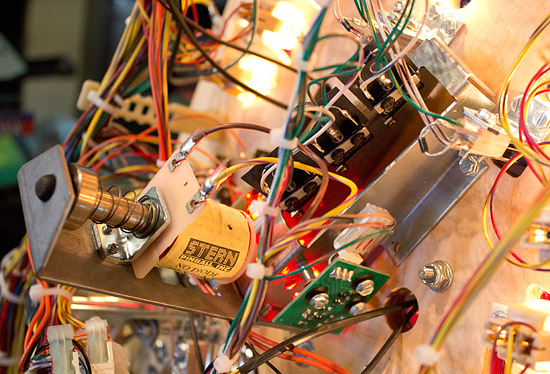
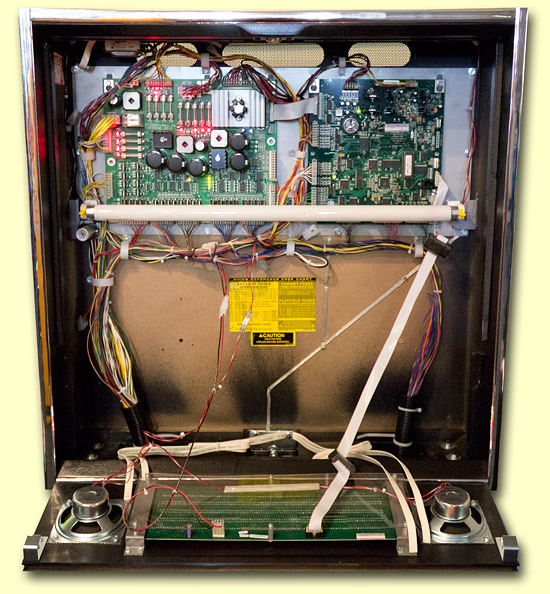
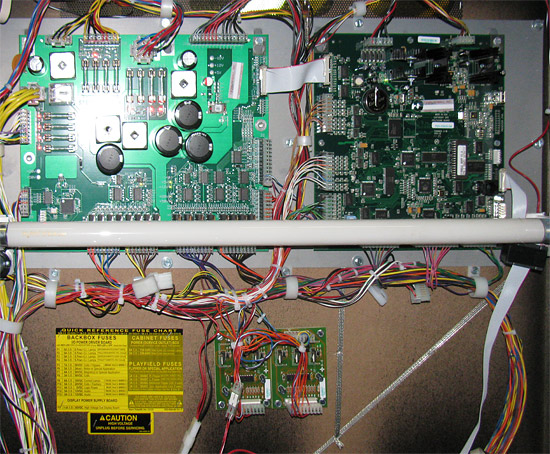
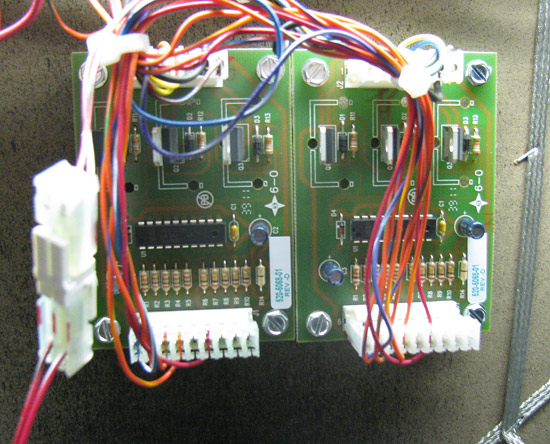
There are the usual two SAM system boards mounted behind the fluorescent tube. This game is fitted with an LED display, so there's no need for a high voltage board to drive it. In the Limited Edition version there is some extra hardware in the form of two small controller boards for the two mini-playfields.
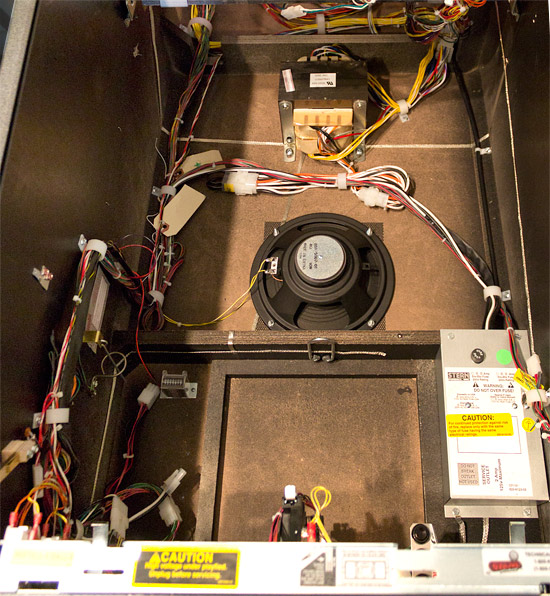
The cabinet contains the usual selection of hardware, with the speaker and transformer (lower-case 't') the most prominent.
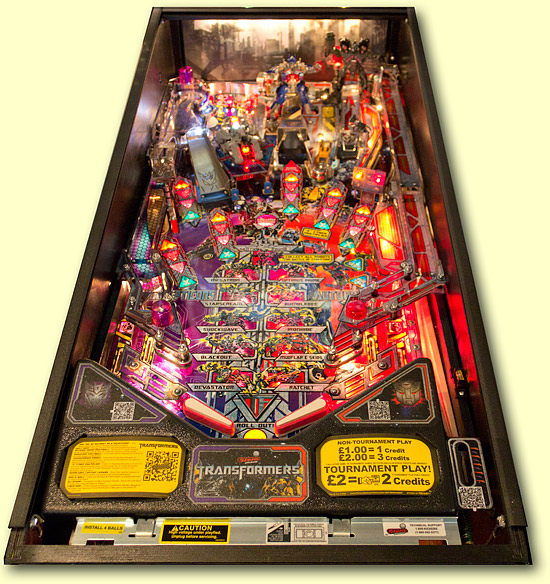
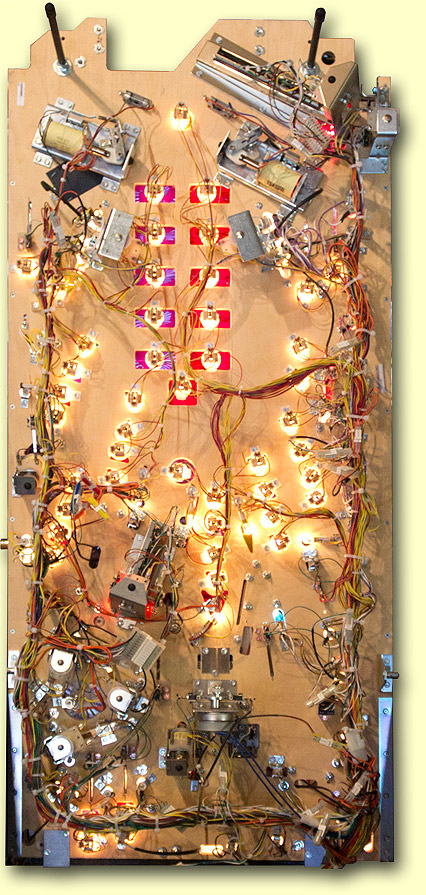
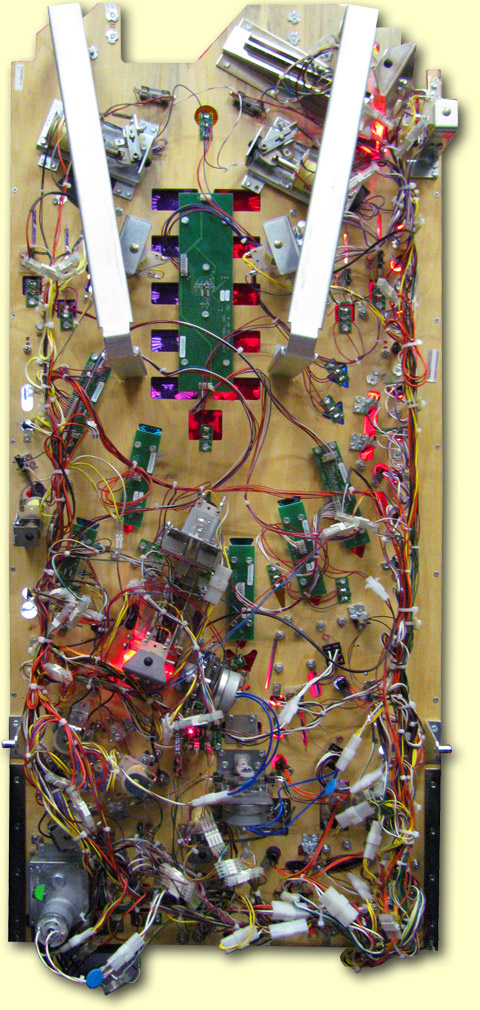
Here's the whole playfield from the Pro version of the game.
Once again, the Limited Edition models have some differences. Not only is the motor for the Starscream mini-playfield added, but wherever the quartet of inserts appear in front of every major shot, they are fitted with a circuit board with LEDs instead of lamps, as is the feature grid and most other controlled lamps.
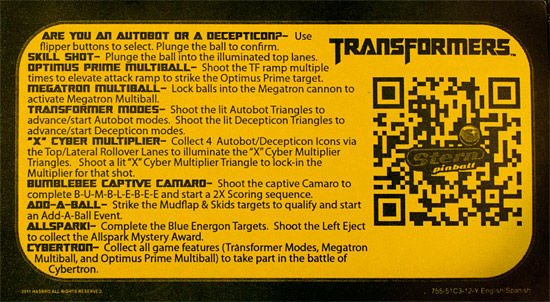
Finally, before we move on to look at the rules in part two, here is a taster with the instruction card for the Pro version of the game.
We'll be back with part two of this exclusive In-Depth Review of Stern's Transformers soon. In the meantime, why not give us your thoughts on the game. Have you played it? Did you buy one? What do you think? We asked for your comments and they are shown below. Thanks to Evert Brochez for the pictures of the Limited Edition model. Your comments:
© Pinball News 2012 |